The Thompson Type Caster is a simple machine which requires a surprisingly large number of auxiliary tools in operation. This Notebook identifies those tools which are used in routine Thompson operation and in basic maintenance typically performed by the operator.
Thompson tools and supplies may be grouped into these categories:
The Thompson was also designed to be fitted with a wide range of alternative parts to adapt it to particular circumstances. Different Type Body Pieces, for example, are required for each body size within a particular style of Mold. Different Molds may be required for different types of matrices. For center-jet machines operated as such, Pot Shims are required for most body sizes. There are also a number of consumable parts, such as Foot Plows, which need replacement or refurbishment on a regular basis. Considered as a whole, these alternative and replacement parts constitute a considerable kit in their own right. They will not, however, be covered here.
Great thanks are due to Sky Shipley, proprietor of Skyline Type Foundry for much of the information here; any mistakes are of course my own. Thanks are also do to Michael Hurley (Titivilus Press) for prompting me to finish this writeup.
Safety glasses must be worn when operating the Thompson. I wear side-shield safety glasses when operating my own machines, because you never know which direction the squirt will come from.
Long-sleeve shirts must be worn when operating the Thompson (even on hot days). According to Theo Rehak, it used to be said that one could identify Thompson operators by the burn scars on their forearms.
Full-length pants must be worn when operating the Thompson. Typecaster operation is not an activity for short pants, skirts, or kilts.
Full leather shoes (not sandals or plastic athletic shoes) must be worn when operating the Thompson. Leather boots would work, as well. If wearing boots, keep your pants on the outside of the boots (do not tuck them into the boots), so that typemetal doesn't flow into them.
All clothing should be natural fiber. Polyester and other plastic clothing melts into the skin.
During some Pot maintenance operations, heat-resistant gloves are required. Some operators use leather welder's gloves, but I do not find these to be sufficient and prefer heat-resistant glvoes .
The typecaster will find it convenient to wear a short apron with pockets. The style is a matter of personal taste. The pockets are important.
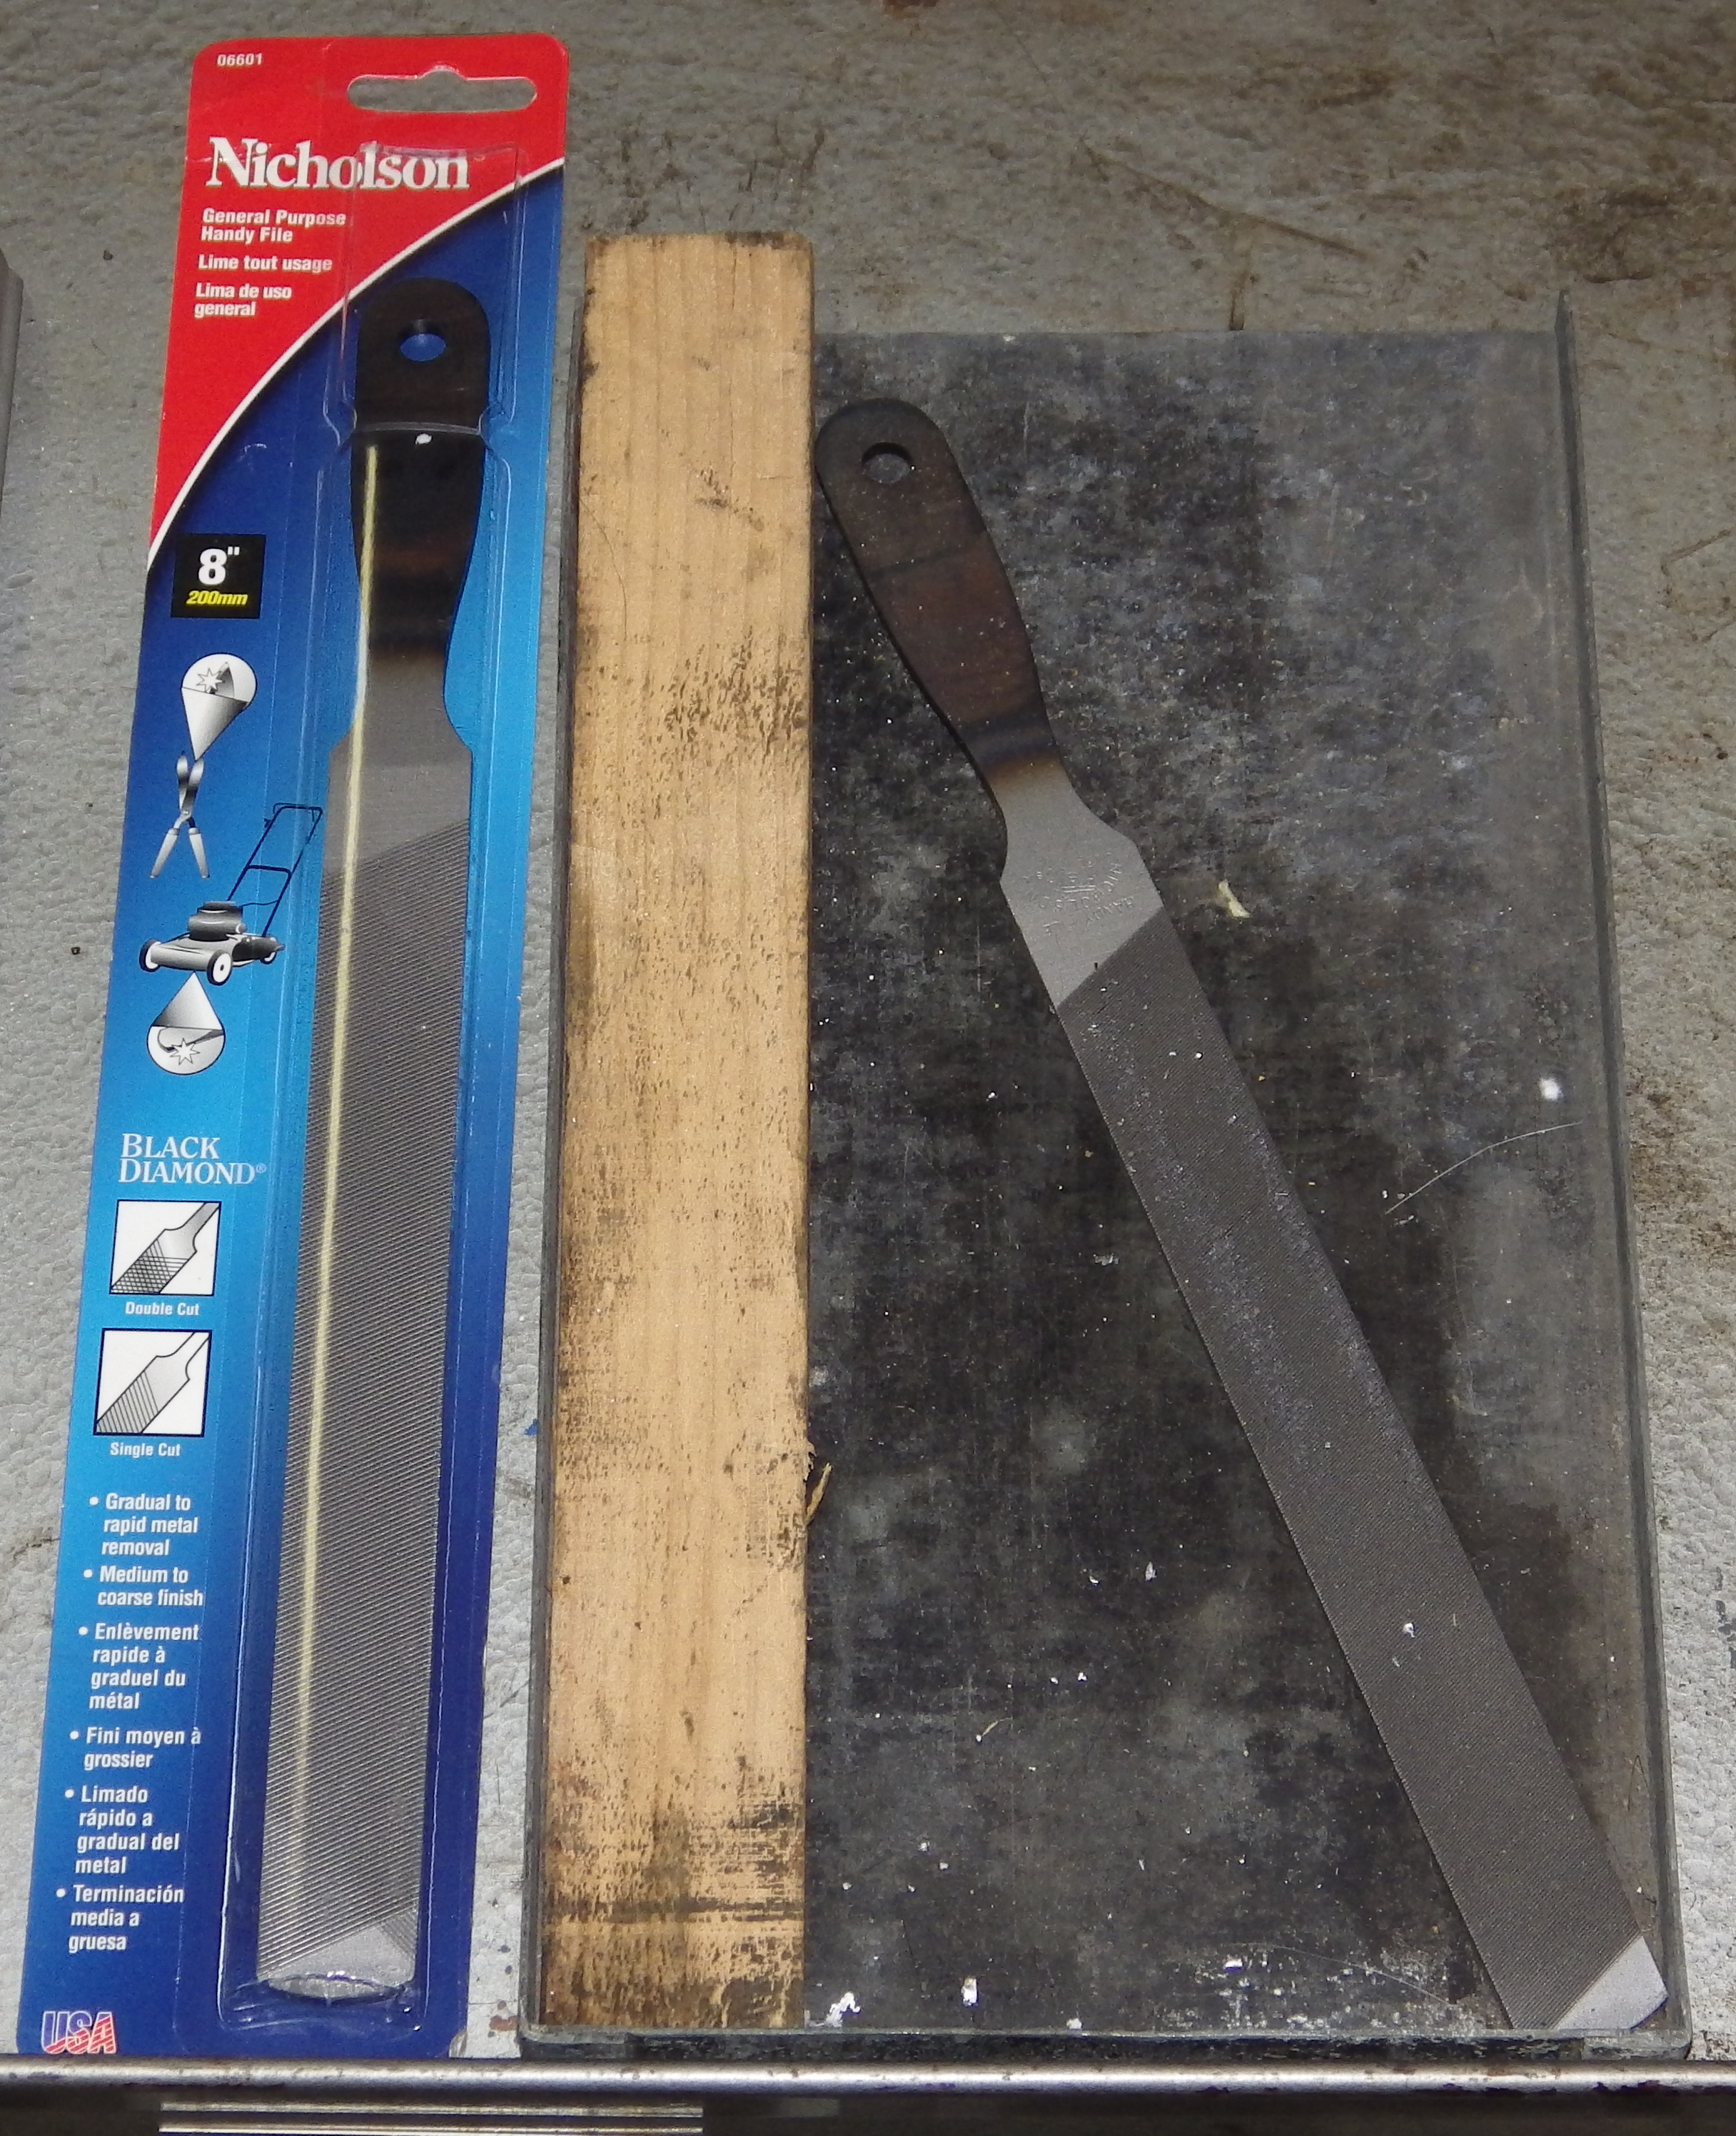
Before type may be inspected and aligned, it must be dressed. This is best done with a single-cut file on the bench (lay the file flat on the bench and rub the type over it at an angle). The single-cut side of an 8-inch Nicholson (brand) "Handy File" works well for this.
It is convenient to keep and use the Dressing File in a small galley (this keeps it at a constant angle and makes it easy to clean up the filings).
Below is a Nicholson 8" '"Handy File' in its original blister-pak, along with another ready for use. The packaged file displays the double-cut side, which is never used in this application. The file shown in the galley has the single-cut side up. This particular galley is just a bit too wide for holding the file at a good angle, so I've inserted a wooden shim to reduce its effective width.
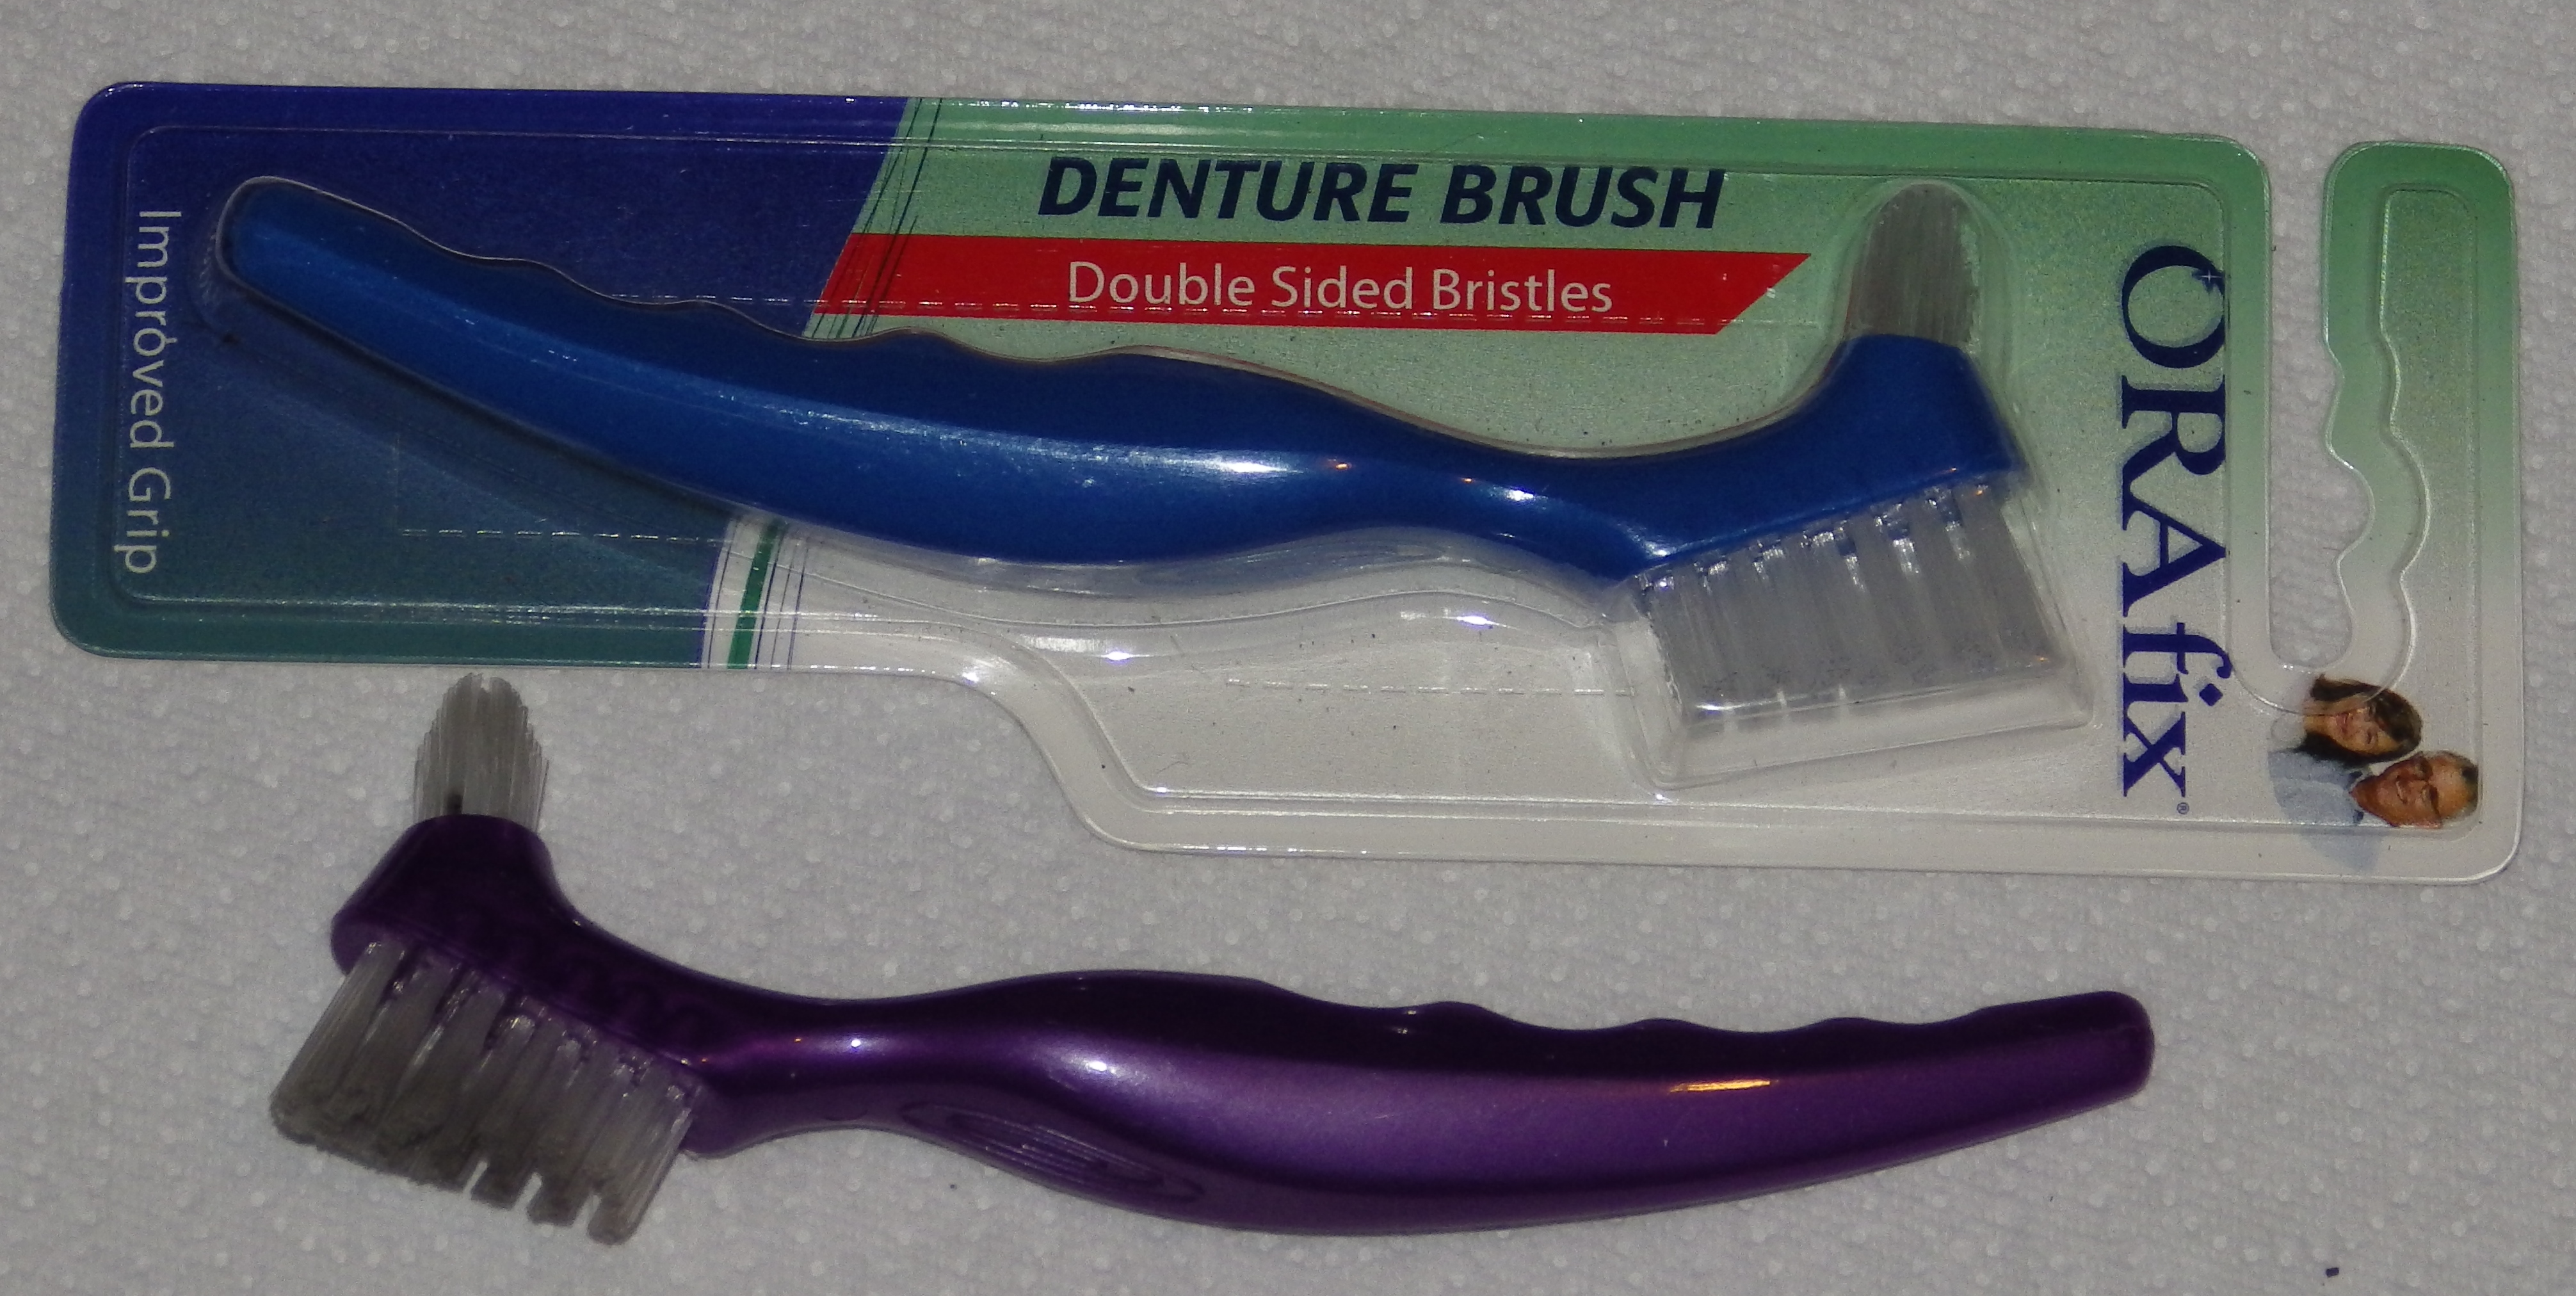
Before dressed type may be inspected and aligned, it must be brushed clean. The brush should be stiff, but not so stiff or sharp as to damage the face of still-hot type. The kind of brush currently available which seems to work best for this is a denture cleaning brush.
Do not use the Type Brush for general machine cleaning. Use ordinary brushes instead.
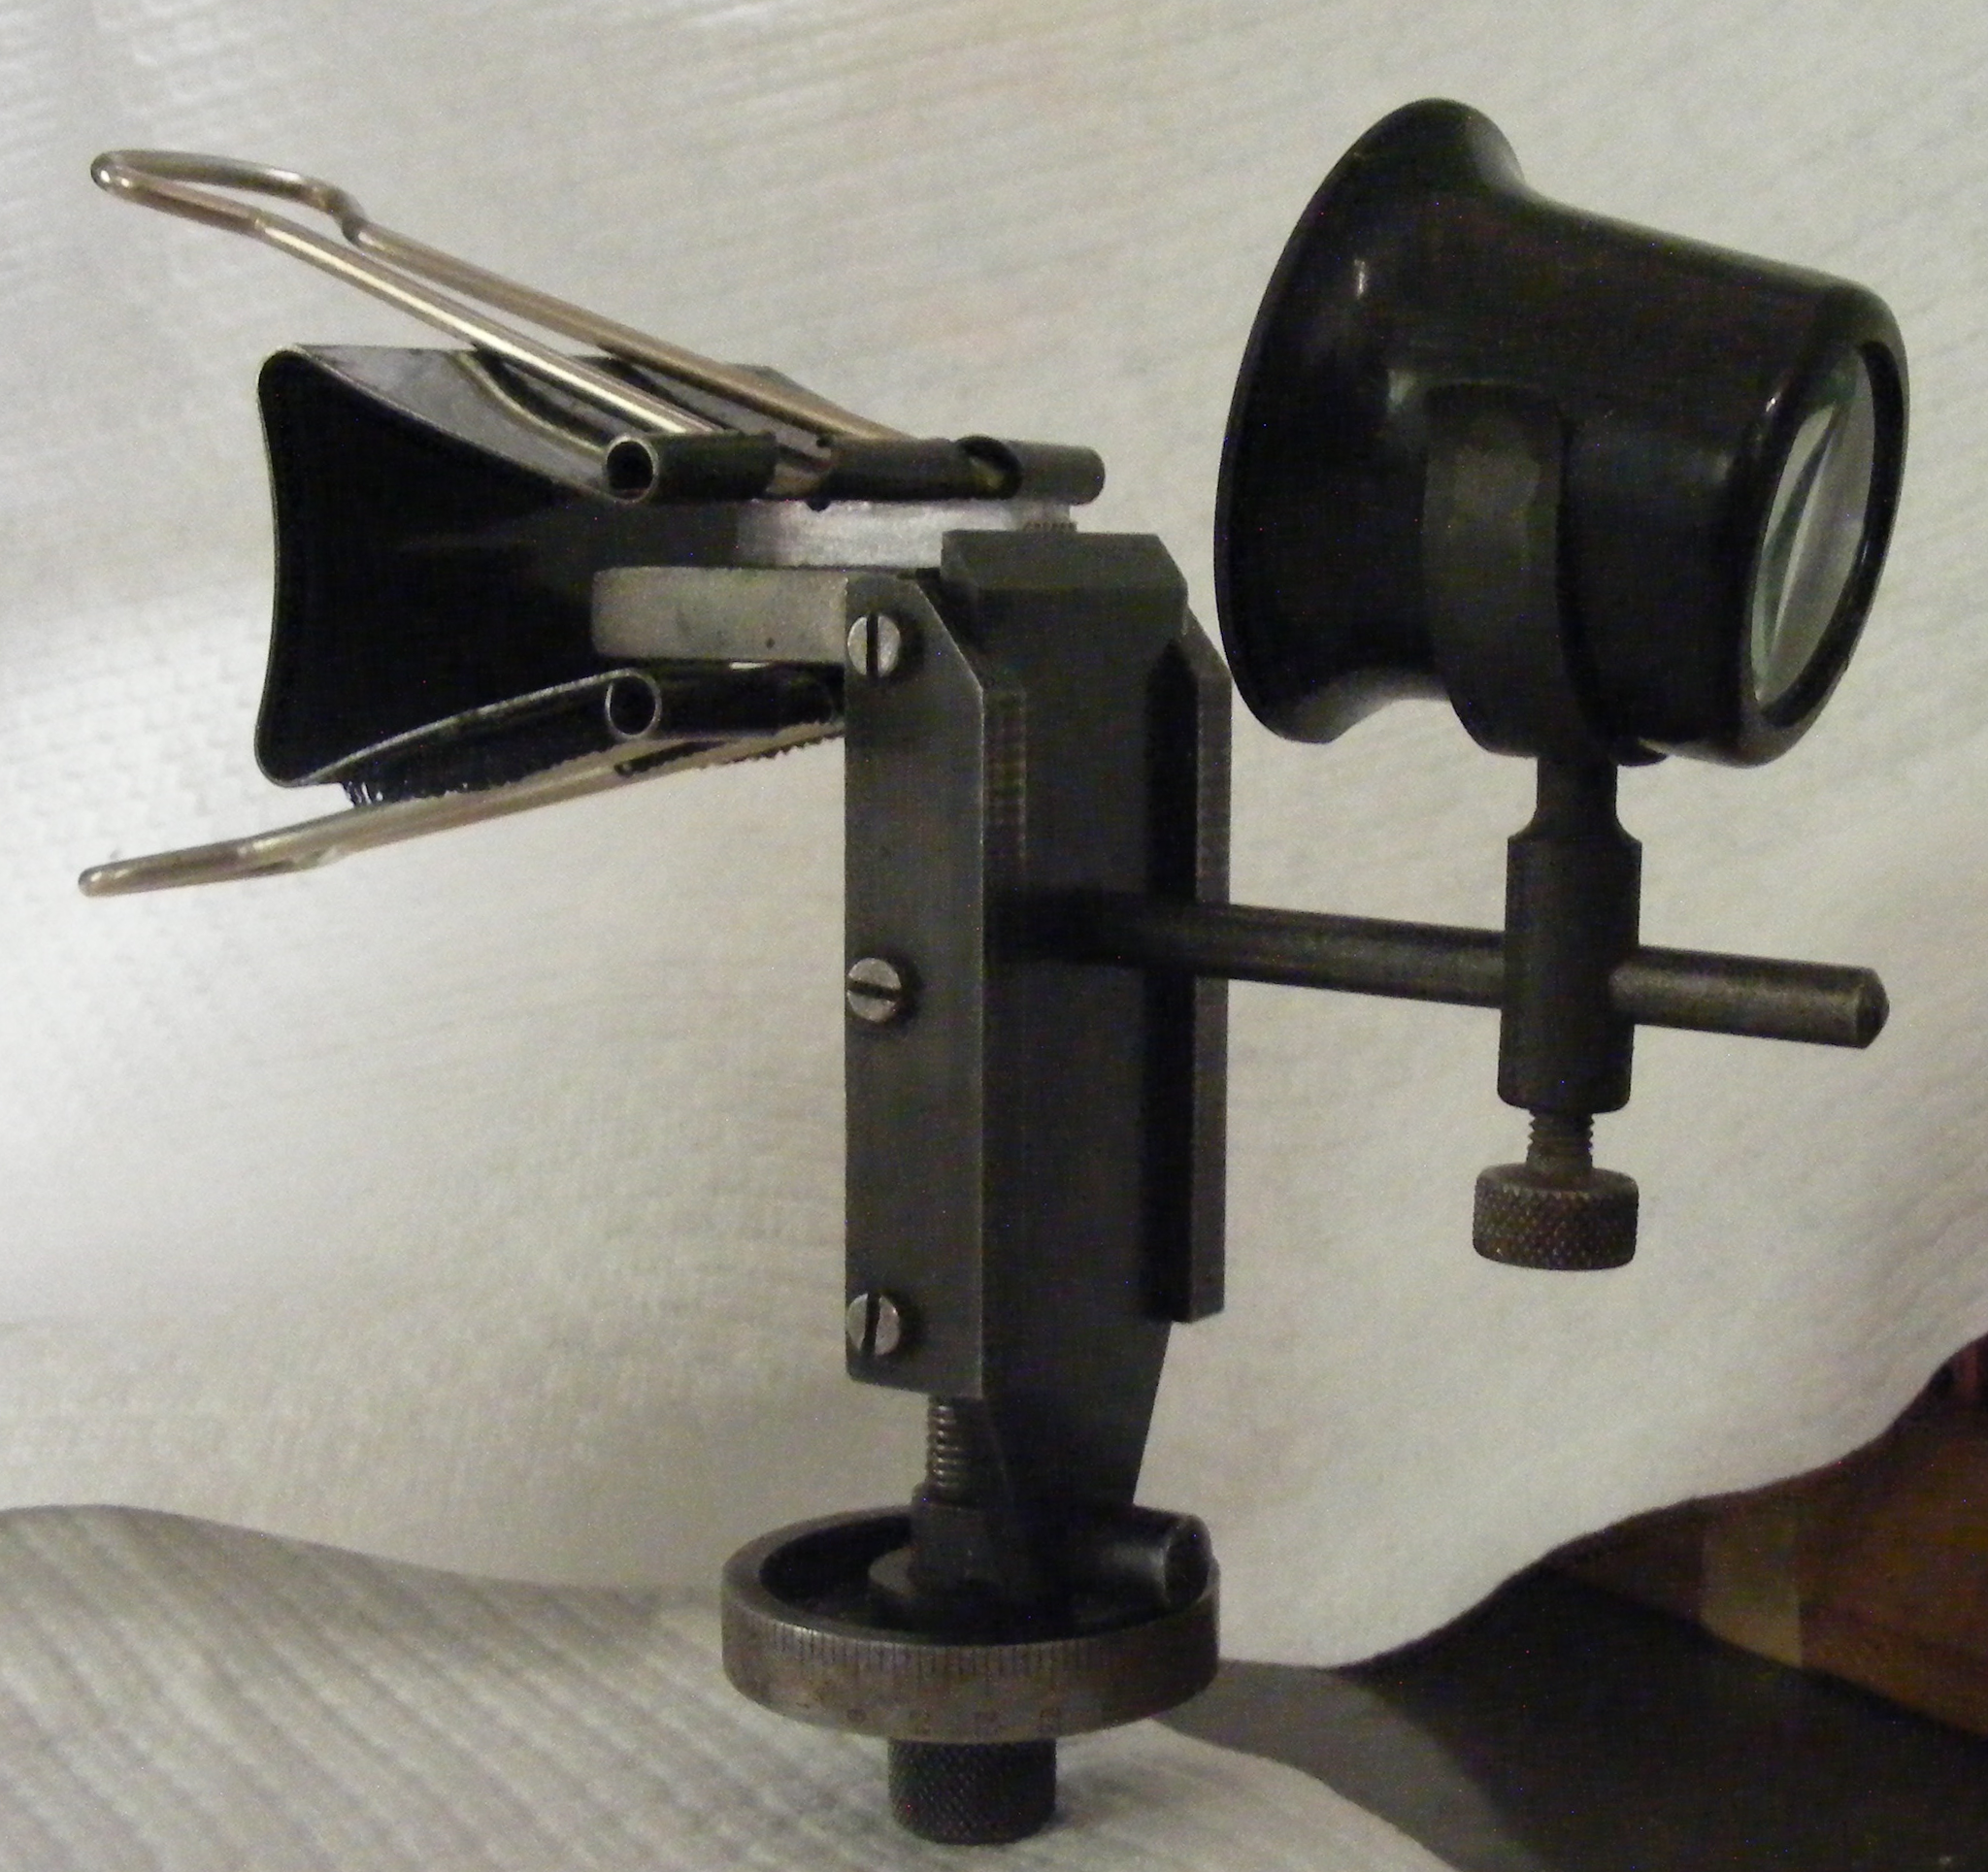
Here is a Lanston Monotype Type Alignment Gauge shown in use at Skyline Type Foundry aligning type. Since the loupe is a simple lens, it is a matter of personal preference (and the limits of ajustment of its holder) as to which direction it is mounted. Here it is held "backwards" (relative to the position one would use it standalone in one's eye), which is Sky's preference. The use of a "Banker's Clip" to hold the types firmly in place while they are being examined is also a Skyline practice; it makes the instrument much easier to handle.
You will need a 5x or 6x magnifier for visually inspecting the type. The conventional jeweler's loup will work, but is not necessarily the most convenient item for this purpose. A magnifier intended for desk use, or a linen counter, typically work better.
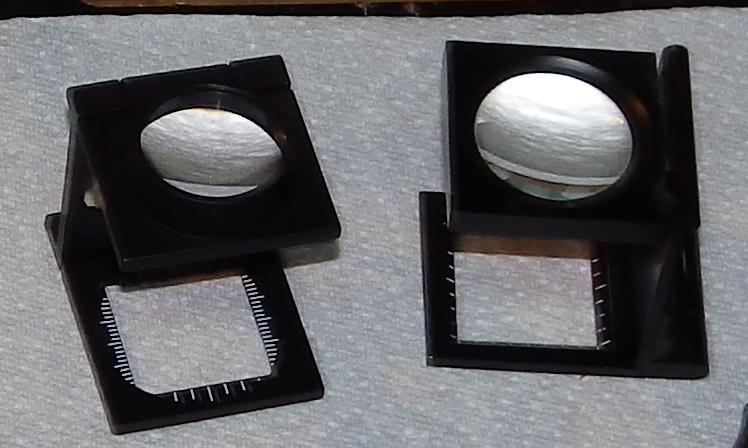
It would be counterproductive to attempt to use the loupe on your Type Alignment Guage for this. You will be using both tools nearly simultaneously to align and visually to check the type.
Sometimes a 10x magnifier may be useful for looking at very fine detail, but in ordinary use this level of manification is too high.
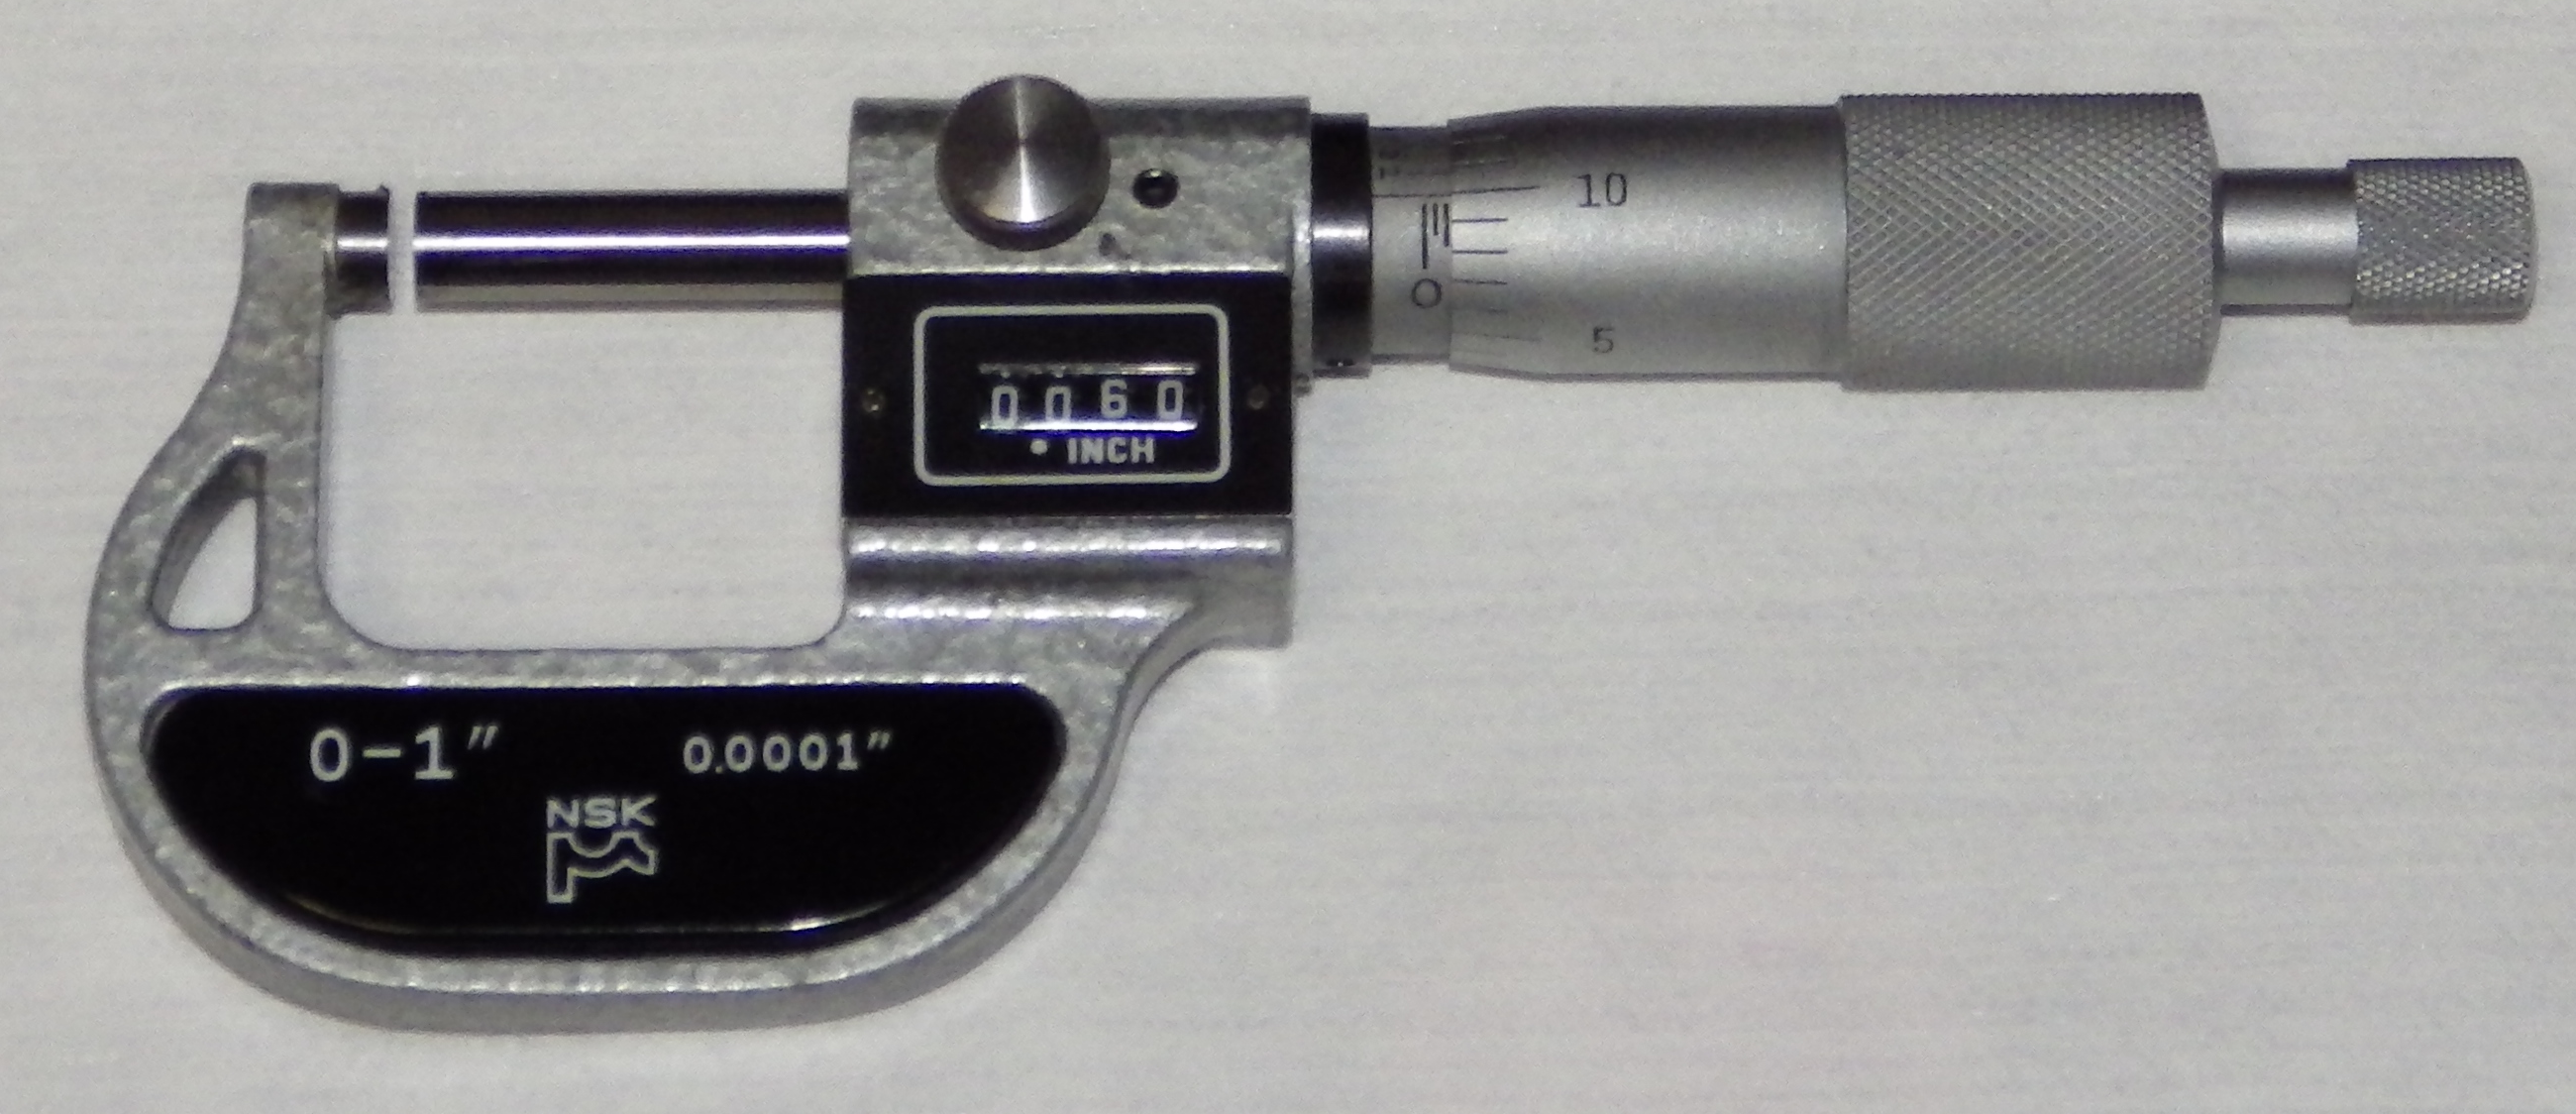
You will need a decimal inch micrometer in the 0-1 inch range. This will be used to measure all three dimensions of the type (type height, body height, and set width). Type height and body height are measured at the start of a casting run to ensure that the setup is within tolerance. Set width is measured with a micrometer at each set width change.
Formerly, micrometers which read directly in printer's points were made. These are now rare. However, type height is measured in decimal inches in the US, so even if you are fortunate enough to have a point micrometer you will still need a decimal inch micrometer.
The very cheap digital micrometers sold by the discount tool houses ("very cheap" = about $20 in 2013) are actually a lot better than you might expect. Still, I do not think that I would trust one of them for type that I was shipping out the door with my name on it. You will need a micrometer for every aspect of your work with all kinds of machinery; you will never regret the money you spend on a good quality micrometer.
Here is the first micrometer I ever bought. It's still my favorite, 25 years later. Even though the manufacturer called this a "digital" micrometer, and it has a digital readout, it is not really a digital micrometer. It's an analog micrometer with a revolutions counter. The digital display is useful for quick approximations, but for an accurate reading you still have to read the conventional analog micrometer spindle.
Here is a conventional analog 0-1 inch micrometer. This one happens to be a Starrett No. 230. It's very good, but not quite as good for the price as it should be (this one was shipped from the factory incorrectly zeroed, for example).
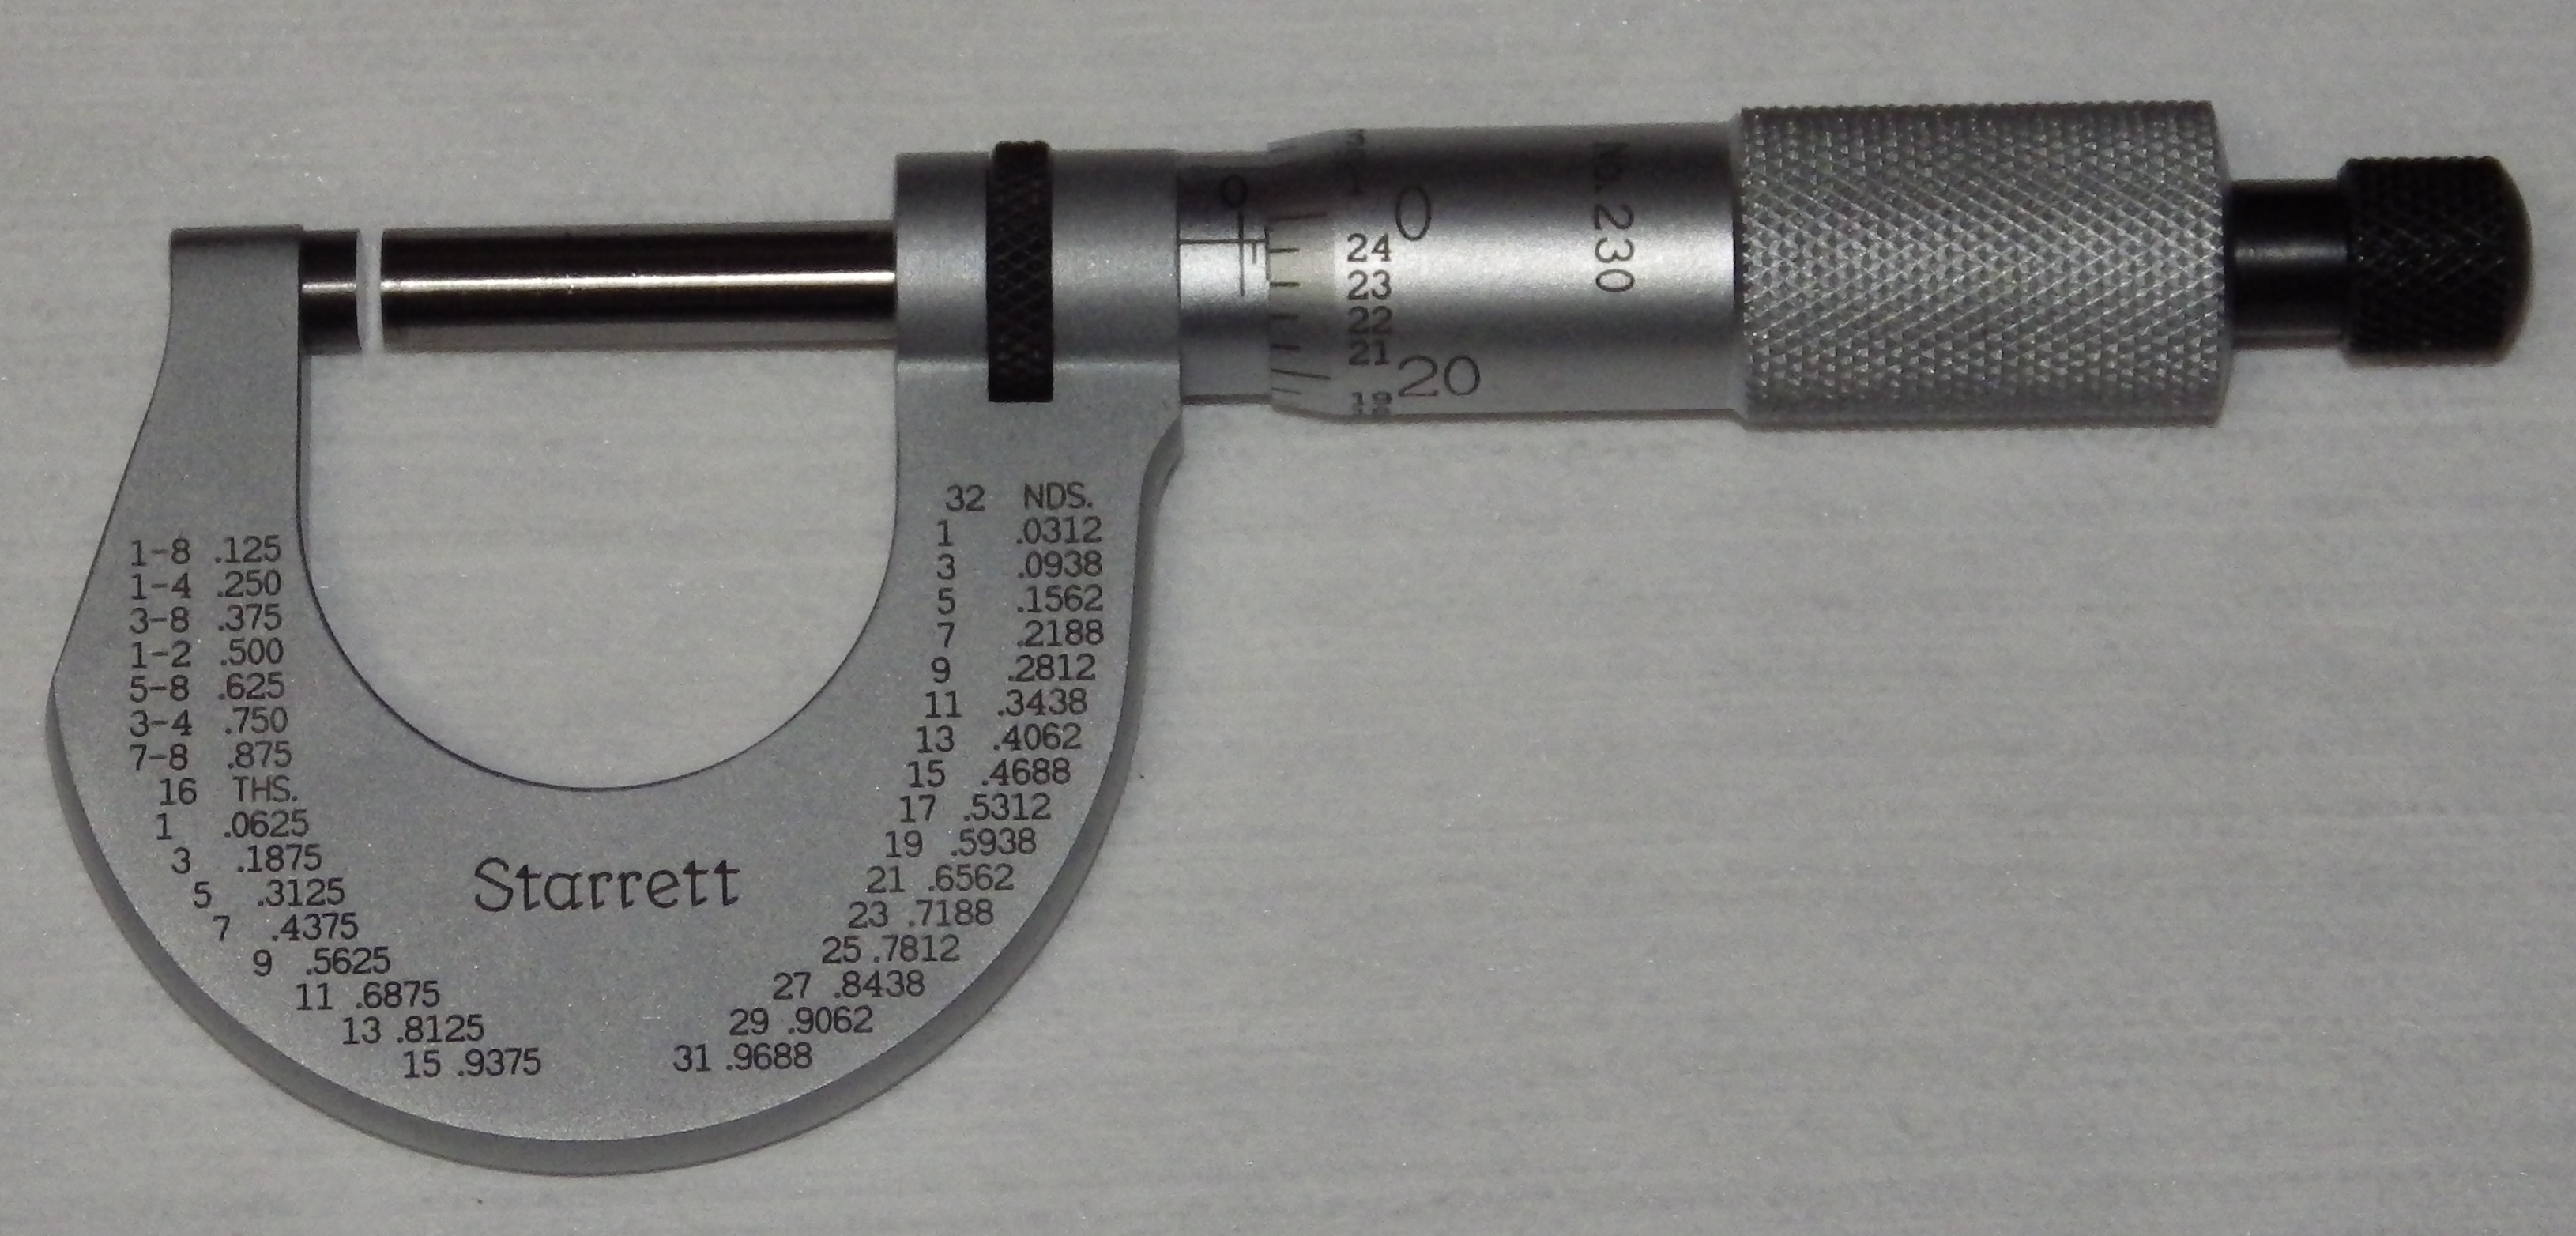
You can also, of course, get an electronic digital micrometer. Reading these is much more convenient, but (speaking from experience) the batteries will fail at the most inconvenient times. It is worthwhile (and not difficult) to learn to read an analog vernier micrometer spindle.
Micrometers are now generally equipped with one of two kinds of spindle devices for limiting the tendency to crank down on them as if they were C-clamps: friction spindles or ratchet spindles. The concensus in machine-shop circles seems to be that both styles are equally effective in allowing repeatable measurements, but that once you commit to one style it is best to stick with it. (I started, more or less by chance, with ratchet spindles, and have stayed with them.)
It is important never to close a micrometer all the way when putting it away after use. It will expand and contract with changes in temperature, and if closed all the way this could damage it.
It may be tempting to use a caliper instead of a micrometer. The photo below left shows a very clever digital caliper house-branded by Harbor Frieght. It reads in metric, decimal inch, and fractional inch and is really very handy around the shop for low to medium accuracy measurement. The photo below right shows a Mitutoyo analog vernier caliper. It is harder to read, but very accurate.

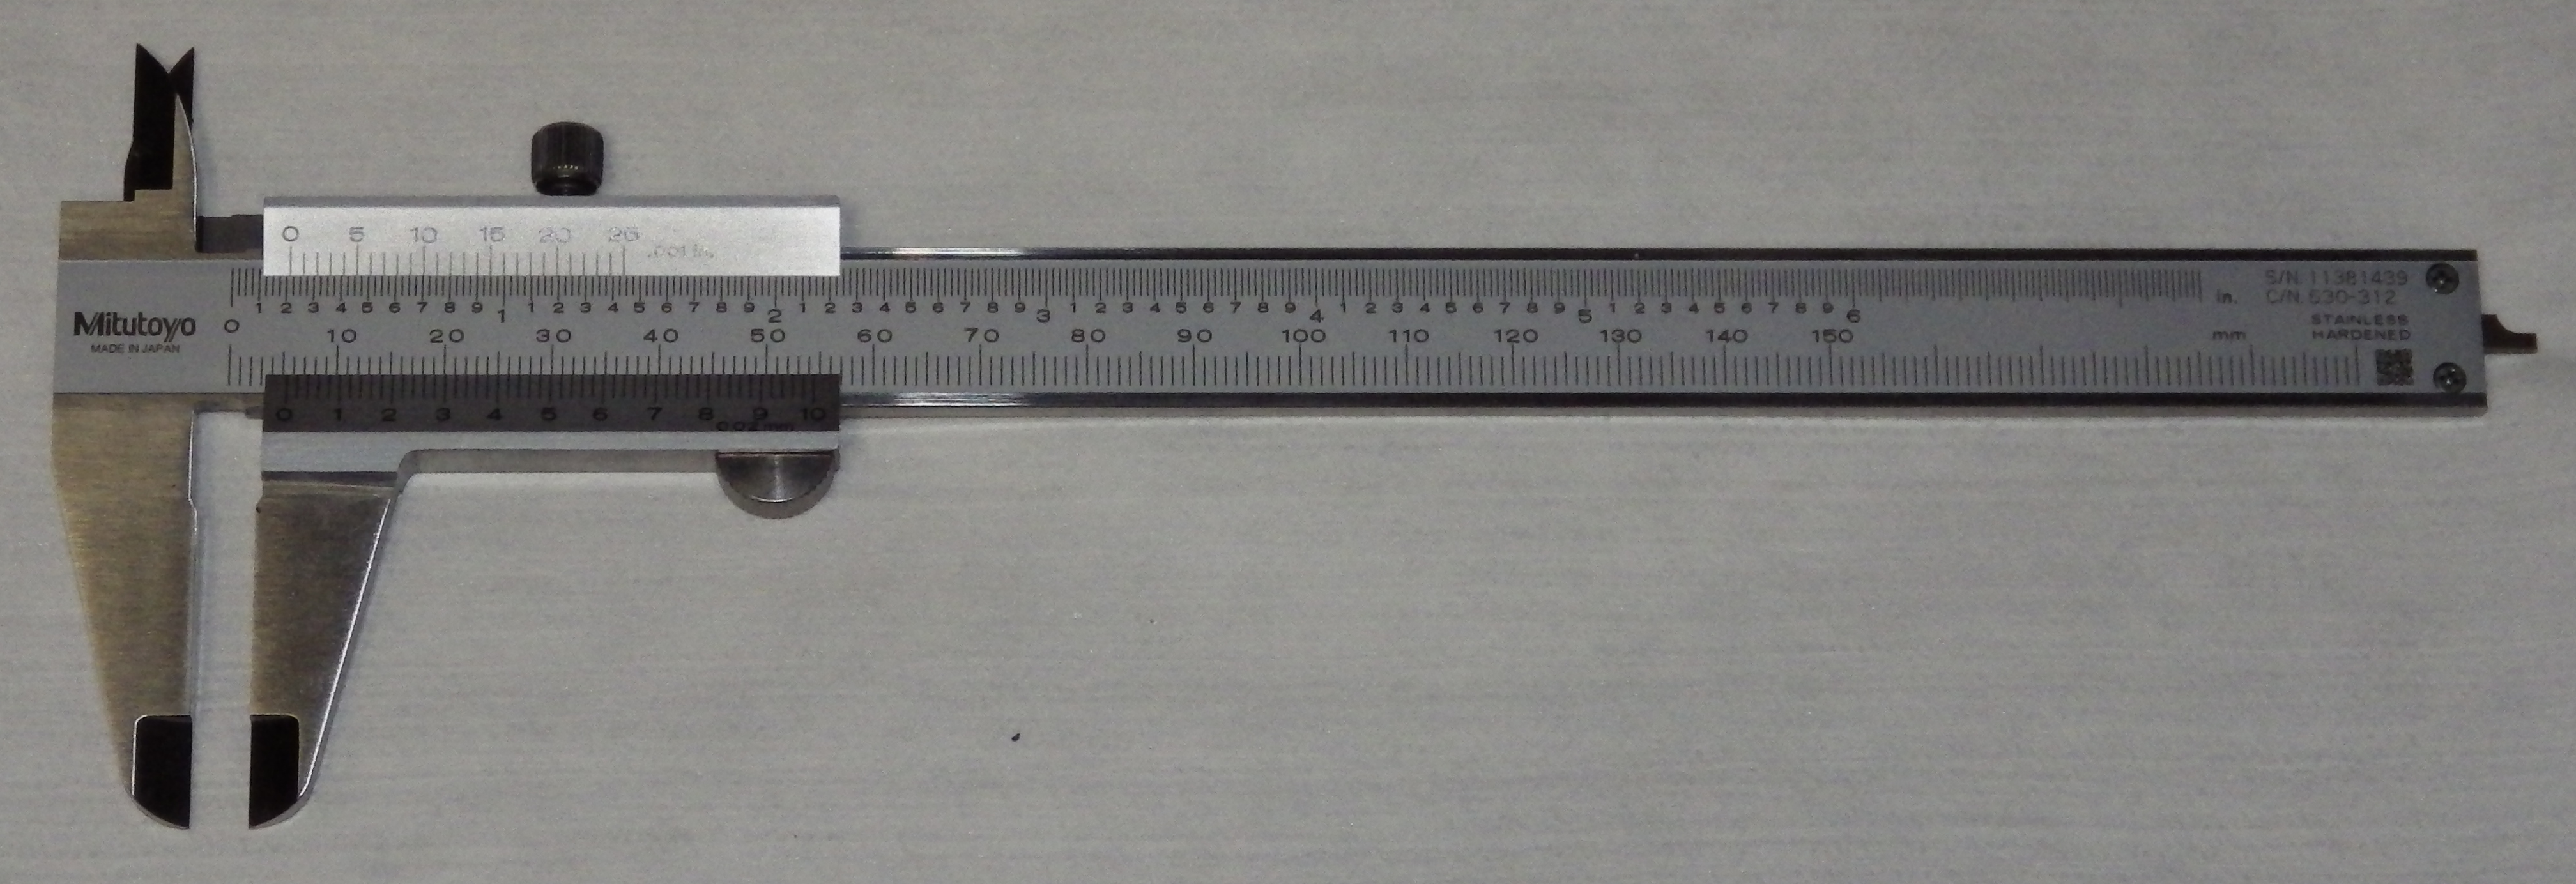
Although it may be tempting, a caliper is not appropriate for measurements under one inch in typecasting. Calipers, however finely made, are subject to errors of alignment in usage. The micrometer is the appropriate tool for measuring a type.
Presuming you do not have a point micrometer, you will need a chart converting printer's points to decimal inches. For American printer's points, a set of charts may be found at: Point and Pica Conversion Tables. These may be printed out for shop use. (I find it convenient to laminate them as well; they last longer that way.)
The resolution of the chart you need is a matter of personal taste and the house practices of your type foundry. The smallest graduation on the micrometer set width mechanism of a Thompson is 1/8 point, but working to eighths of a point is very difficult. A chart to quarter points might be more practical.
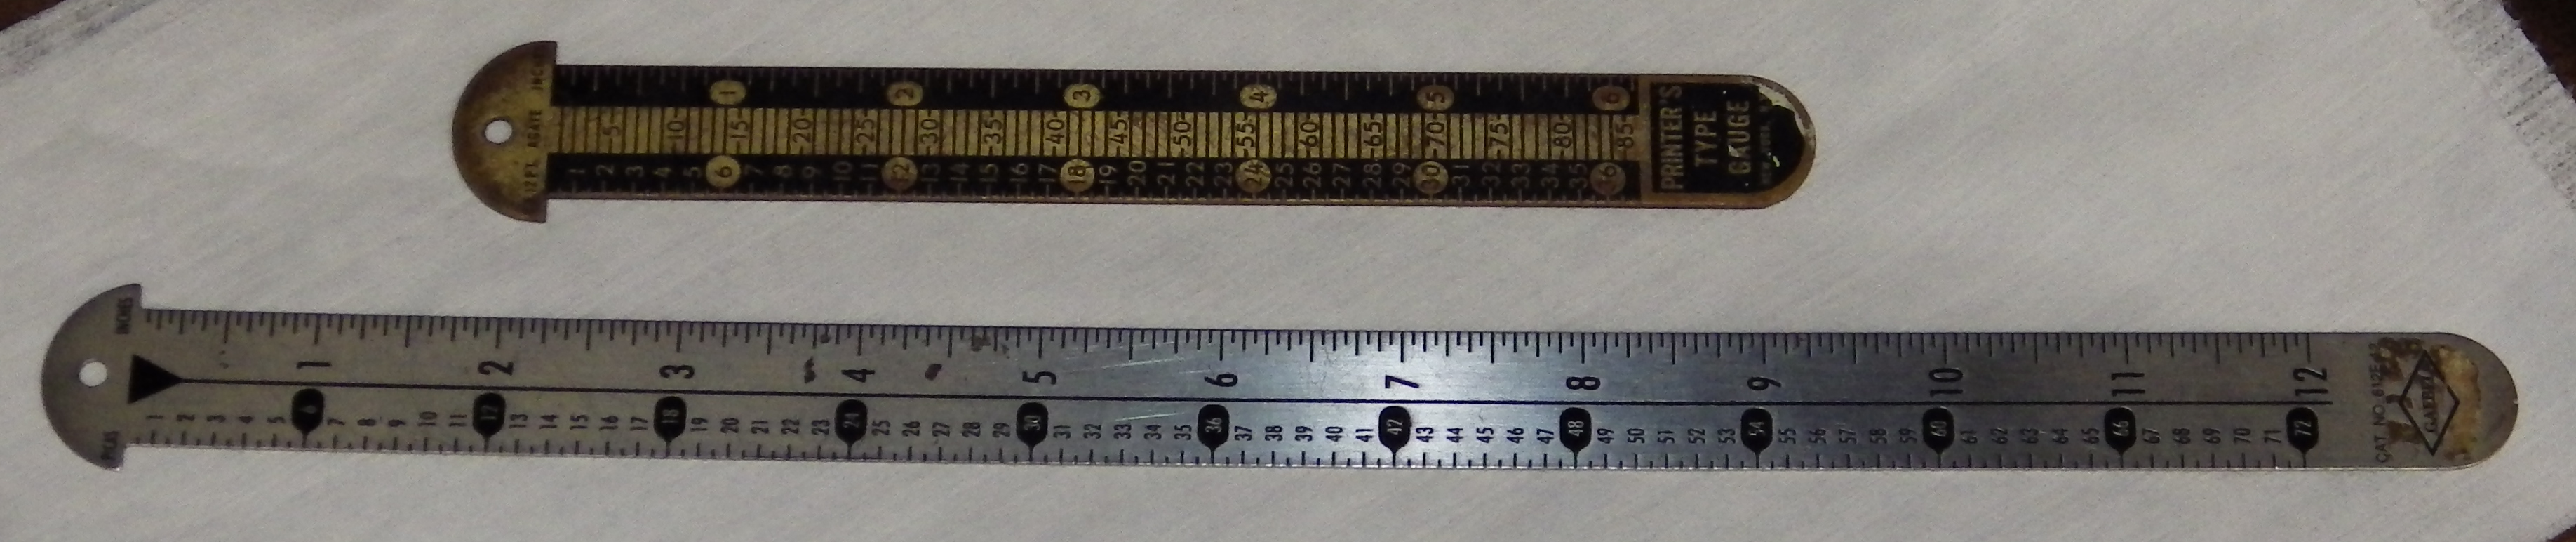
Although it is not used for measuring individual types, sooner or later you're going to need a standard printer's Line Gauge (aka "pica stick.") This should be calibrated in picas and half-picas (12pt and 6pt); if it has point calibrations, so much the better.
A 36 pica pocket line gauge (q.v.) is useful not only as a gauge but as a cleaning tool
New Line Gauges, including 36 pica pocket gauges with clips, are available from NA Graphics.
Here are two Line Gauges: a relatively old brass 36 pica gauge, and a newer steel 72 pica gauge. (The steel gauge is in fact straight, not bent as distorted photographically here.) The 36 pica gauge shown here is not the sharp-edged 36 pica pocket gauge with clip mentioned earlier.
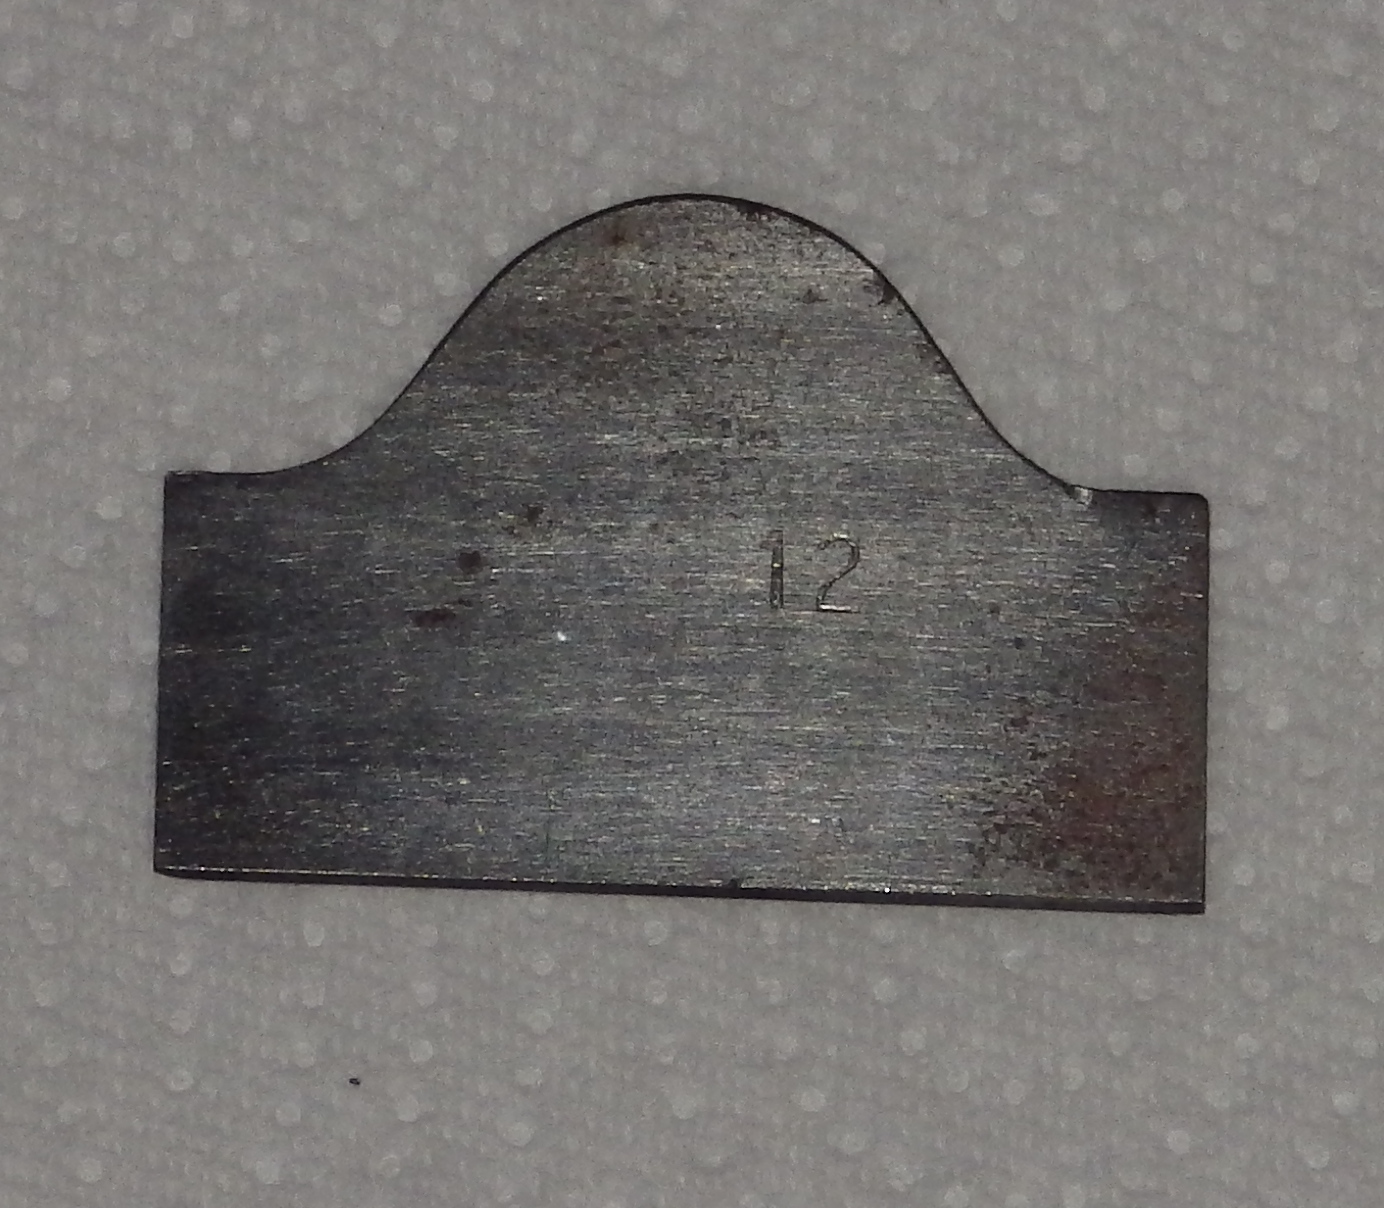
This is a fixed gauge for measuring type height (0.918 inch in the US). In its absence an inch micrometer may be used. Some typecasters prefer using a micrometer in any case.
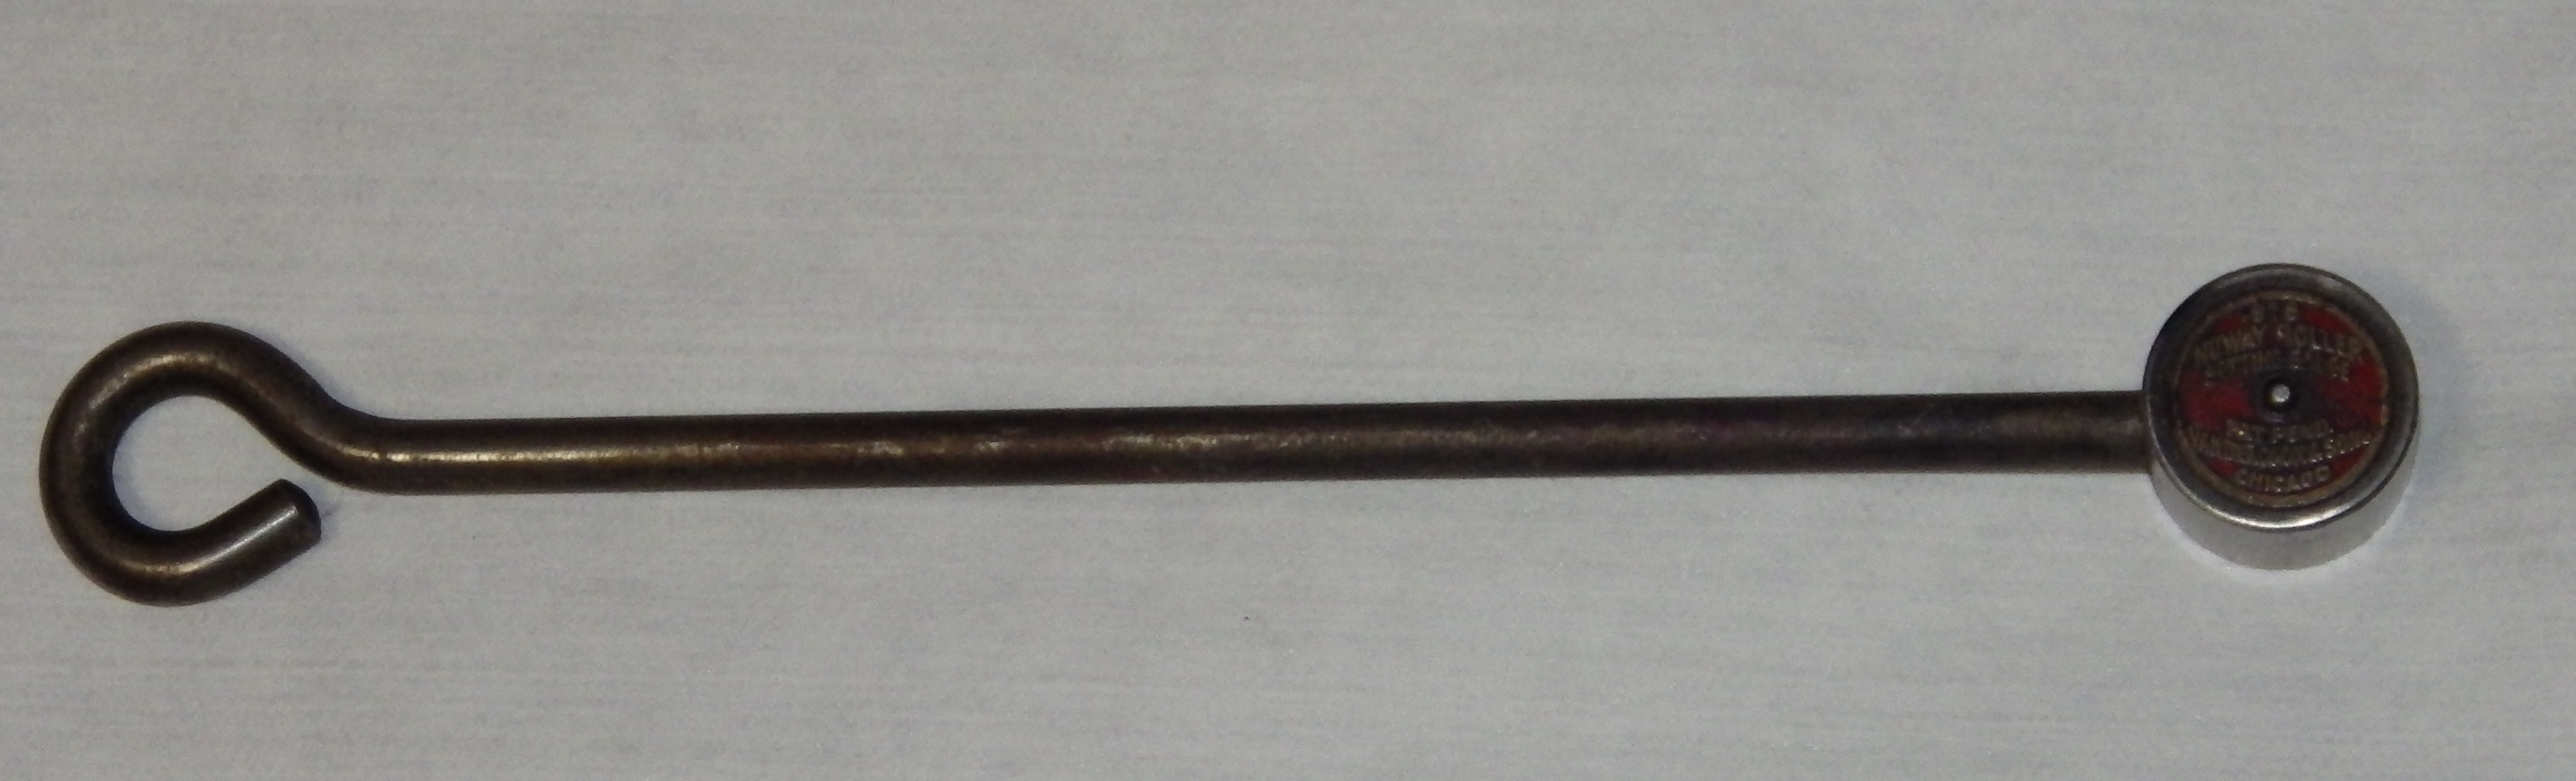
This gauge should not be confused with the Roller Setting Guage used by printers to establish roller height on presses, even though it is also a gauge and it is also type-high. That kind of gauge is an type-height-diameter disk on the end of a long wire handle. It is not useful in operating the Thompson.
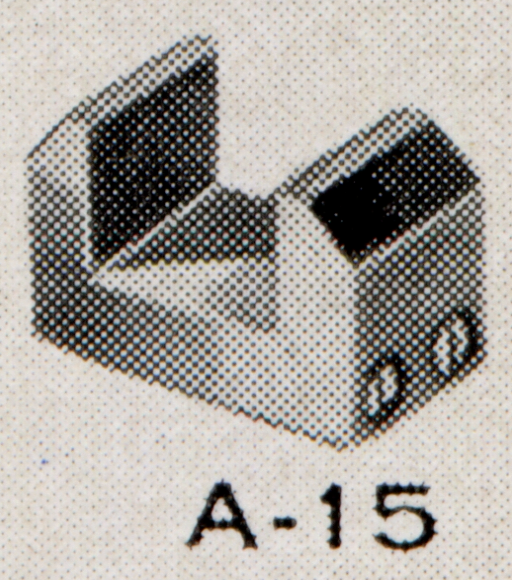
This is a fixed gauge for checking type body size (not type height). It is used by casting a sufficient number of pieces of type so that their combined body sizes is 72 points (for example, three pieces of 24 point type). These are placed "sideways" in the Type Body Gauge to check to see that the type body height is indeed as expected.
I don't have a Type Body Gauge to show here.
Here it is as shown in the 1925 Thompson manual:
The illustration above is far from self-explanatory, so here is a composite of two drawings of Type Body Gauges from Legros & Grant's Typographical Printing Surfaces (1916). Both show gauges longer than 72 points.
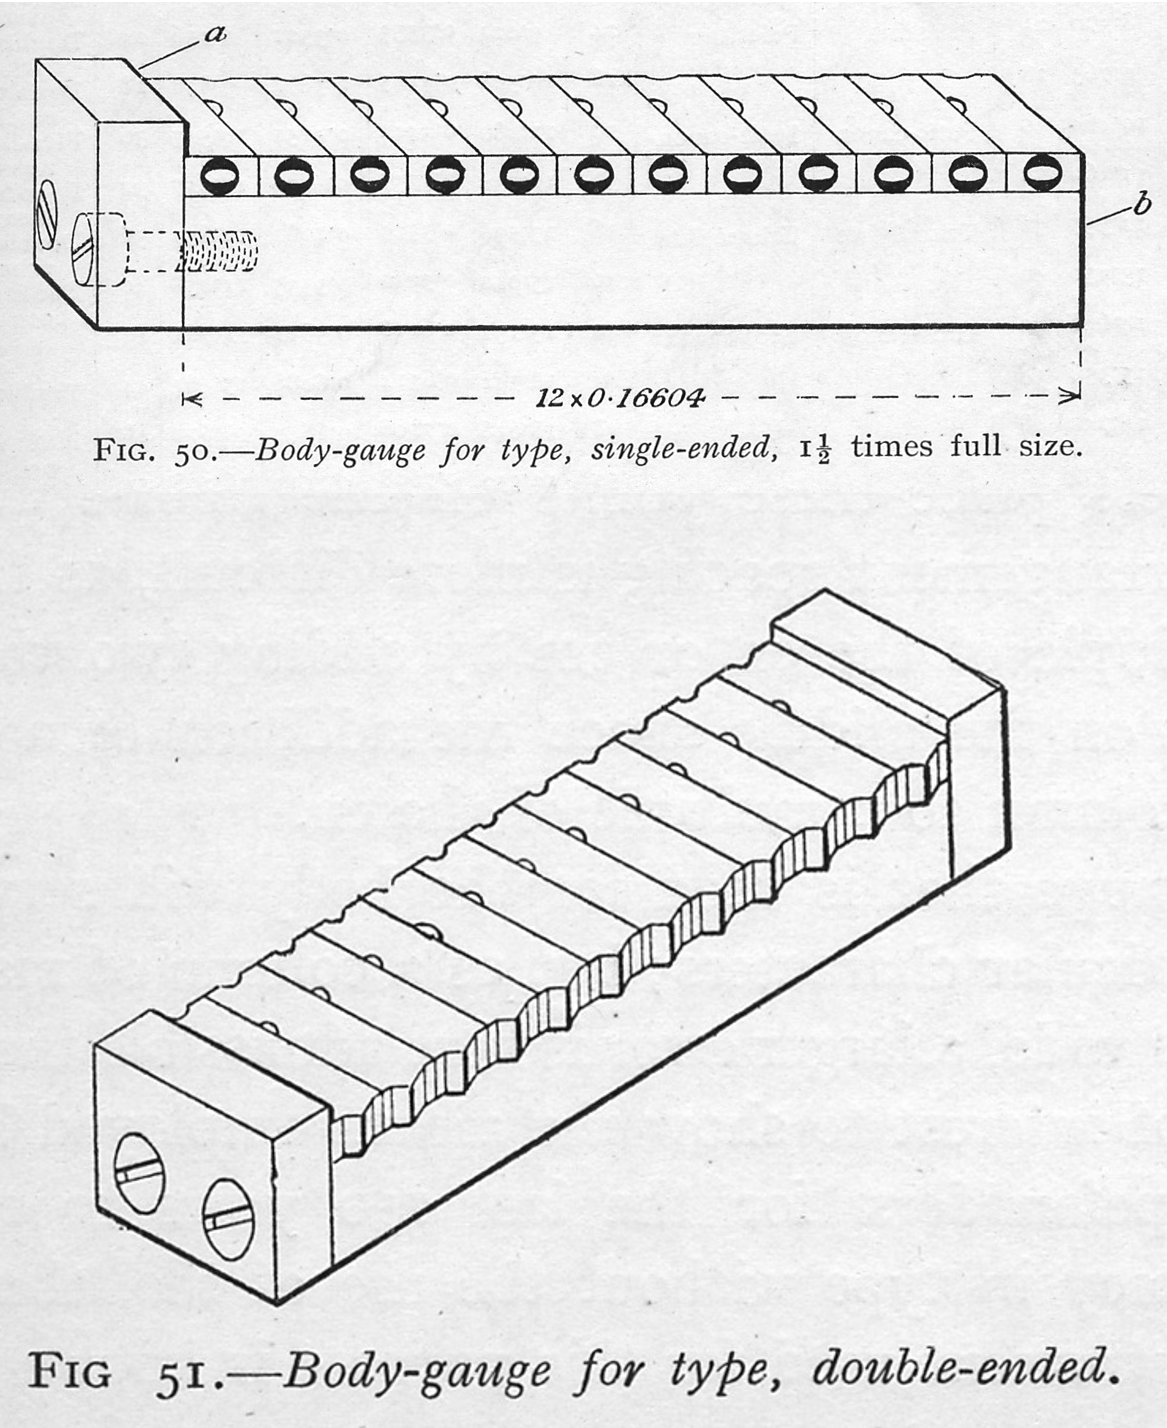
In the absence of such a gauge, a decimal inch micrometer will suffice (though with a micrometer typically you measure only a single piece of type, not 72 points' worth of type).
The 1942 Parts Price List calls this out as p/n X21TC. It is listed both in the main parts list (as group 21TC) and as one of the "special" tools recommended but not supplied by default. It was available in either American or Didot points under the same part number. This gauge is shown on Plate 6 of the 1956 manual. Its use is described on p. 19 of the same manual. In the 1925 manual, it is p/n A-15 on Plate 6.
Note also that the Type Brush should be used frequently to brush off type as it is taken from the Type Receiving Stick and as it accumulates in the galleys.
Used for handling type. Also used to hold the Nozzle Plate when removing and cleaning it .
There is no clear answer to the question of what to call this tool. In certain fields, one or the other term is universally used and strictly correct. Thus in the medical fields these are always called "forceps," while in watchmaking they are always called "tweezers." In other fields the usage is less certain. There seems to be no clear division between the two, but tweezers are always used for small or delicate work while forceps may be of any size. A strong argument may be made that in typecasting the scale of work is such that these tools are forceps, not tweezers.
In typecasting, apprentices should adopt the terminology of the type foundry where they work.
The only clear rule concerning their terminology is that in both cases the word is both a singular and its own plural although it looks plural. Thus one says "a forceps" or "a tweezers" (not "a forcep" or "a tweezer").
The Oxford English Dictionary does list "forcep" as a historically attested singular, but this use is not correct. The word "forceps" was adopted into English unchanged from Latin, where "forceps" is the Latin singular and "forcipes" the Latin plural; there is really no such word as "forcep."
A "tweezer" is either a case for tweezers or (as a verb) the act of using tweezers (to tweezer something). It has been used as a "back formation" from tweezers by those unfamiliar with the language, but this is not correct.
One does not refer to forceps as a "pair." Thus one says "hand me a forceps" but "hand me a pair of scissors." The use of "pair of tweezers," on the other hand, is attested.
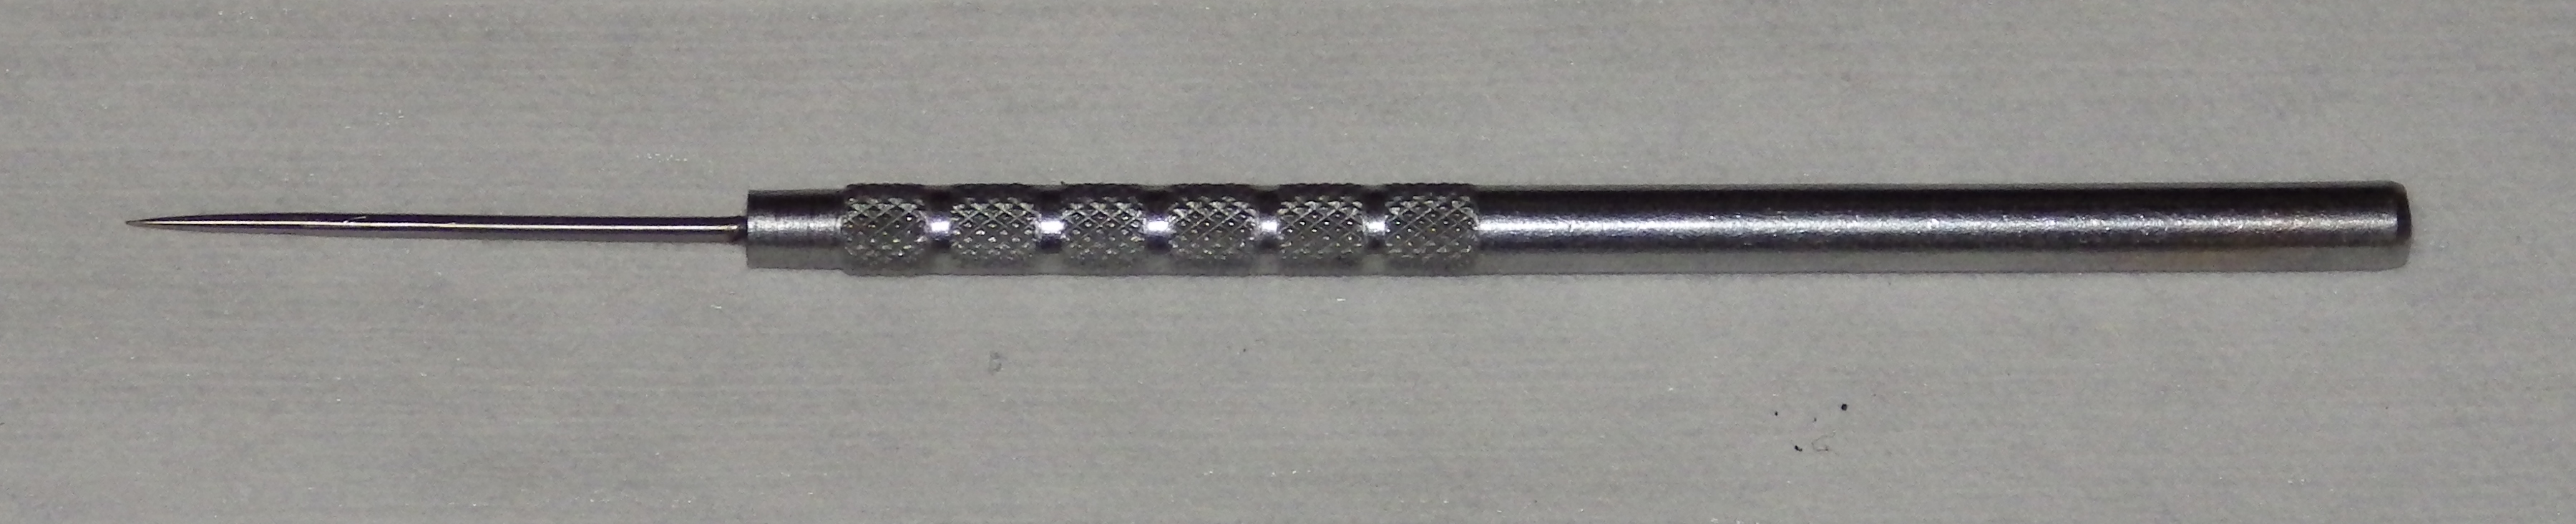
Used traditionally to separate types so that they may be removed. It is easy to damage the face of a type with a Bodkin. Passable Bodkins are available as straight picks in sets of picks ("dental tools for the shop") available through discount tool dealers. Here is one:
A standard printer's Makeup Rule will be convenient to handle type on the galley. It is also useful for any number of other tasks (such as cutting string when tying up type), as novice printers soon discover.
New Makeup Rules (prettier than the one shown above) are available from NA Graphics.
One of the many contributions of Skyline Type Foundry to the art has been the development of a compellingly descriptive vocabulary for some of the finer points of typecasting. One of the best of these terms is "Casting Blap." This is not a traditional term of typefounding. If you were to walk into a typefoundry decades or centuries ago and ask for a "Casting Blap," they'd just look at you funny. Nevertheless, they almost certainly had and used Casting Blaps; they are essential.
A Casting Blap is just a stick, less than type-high, which separates columns of cast type on the galleys. Casting fonts of type is best done in order of descending set width, but the type so cast should be accumulated on galleys in alphabetical order. This involves a considerable amount of shifting columns of type left and right in the galleys. This in turn is facilitated by having a wooden stick between the columns.
As the casting progresses, blaps may be removed when no longer necessary (they do take up space). However, during fonting they may be used to separate the type on the galleys into columns each of which is a line of type in the boxed font.
The origins of the term "Casting Blap" are interesting. Skyline Type Foundry possesses a rather useful antique wooden box which originally contained blasting caps. It turned out that it was the perfect size to store the wooden sticks used to separate type on the galleys. These sticks had no established name, but if they were stored in a "Blasting Caps" box then certainly they must be "Casting Blaps."
The use of Galley Locks will save a lot of lost time recasting spilled type. If your taste is for Galley Magnets, they'll work, too.
See also the Nozzle Wrench
One or more pin wrenches are required.
The matter of pin wrenches is much more complicated than it really should be; see What Is a Pin Wrench? If you come to the Thompson from a background in other Monotype casters, you should note that two of the three kinds of "pin wrenches" cited in the English Monotype parts books for the Composition and Type-&-Rule casters are not pin wrenches as the term is used here.
More briefly, this is a home-made pin wrench:
This is a commercially manufactured pin wrench (made formerly by the Hartzell Machine Works for Monotype operation):

(From a catalog of the Hartzell Machine Works of Chester, PA (undated, but probably late 1960s).
It is difficult to specify pin wrenches exactly. The Lanston Monotype Pin Wrench p/n 49L1 cited in the 1956 Thompson manual is not illustrated. Moreover, over time individual machines may have been fitted with nonstandard parts.
On my machine s/n 12,492, a 5/32 inch pin wrench works best for most situations. An inexpensive 5/32 inch solid pin punch makes a good substitute.
A word of caution is advisable here. A punch is hardened and is not designed for twisting motions. Cheap imported punches may be poorly or overly hardened and may shatter if you wrench on them too hard. However: (a) you should always be wearing side-shield safety glasses when operating the Thompson, and (b) no operation on the Thompson requires great force on a Pin Wrench. If it does, something is wrong and you should stop and fix the problem rather than apply excessive force.

Note: In changing the set width with the Micrometer Set Adjusting Device, it is necessary to use a pin wrench on the two Lock Nuts on the Type-Body-Piece-Plate Adjusting Screw (a46TC2 & a46TC3) and on the Clamping Screw (41TC9) of the Micrometer Set Adjusting Device. The optimal pin wrench diameters for these two uses may be different (this is the case on my machine s/n 12,492). Using a pin wrench which is too small in diameter will, over time, tend to enlongate the hole it is used in and bend the wrench. Yet it is good operating practice to use a single pin wrench for both adjustments - they can be done more quickly this way, as the wrench may be held in the hand throughout the process. There seem to be three alternatives:
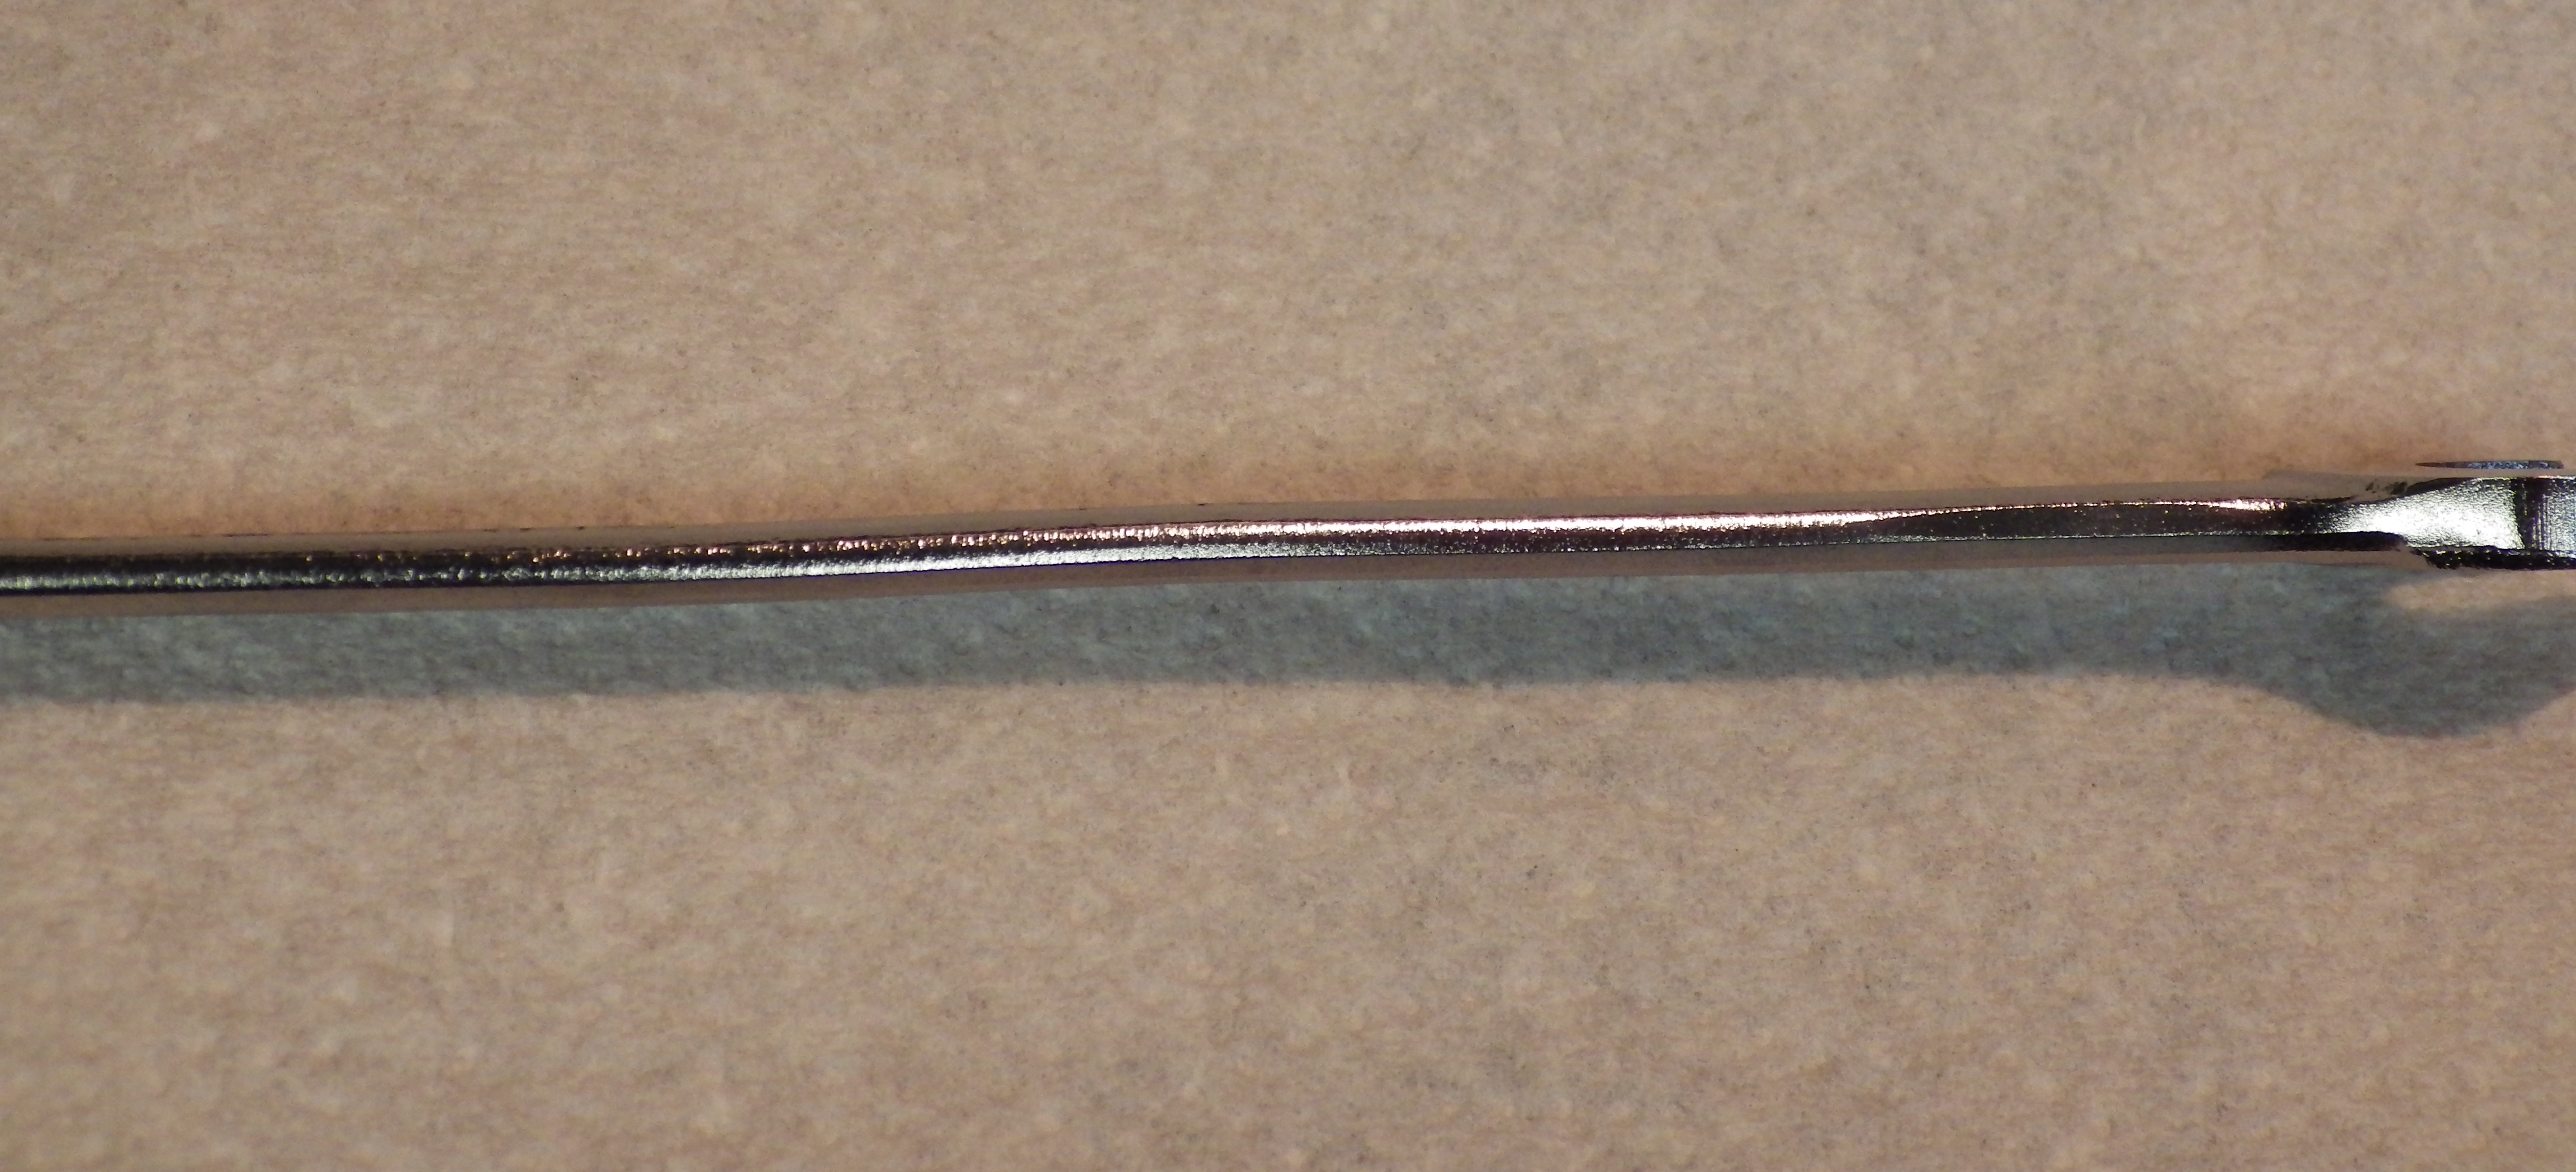
A 1/2 inch open-end wrench is required for the Vertical Mold Blade Stop Screw and its Lock Nut (X85TC). This wrench needs to have a relatively thin head and it is very convenient if it is a long wrench.
I presume that the wrench intended for this function in the 1942 Parts Price List. is the Wrench No. 83, but I do not have this Lanston-Monotype wrench and do not know its length.
Here is the wrench that Skyline Type Foundry uses for this purpose (although it is shown here in use on a part other than the VMB Stop Screw - but this is the only photograph I have of this lovely Skyline wrench):
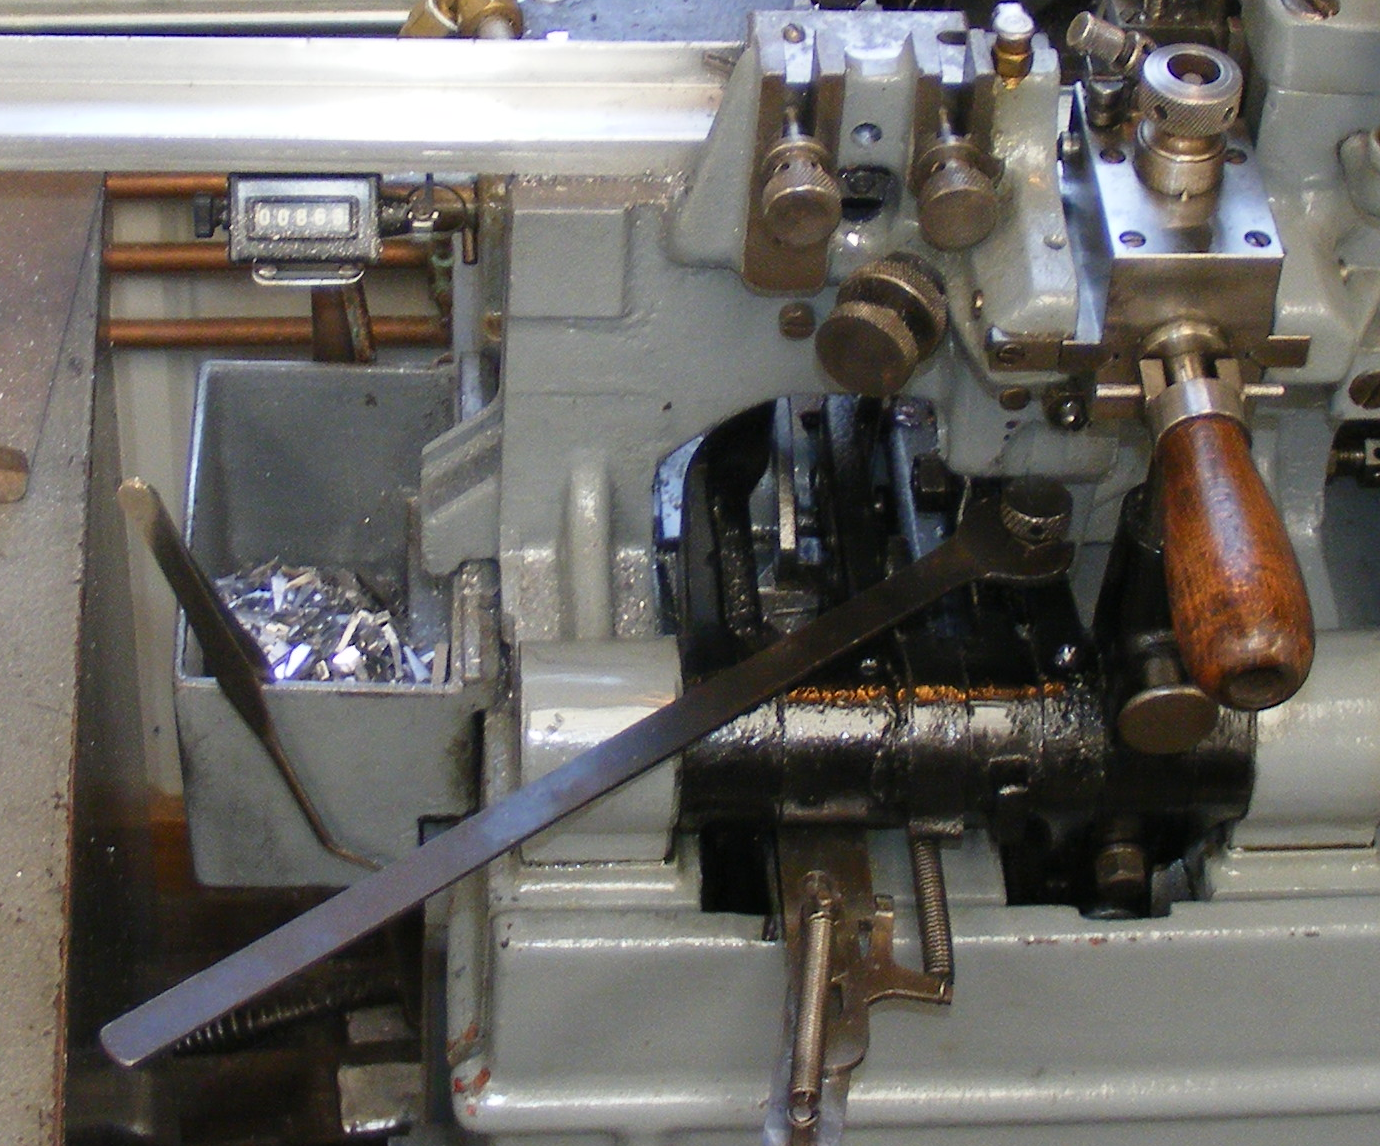
I do not know the actual original type and use of the Skyline wrench shown above, and I have never seen another like it. However, I am told by Michael Hurley (Titivilus Press) that the most common type of long, thin, open-ended wrench is a kind called a "tappet wrench" after its use in adjusting the tappets in early automobile engines.
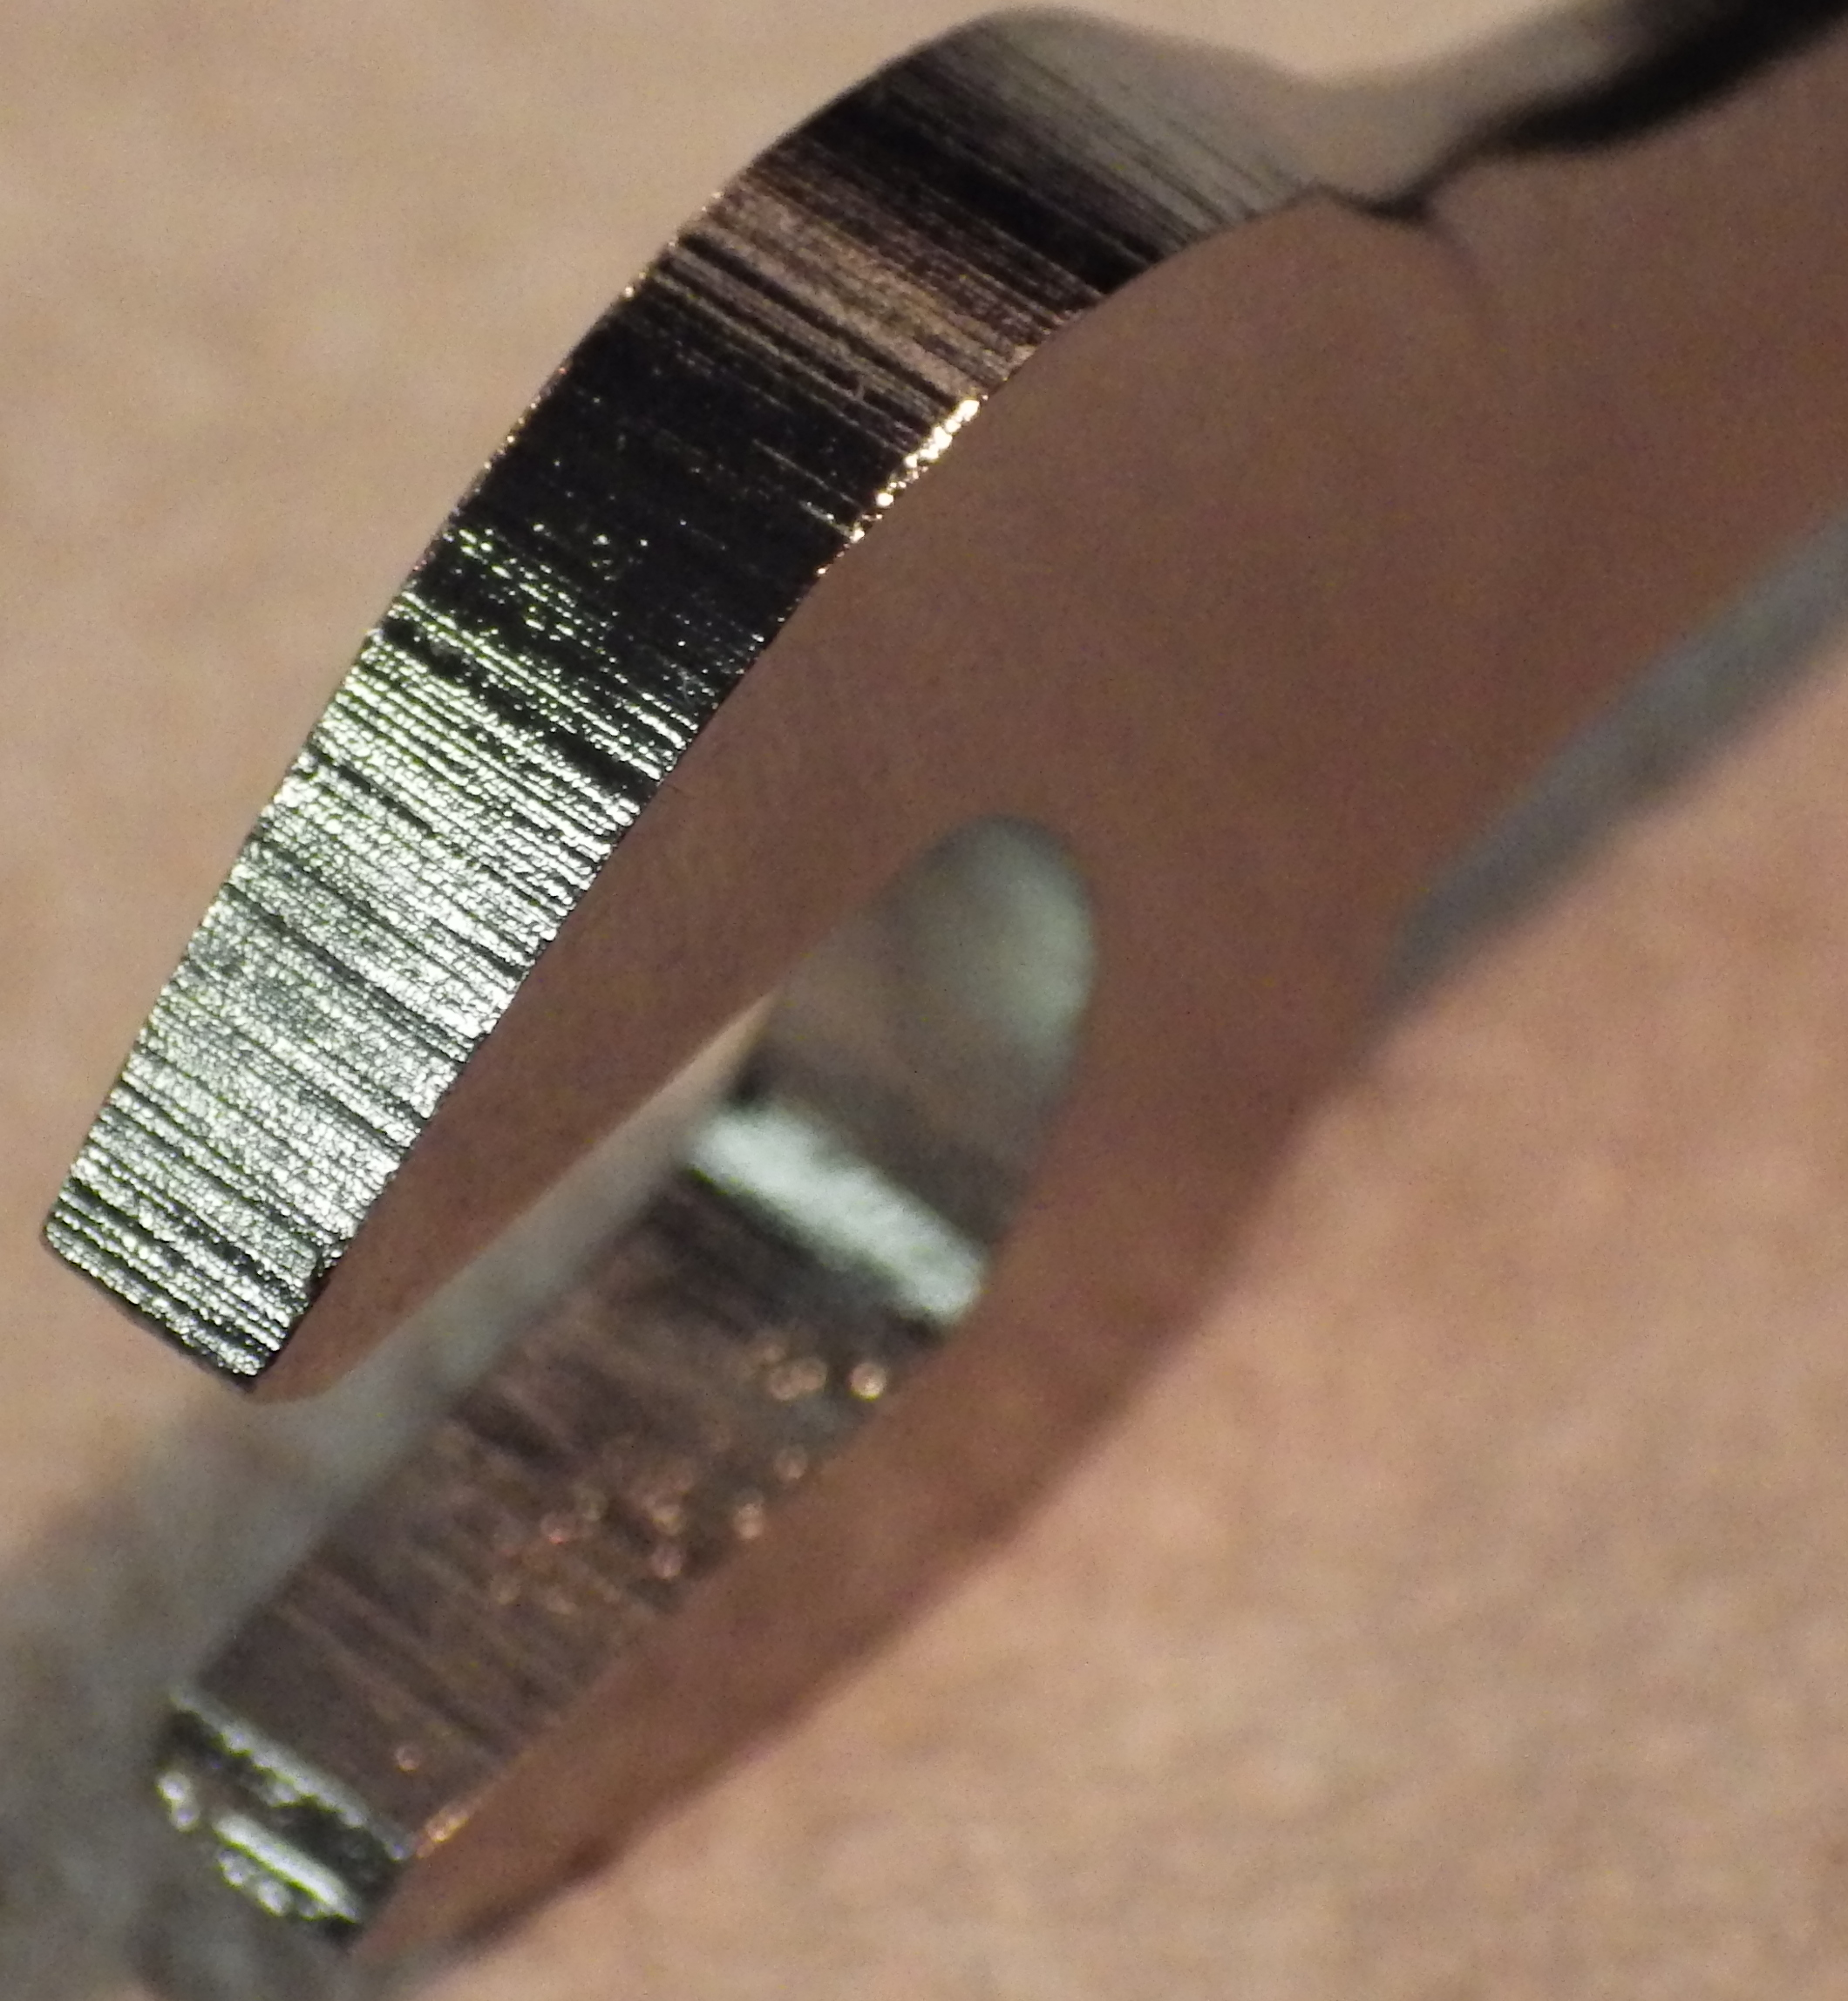
Here is a new Armstrong® brand 1/2 x 7/16 tappet wrench, p/n 27-658:

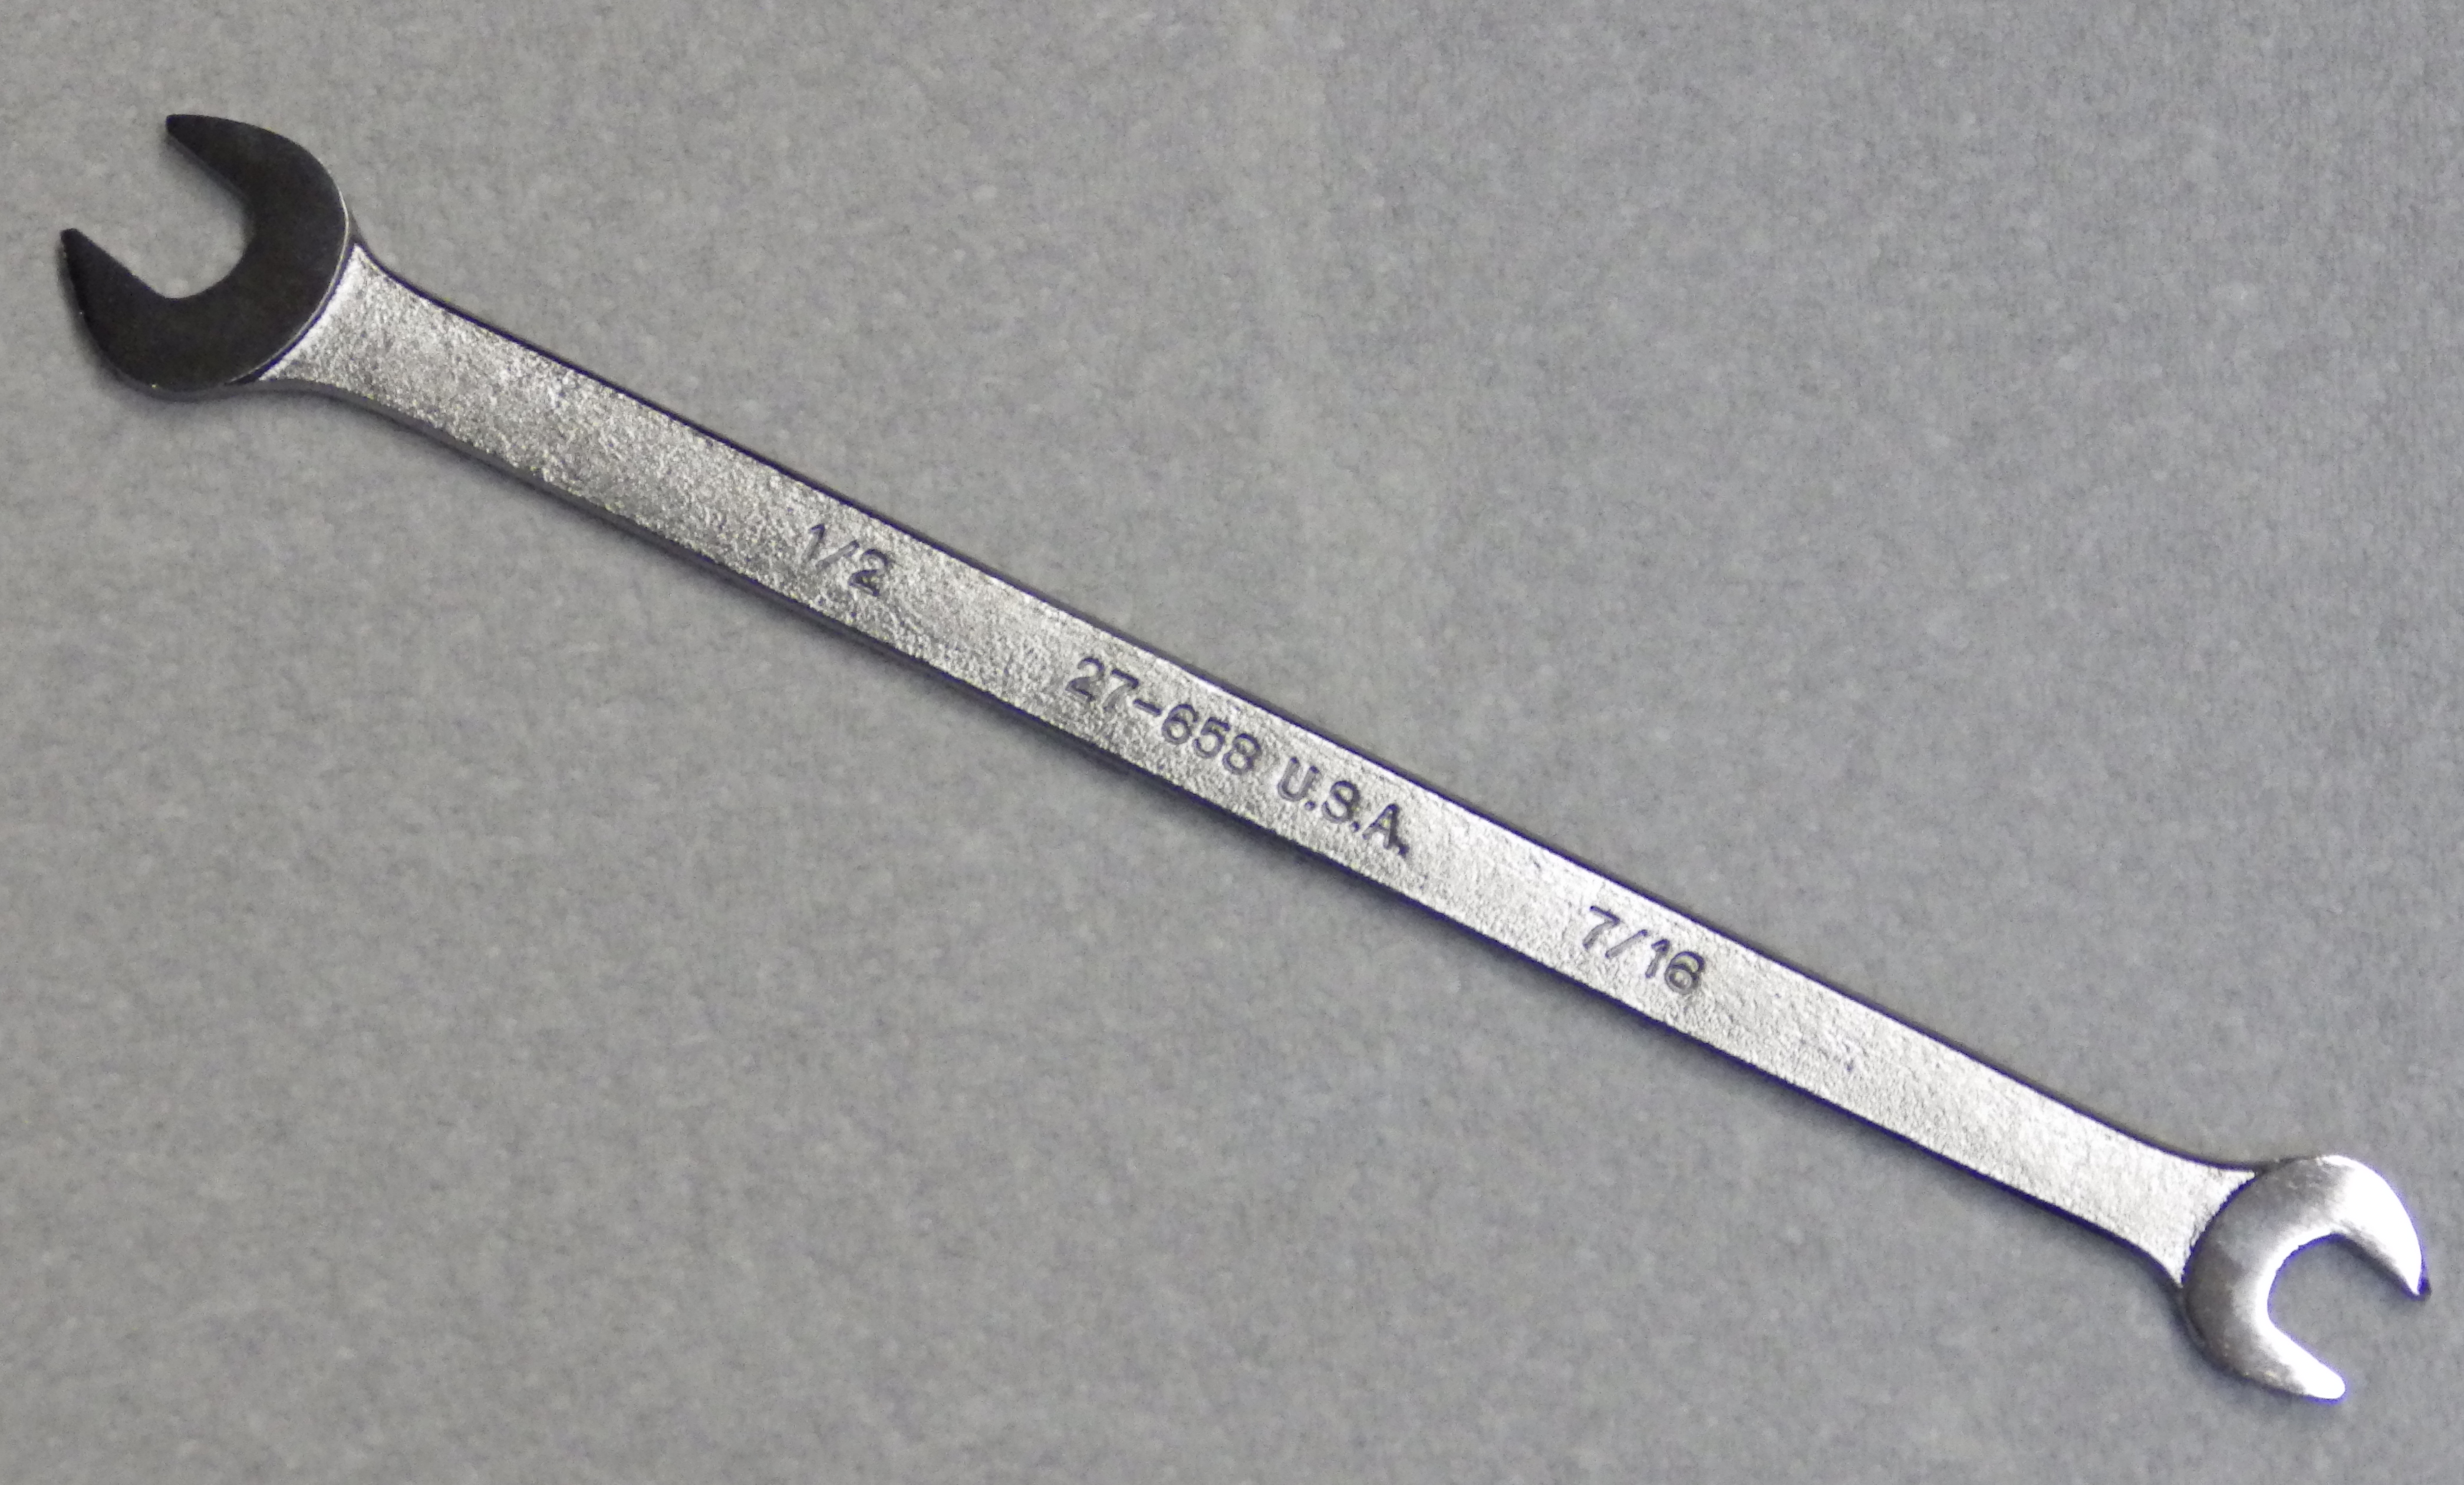
I must say, though, that this wrench bears little resemblance to the fine tools once manufactured under this name. Chrome-plating over belt-sander work does not make a quality tool.
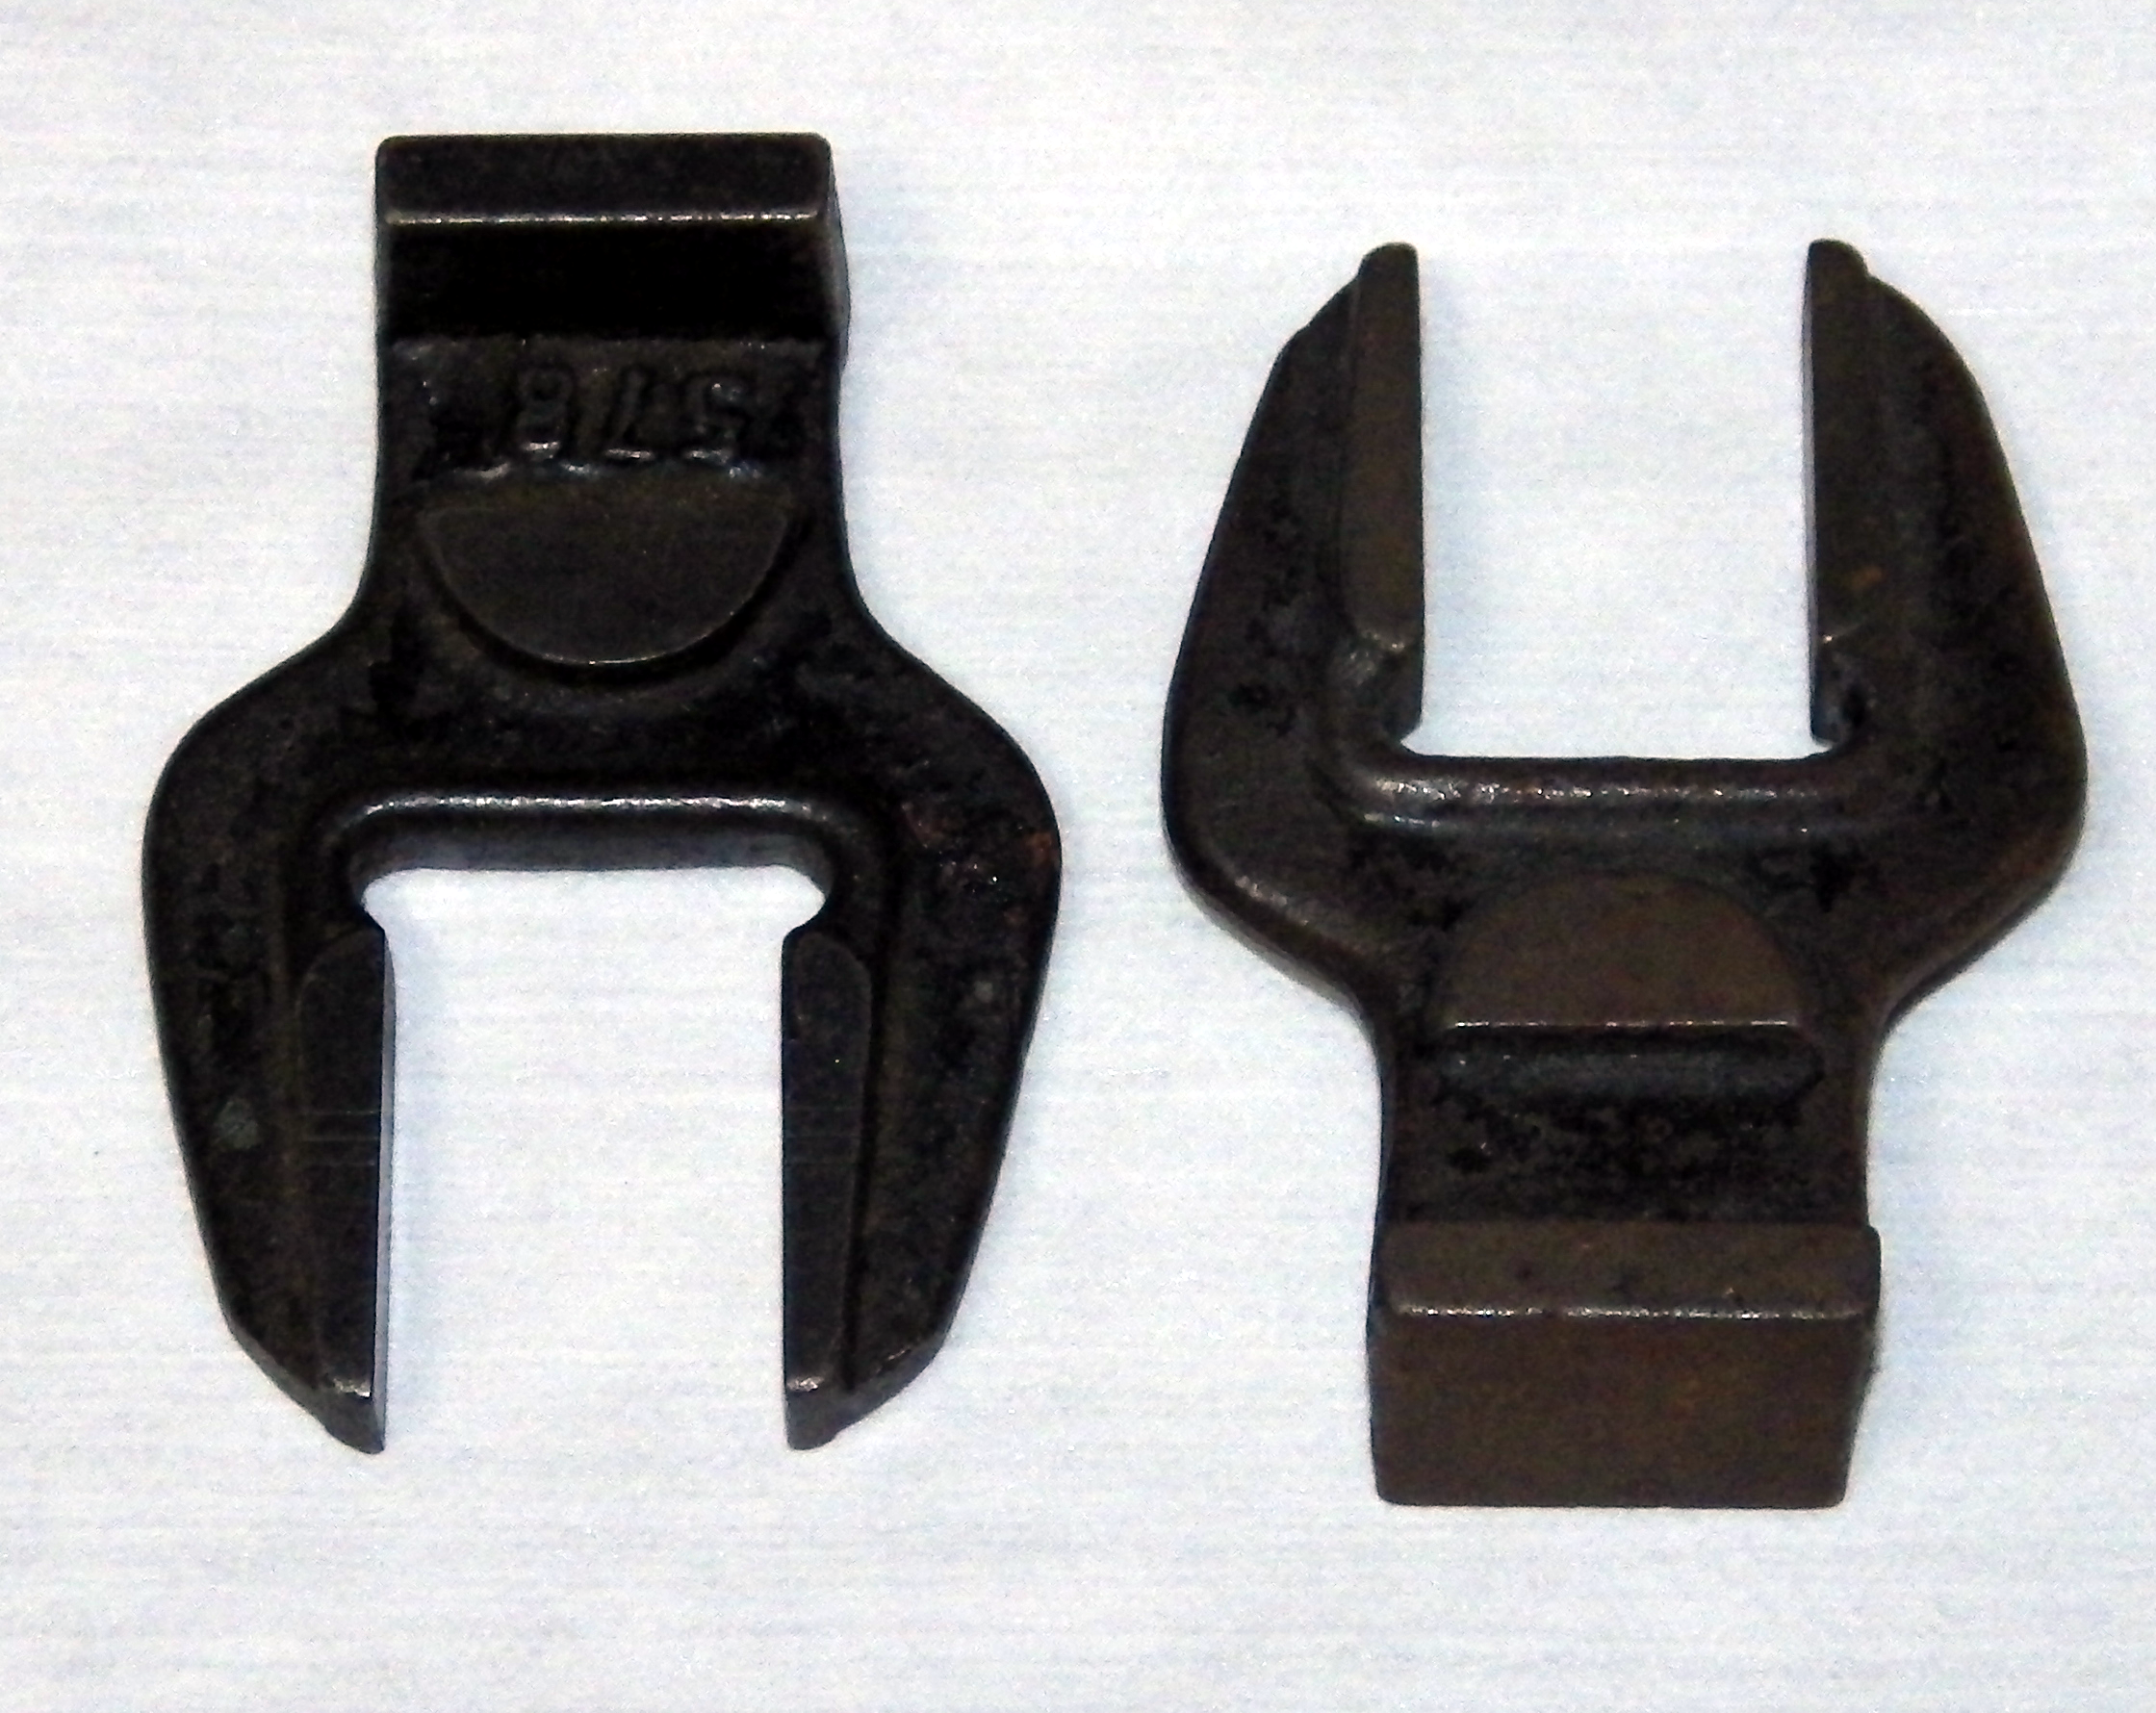
A double-ended open-end wrench: 13/32" on one end and 1/2" on the other.
This wrench is called out in the 1942 Parts Price List as a "No. 83" wrench, with no Lanston Monotype part number.
I am only assuming that this wrench is indeed an open-end wrench. In the Parts Price List it is just called a "wrench", but other wrenches are called, specifically, "box" wrenches.
At least one of the functions of the 1/2 inch side of this wrench may be better served by a long, thin 1/2" open-end wrench (q.v.) or an appropriate tappet wrench.
A double-ended open-end wrench: 5/16" on one end and 1/4" on the other.
This wrench is called out by size in the 1942 Parts Price List. It is given no wrench number, but is identified as Lanston p/n 47L1.
I am only assuming that this wrench is indeed an open-end wrench. In the Parts Price List it is just called a "wrench", but other wrenches are called, specifically, "box" wrenches.
See also the Nozzle Wrench, which is a box wrench.
A single-ended 7/8" box wrench.
This wrench is called out in the 1942 Parts Price List as a "No. 8219" wrench, with no Lanston Monotype part number.
The 1942 Parts Price List calls out a "Wrench No. 8221 (6" light adjustable angle)" without Lanston Monotype part number.
It isn't entirely clear to me what this wrench is. A search of the Internet suggests that quite a lot of people think that an "adjustable angle wrench" is an adjustable wrench of the type known colloquially in the US as a "Crescent wrench" (after the best known brand of such wrenches). An adjustable wrench of this type does indeed have an angled head, and so would be an "angle wrench, adjustable".
The primary function of an adjustable wrench is to round off nuts and the heads of bolts. An adjustable wrench should never be used if the correct box or end wrench is available.
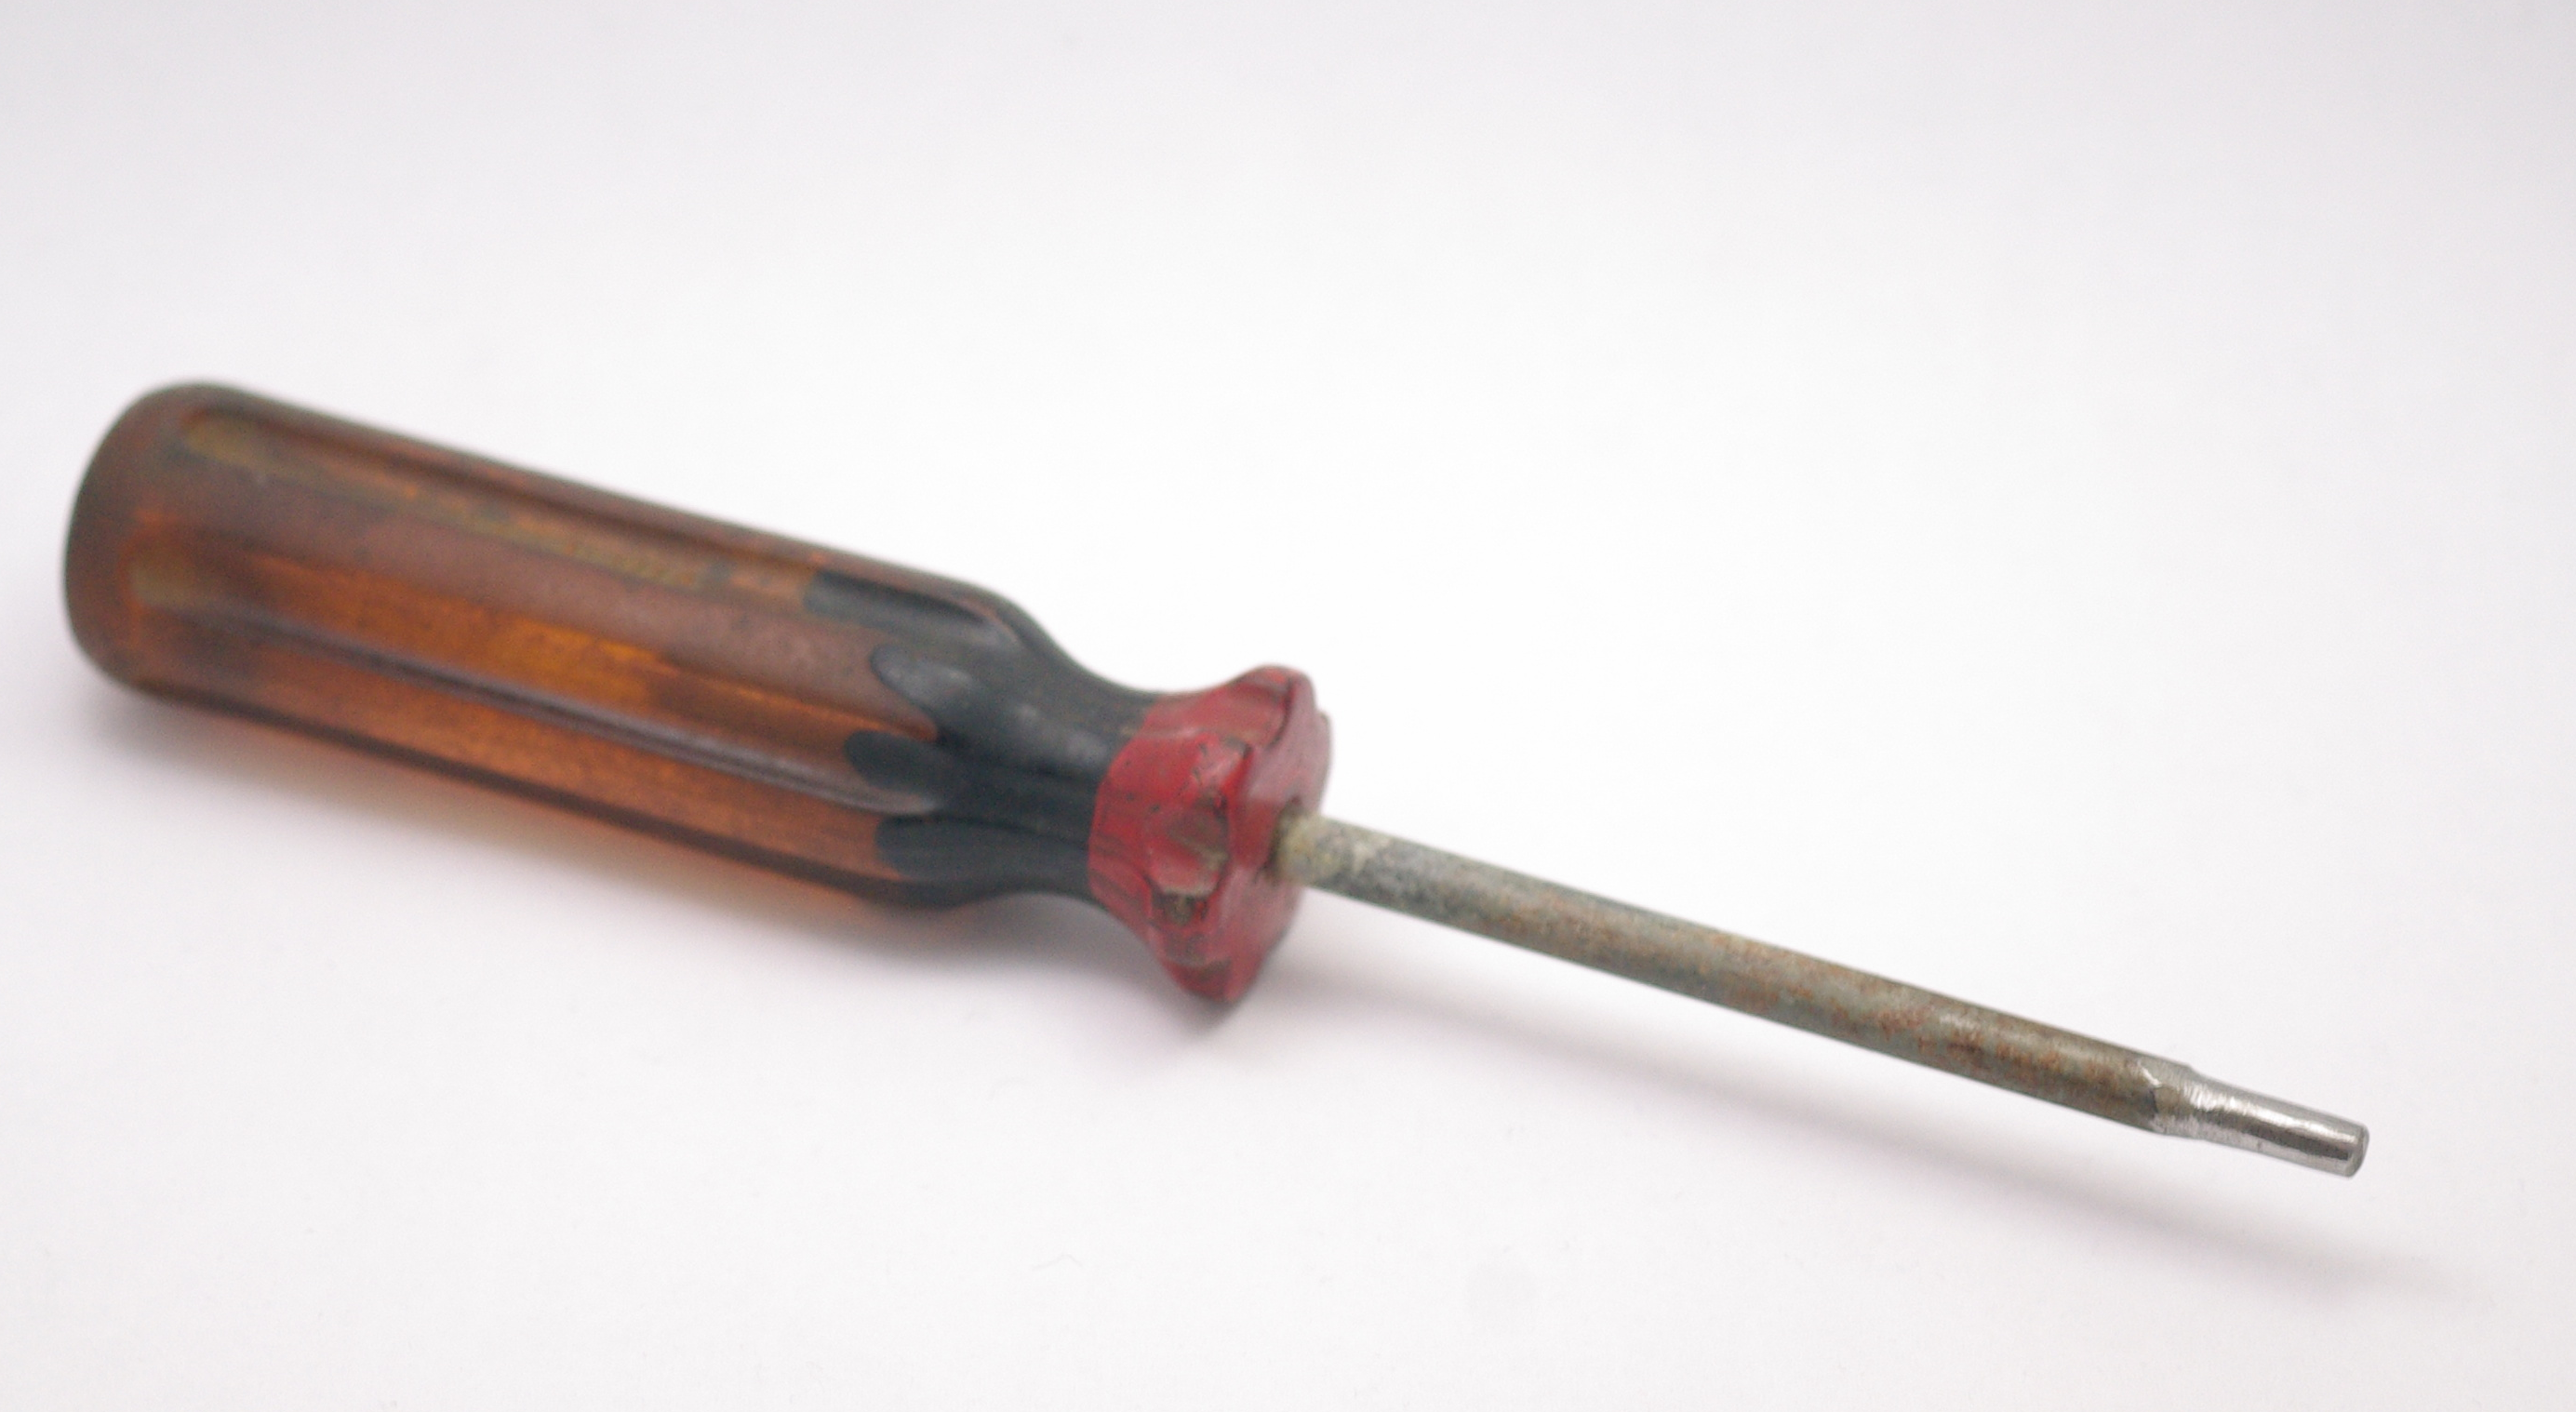
The 1942 Parts Price List calls out a "Screwdriver (large) (10" x 3/8") as p/n 22L6.
The 1942 Parts Price List calls out a "Screwdriver (small) (6" x 5/16") as p/n 22L6.
The same forceps/tweezers used in type handling are very useful for holding the Nozzle Plate when removing and cleaning it.
The 1942 Parts Price List calls out a pair of Pliers (flat nose, parallel jaw) without a Lanston Monotype part number. These are in the "Special Tools" section of tools not supplied by default with the machine.
Parallel jaw pliers are still available from industrial supply houses such as McMaster-Carr or better jewelry supply houses such as Rio Grande. McMaster call them "parallel-action pliers."
The 1942 Parts Price List calls out a Mold Body Lifting Tool, 48L1, as a standard tool supplied with the Thompson.
An alterative can be made by hammering the end of a 6 inch (or so) rod flat and to a blunt point. It may help to hammer this pointed section so that it is aligned parallel with the body of the rod/wire but is offset slightly downward.
An "L" shaped wire tool for removing the Vertical Mold Blade. This is a shop-made tool. No tool is listed for this purpose in the 1942 Parts Price List.
The most frequently used tool in Thompson operation is the Pin Wrench (see above). Several other items are also useful during operation.
Manila folders are useful for rubbing Matrix faces prior to placing them in the Matrix Carrier. They are just slightly abrasive.
600 to 1000 grit wet-or-dry sandpaper is useful for slightly more aggressive cleaning of matrix faces. This is done by placing the sandpaper on a machined flat surface and wetting it with WD-40 or similar.
An X-Acto® knife is useful for carefully scraping deposits from the surface of a matrix.
Whenever the Type Receiving Shoe is removed and replaced, its height must be set by placing paper shims above two pieces of type (one on each end of the shoe) so as to set its height just slightly above the bodies of the received type.
The traditional material for this shim was Cigarette Paper (Wikipedia says this is now called "Rolling Paper"; it the paper one would use to hand-roll one's own cigarettes). This is still available:
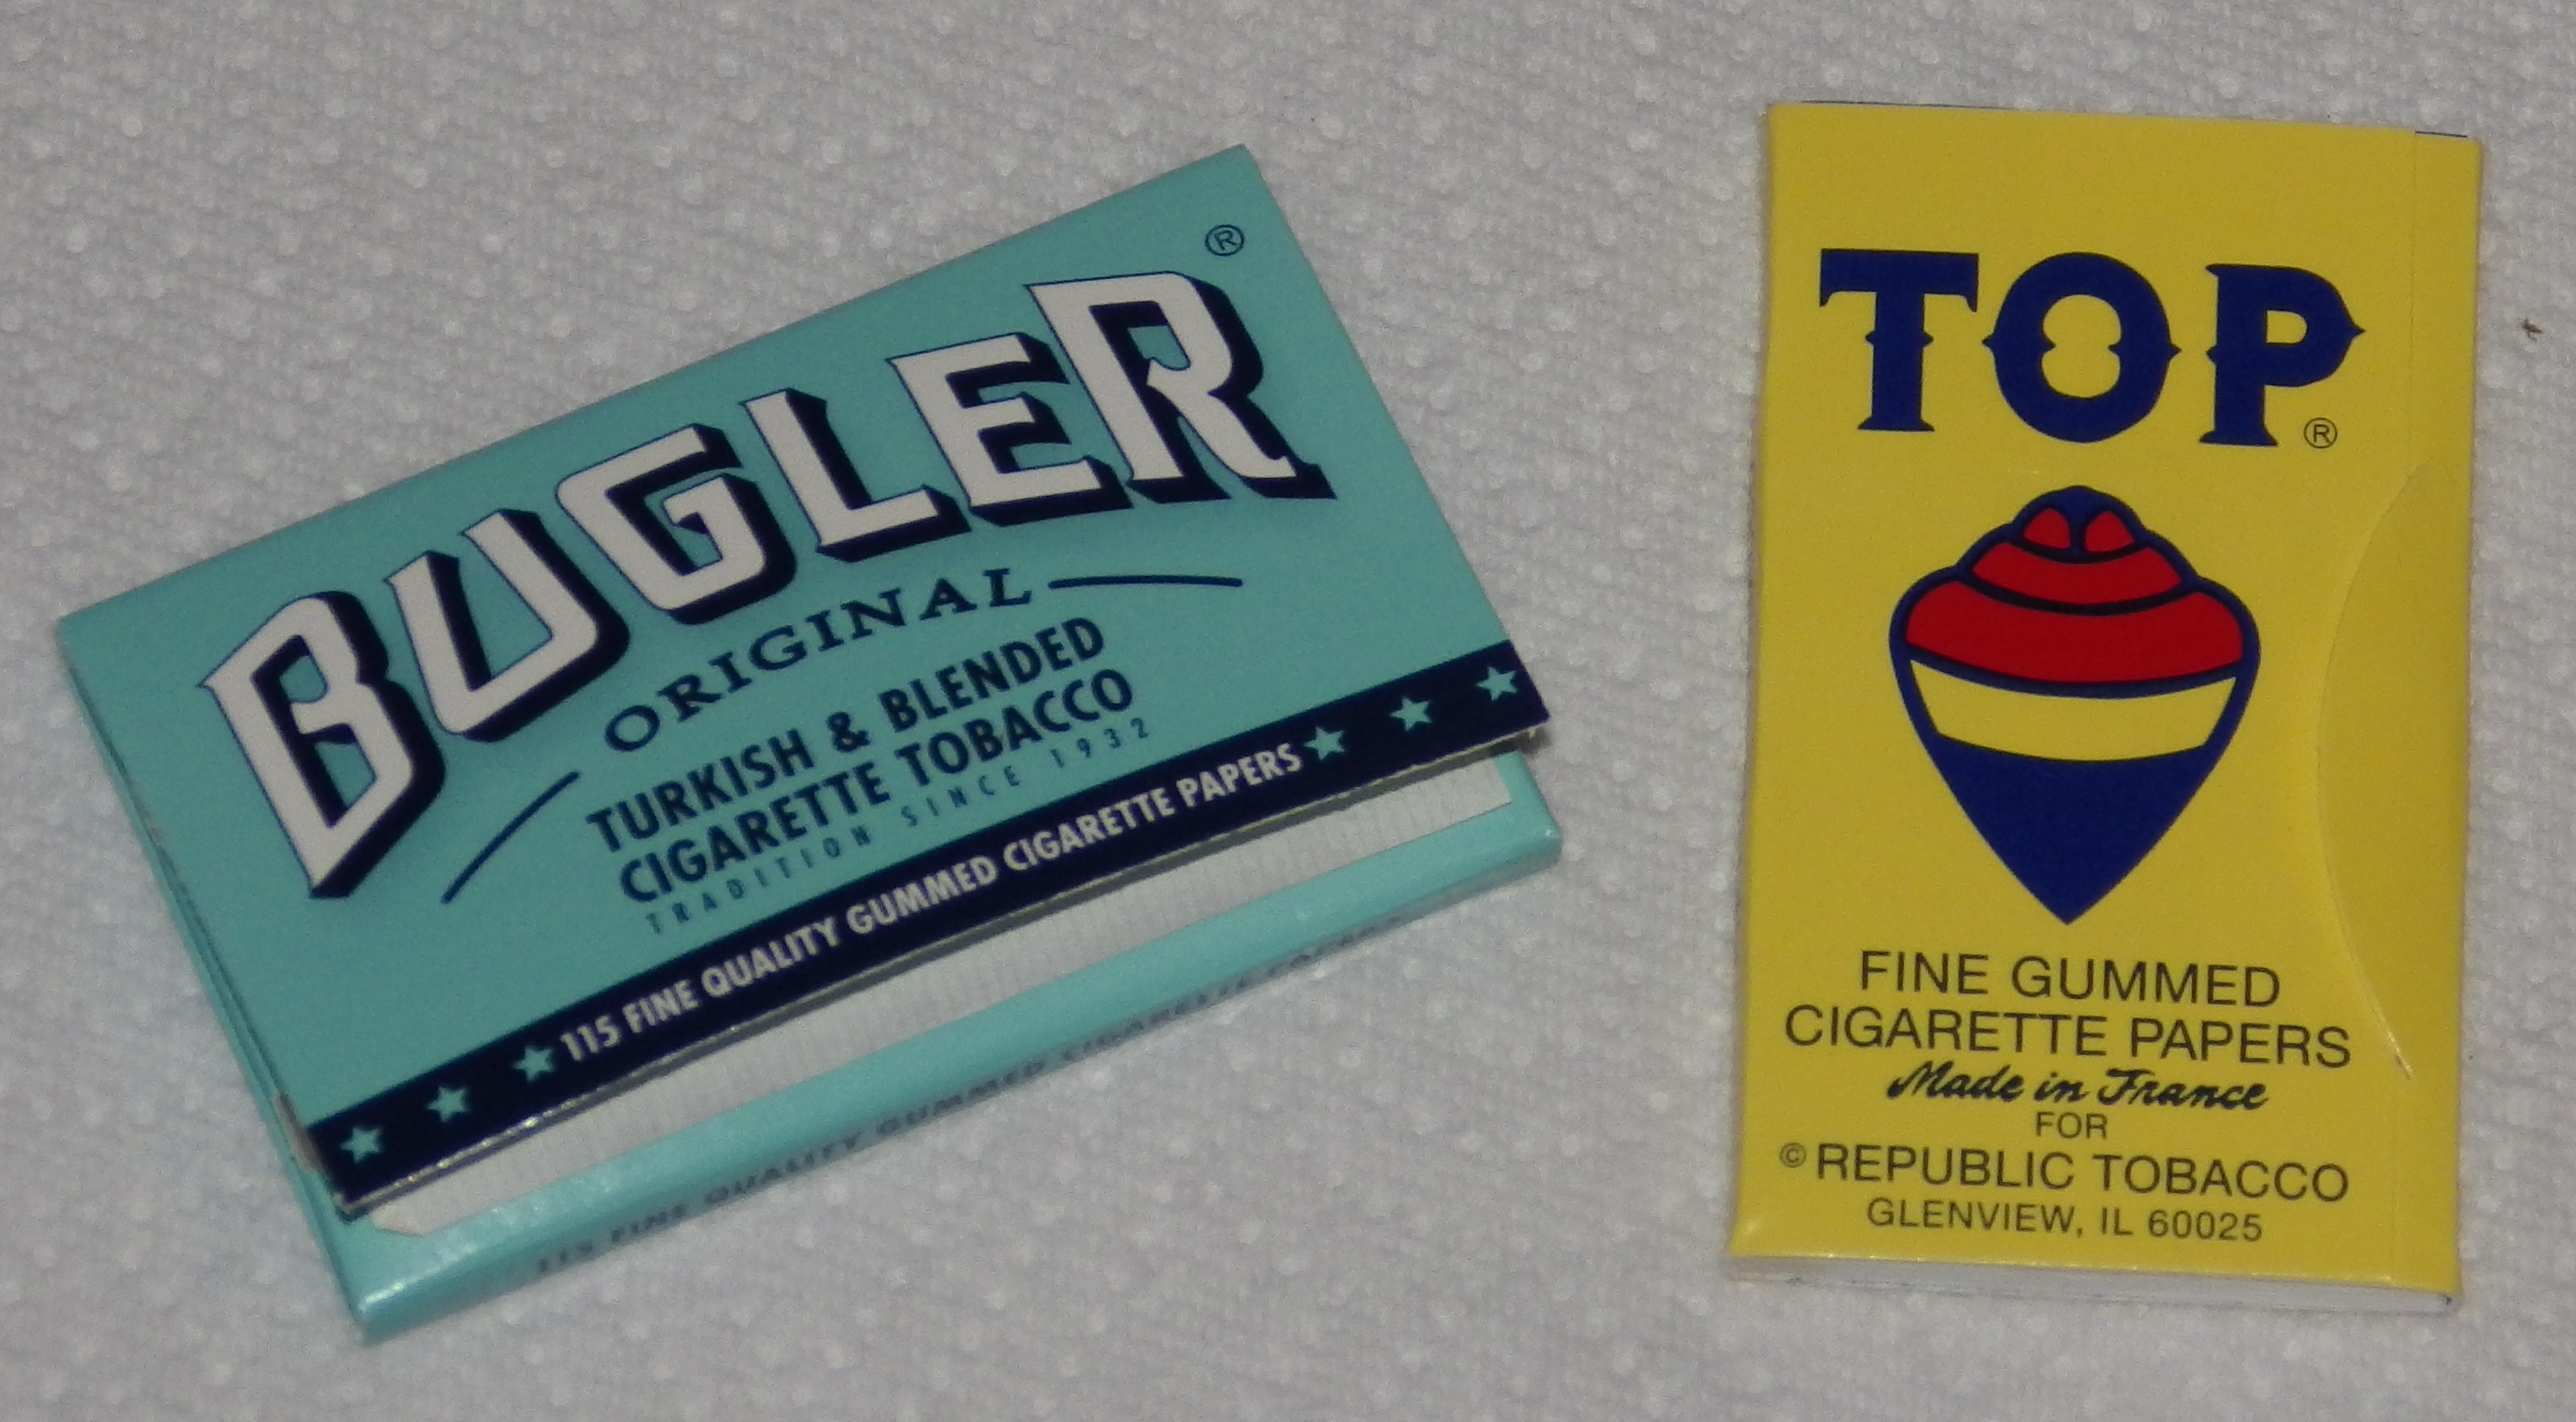
However, Skyline Type Foundry has recently discovered that ordinary office paper, which is thicker than cigarette paper, works better. Ordinary office paper is about 0.003 inches thick. (Scraps of Post-It® notes work, as well.)
Regardless of the paper used for these shims, they are left in place when casting commences and simply pass under the Type Receiving Shoe and may be picked out of the delivered type.
Brushes are of course useful in cleaning the machine. The exact choice of brushes is a matter of personal taste, Note that natural fiber brushes merely burn if too hot, while plastic-bristled brushes melt. Depending on what you are cleaning, this may or may not be an issue. For example, old toothbrushes (which have plastic bristles) are useful for cleaning the slot of the VMB; it is not so hot as to melt the bristles.
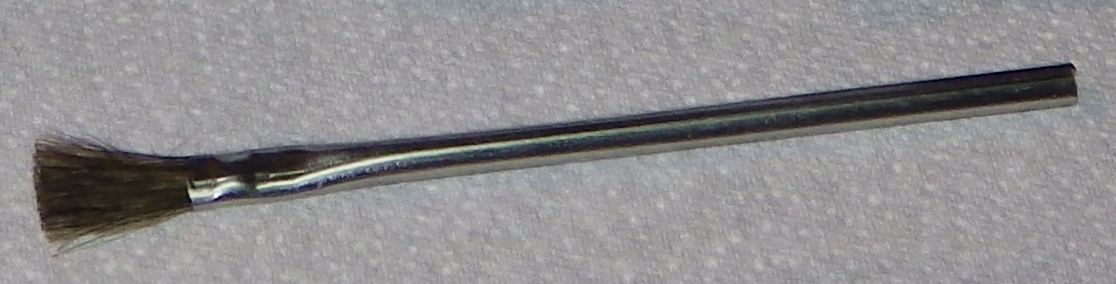
The small disposable metal-handled brushes known as "acid brushes" are quite handy.
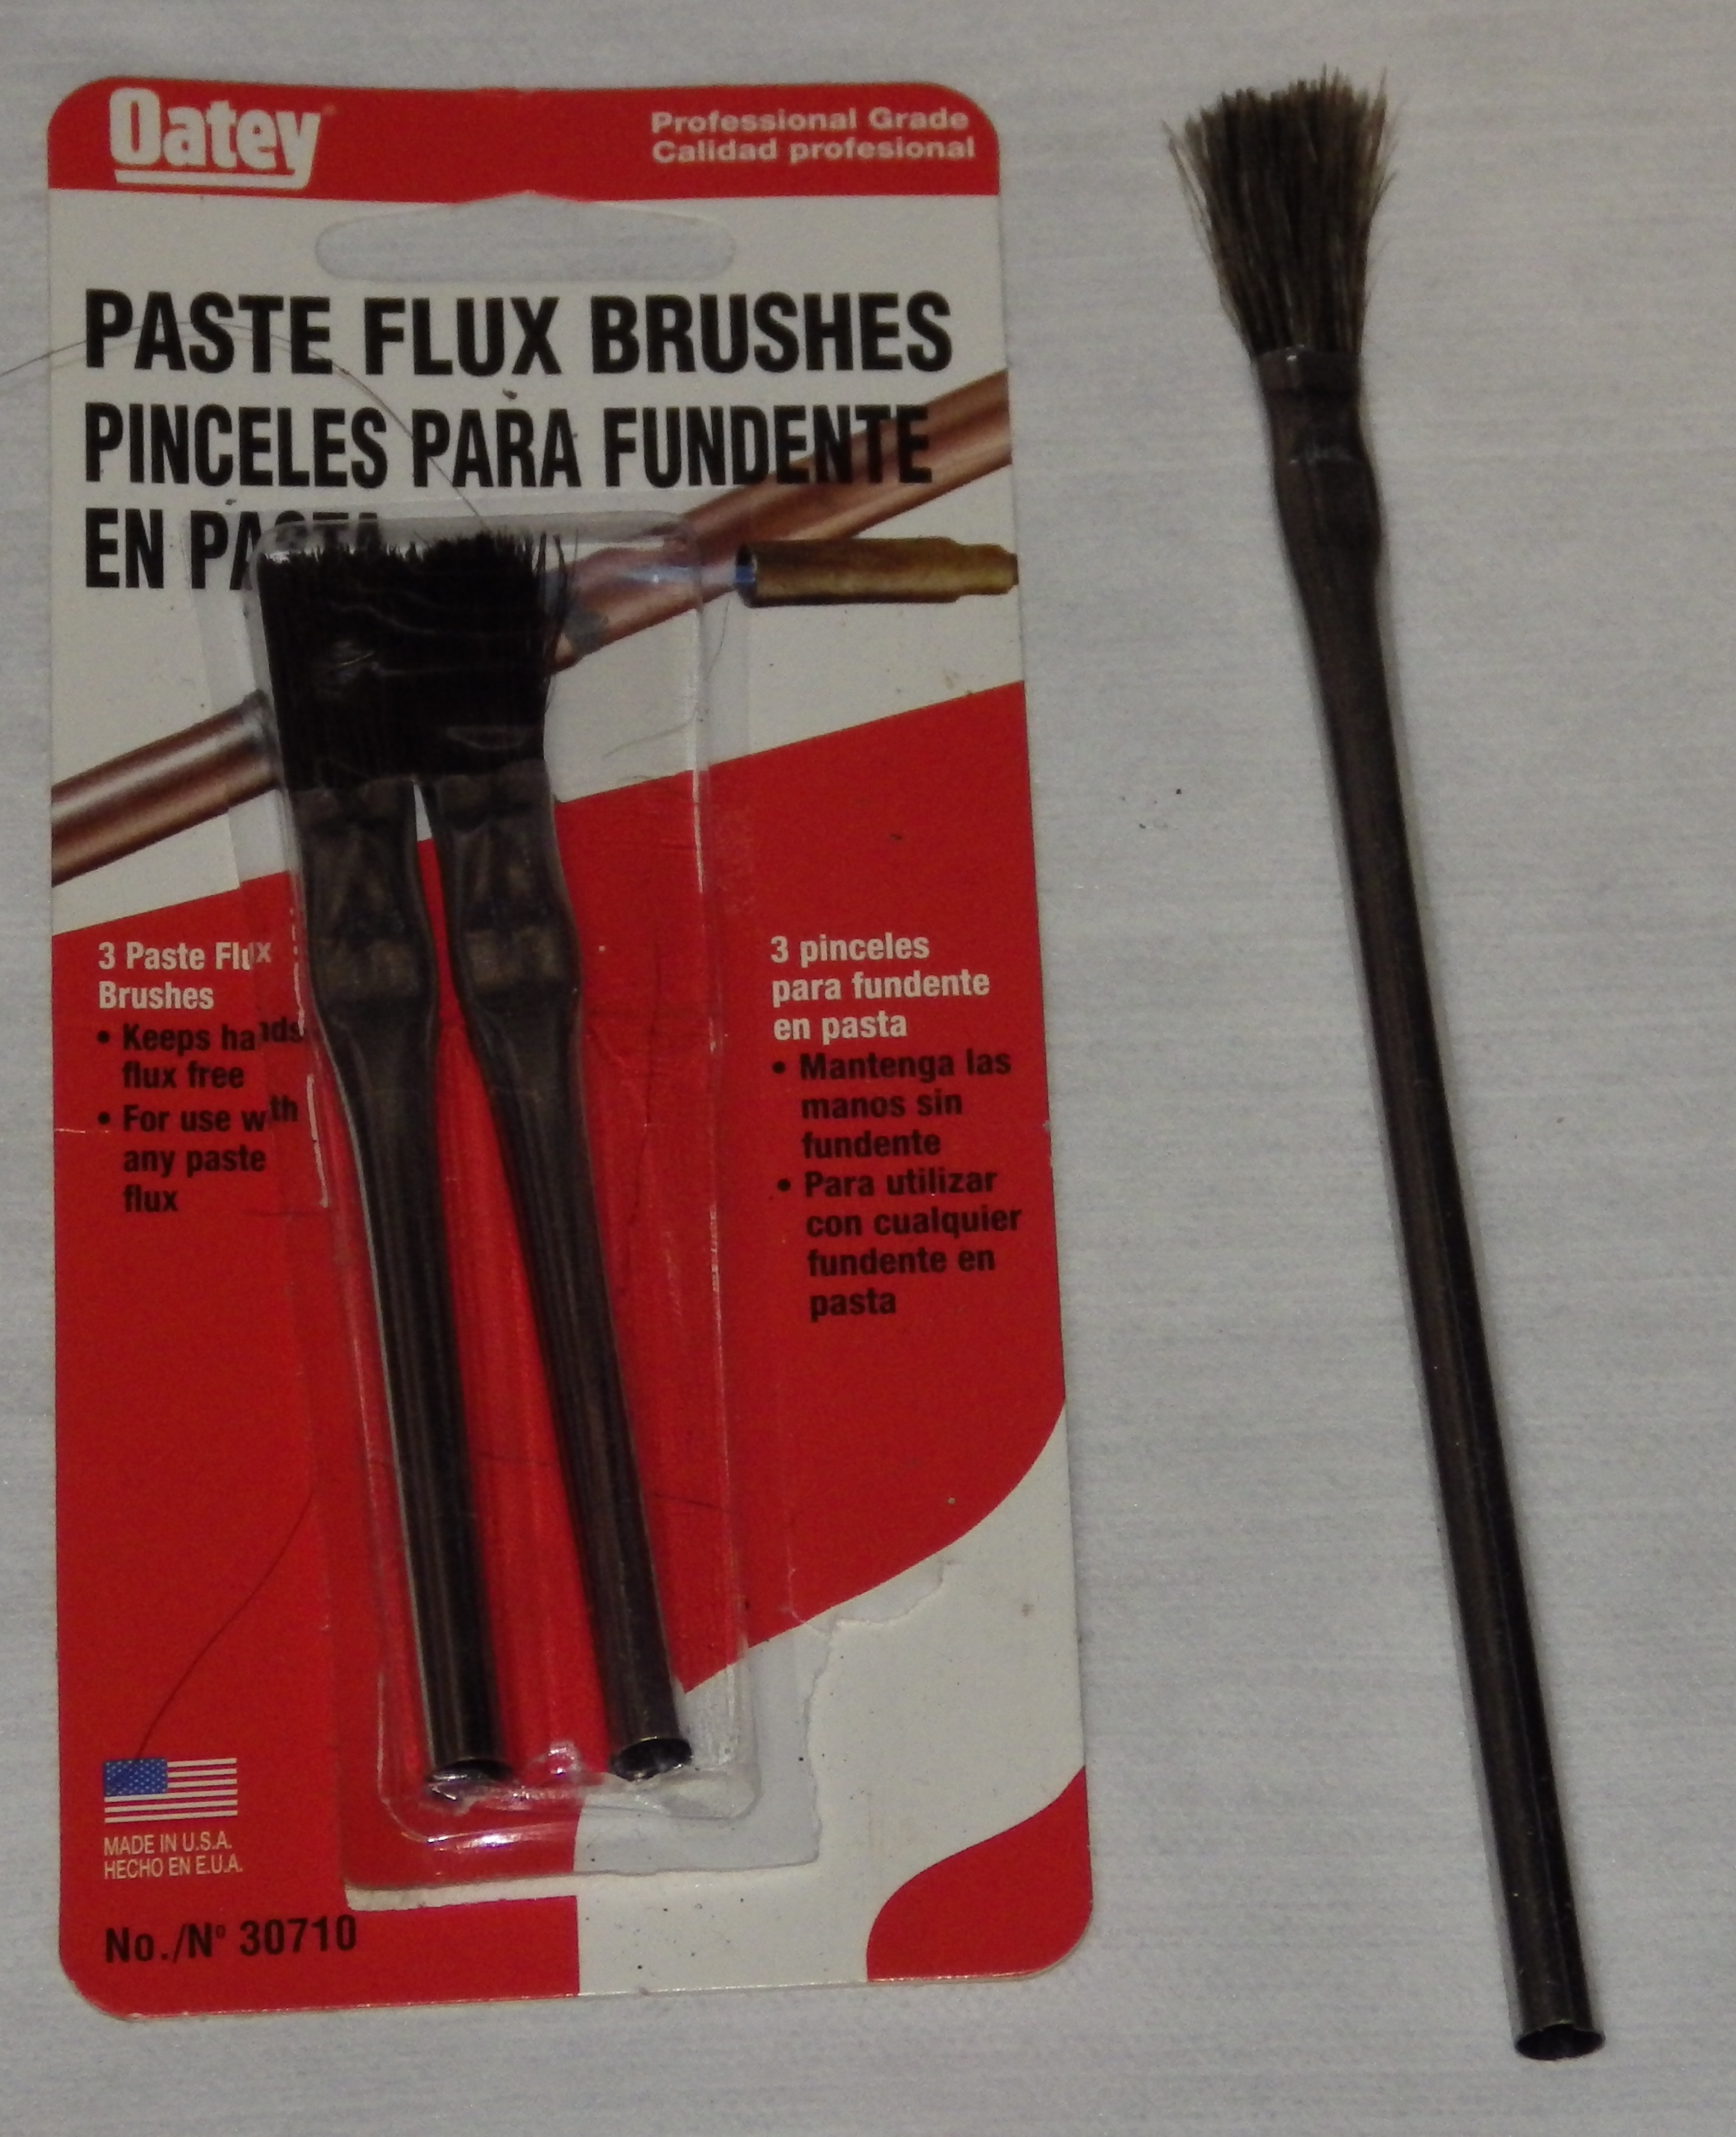
Here are a couple of "flux brushes" (available in home improvement stores in the plumbing soldering section), shown in their original package with a regular "acid brush" alongside for scale. They're very similar, and could be useful, but their handles are a bit short.
The 1942 Parts Price List calls out two brushes in the "Special Tools" section (those tools not supplied by default with the machine): a 1 1/2 inch "large" brush and a 1 inch "small brush. Neither is given a Lanston part number.
These brushes are general-purpose cleaning brushes. The Type Brush is a more specialized brush.
Tools of the following kinds are useful for cleaning the machine and its Mold:
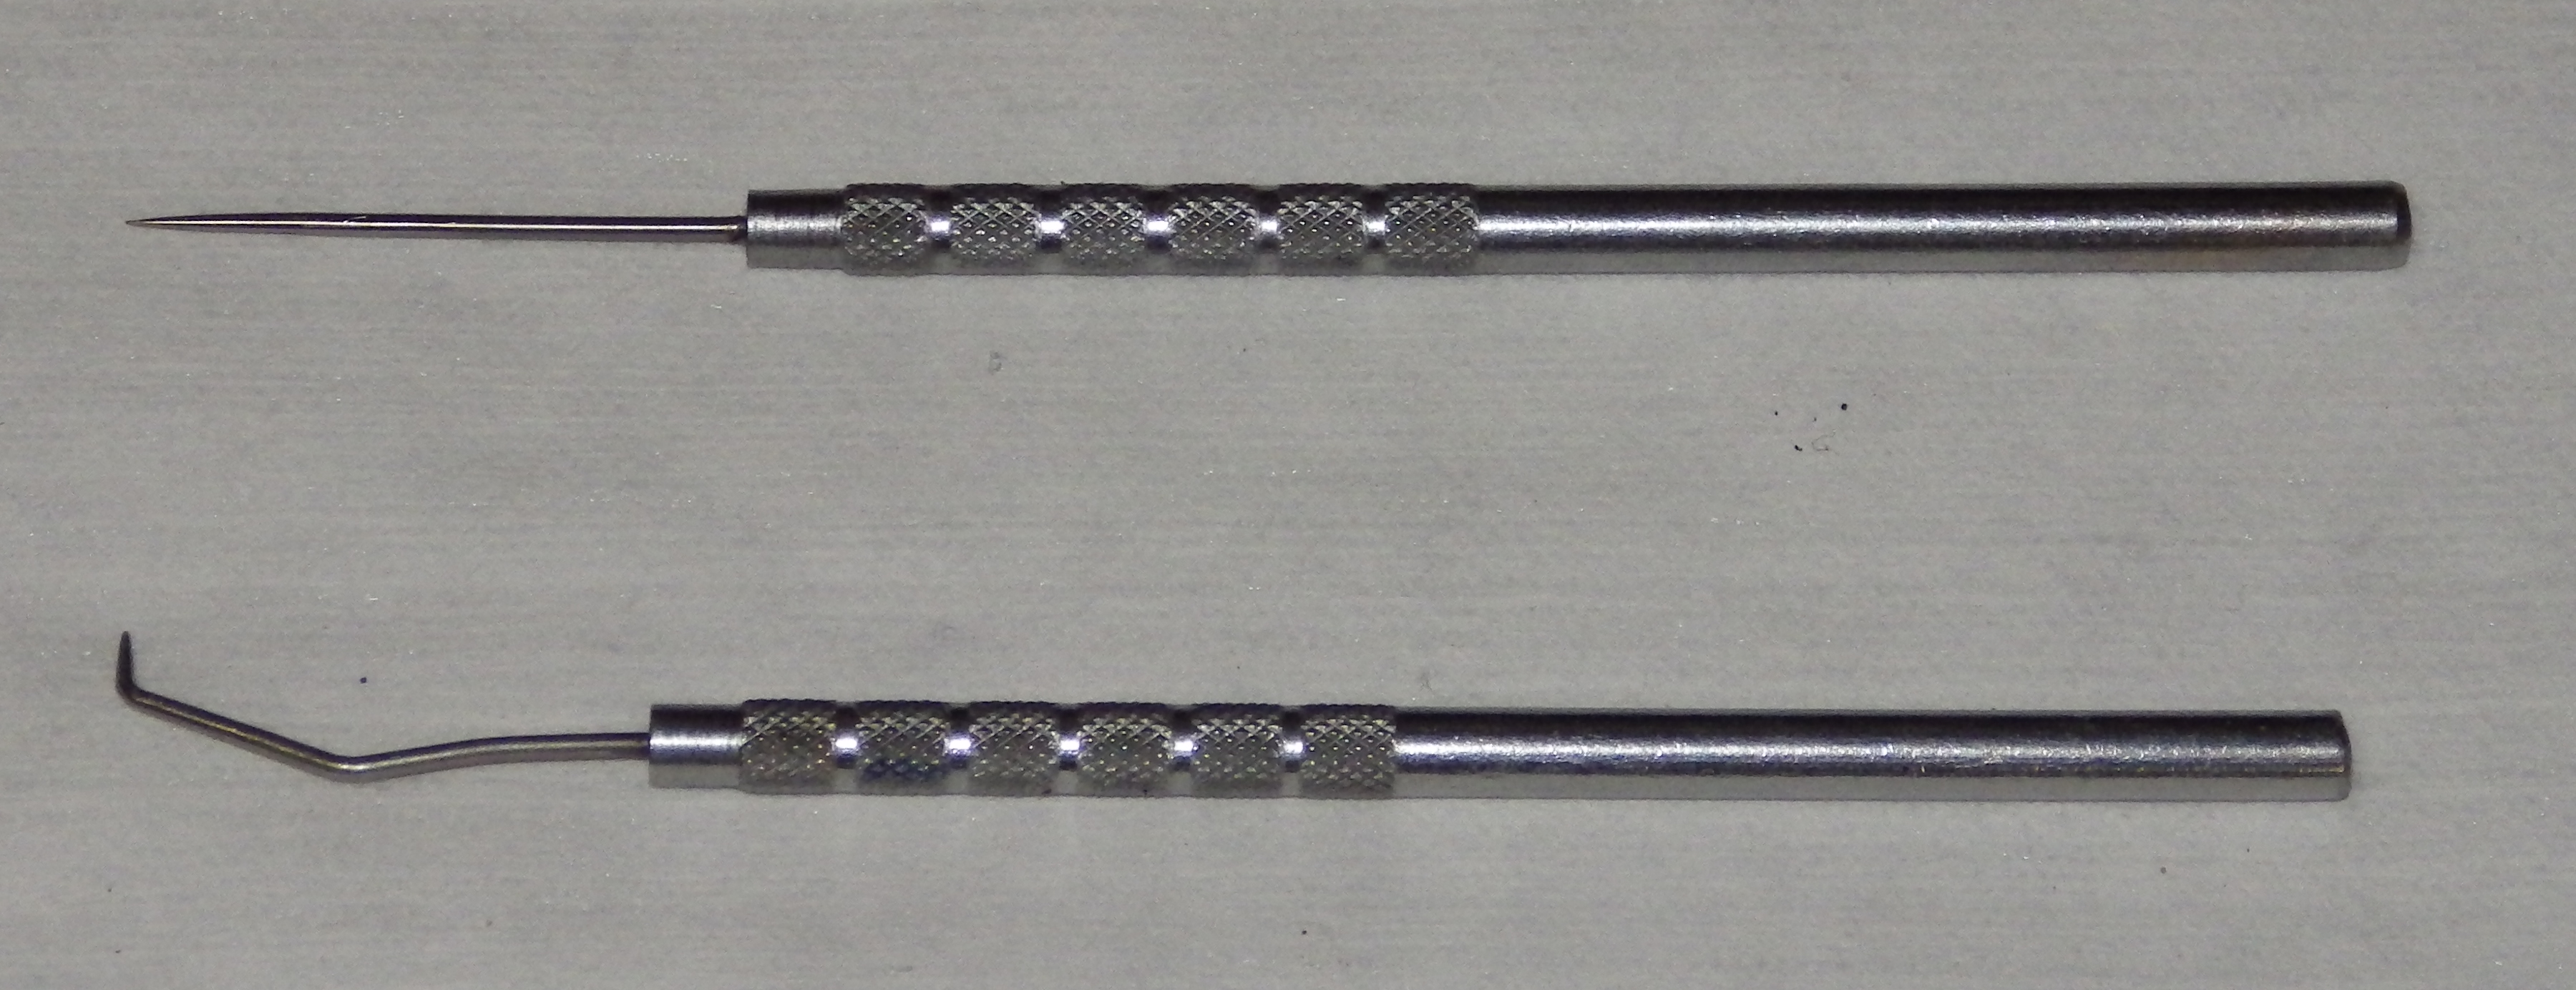
If your cannot obtain official dental tools, useful sets of picks are sold by discount tool houses. Here are two tools from such a set (the upper, straight, pick makes a useful Bodkin, as well):
A pocket-sized (36 pica) printer's Line Gauge with one squared-up end is useful in scraping metal accumulations off of the Vertical Mold Blade.
If you have not equipped your caster with a counter, it also may be used to make a quick estimate of how many types are under the Type Receiving Shoe when you are nearing the end of a casting run.
NA Graphics still sells Line Gauges in various lengths up to 24 inches. Their 6 inch pocket Line Gauge with clip is p/n LG304.
You can also use reglet and/or small scraps of brass sheet similar scraping purposes.
A No. 40 drill (0.098 inches, 2.49 mm) held in a pin vise is useful for cleaning out the oil passage in the left face of the mold (the one which lubricates the right side of the Vertical Mold Blade).
Coat hanger wire, cut and bent as appropriate, is useful for cleaning out the water passages of the mold.
Cotton rags are better than cellulose (paper) shop towels for cleaning/polishing matrices, the VMB, and other mold components.
Cloth rags should be cotton. Polyester and other plastic-based fabrics melt.
Dixon's Mold Polish, once a familiar product to Linotype machinists, is useful for polishing Thompson Mold components such as the Vertical Mold Blade and the Nozzle Plate.
In use with the Thompson, the Mold Polish is applied with a short (1.5") length of printer's reglet which is generally kept in the can of polish.
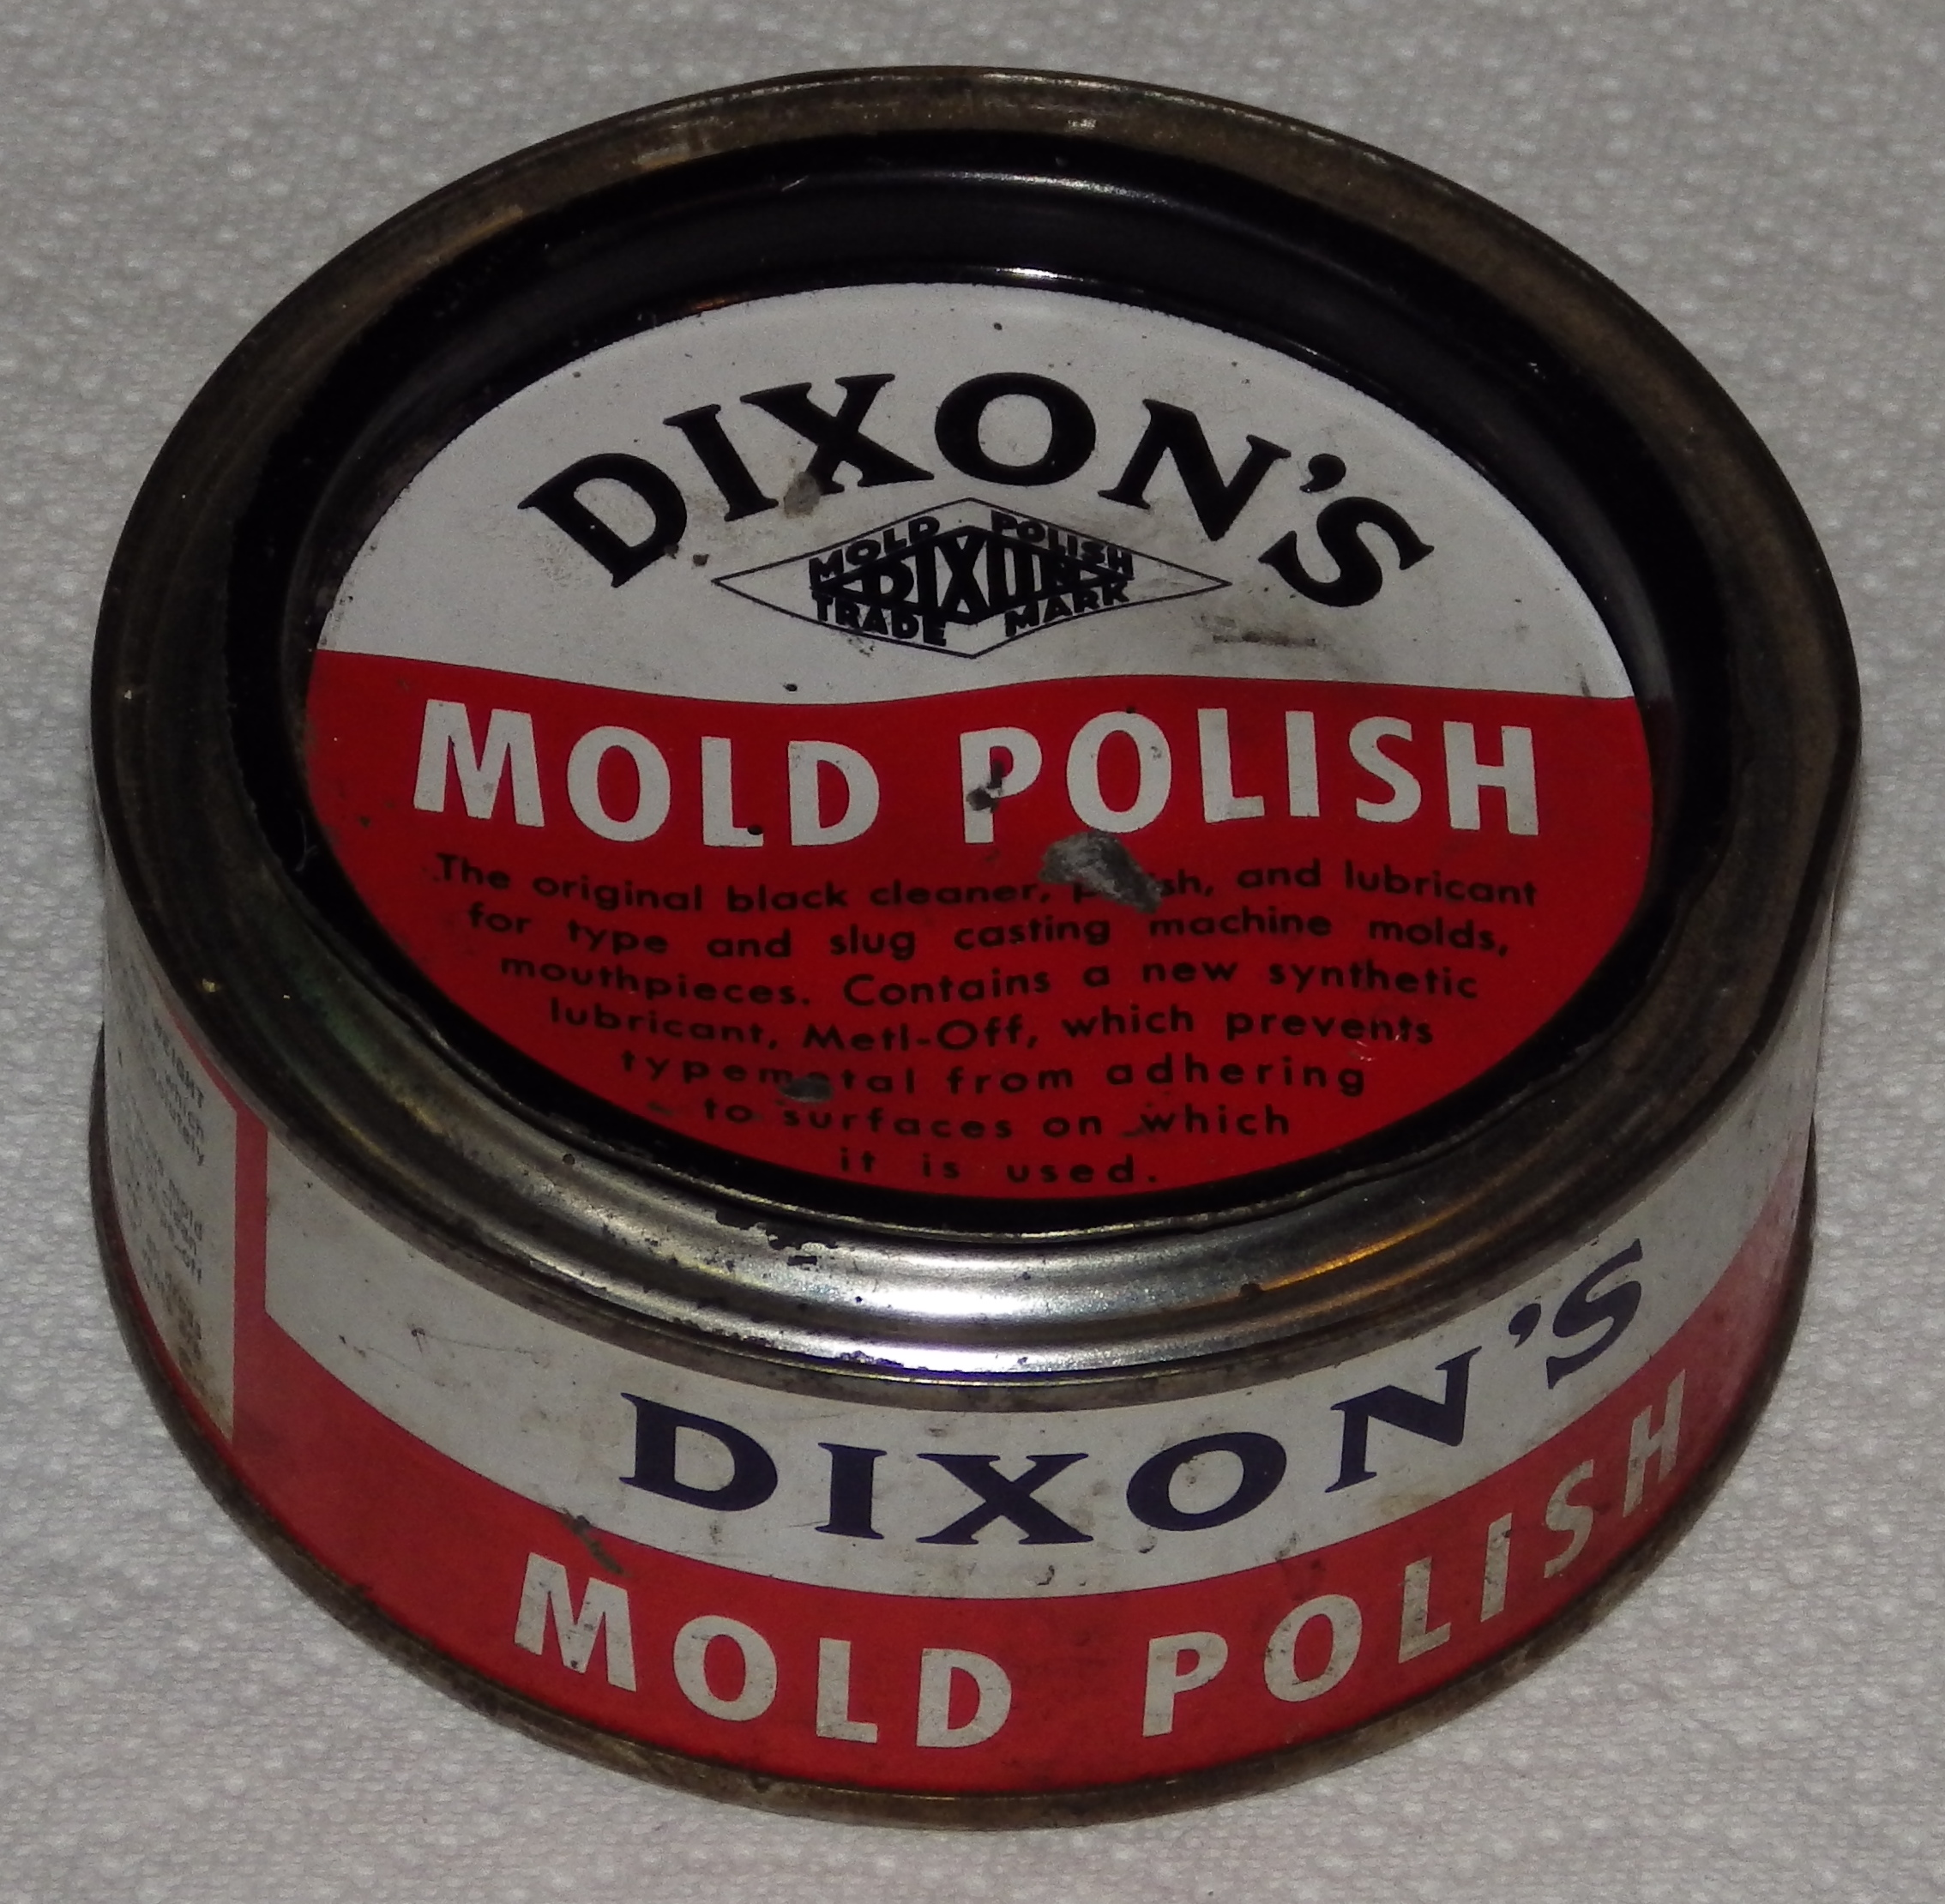
Dixon's Mold Polish is no longer manufactured. The typecasting and linecasting community is still working through the accumulated old stock of it. Sooner or later, though, it will become unavailable. One possible modern alternative would be automotive rubbing compound, available in the US (at least) in auto supply stores. While this works, it is more liquid than Dixon's Mold Polish and over time its abrasive component will settle out. It therefore has a finite shelf life.
NA Graphics still sells "Mold Polish, for hot metal casting machines." I haven't yet purchased any, so I'm not entirely sure what it is.
The 1942 Parts Price List calls out "Mold Cleaning Compound: For cleaning the parts of Molds. Not a lubricant." This Compound is not given a Lanston part number. I'm not entirely sure if it is the same thing as Mold Polish or not.
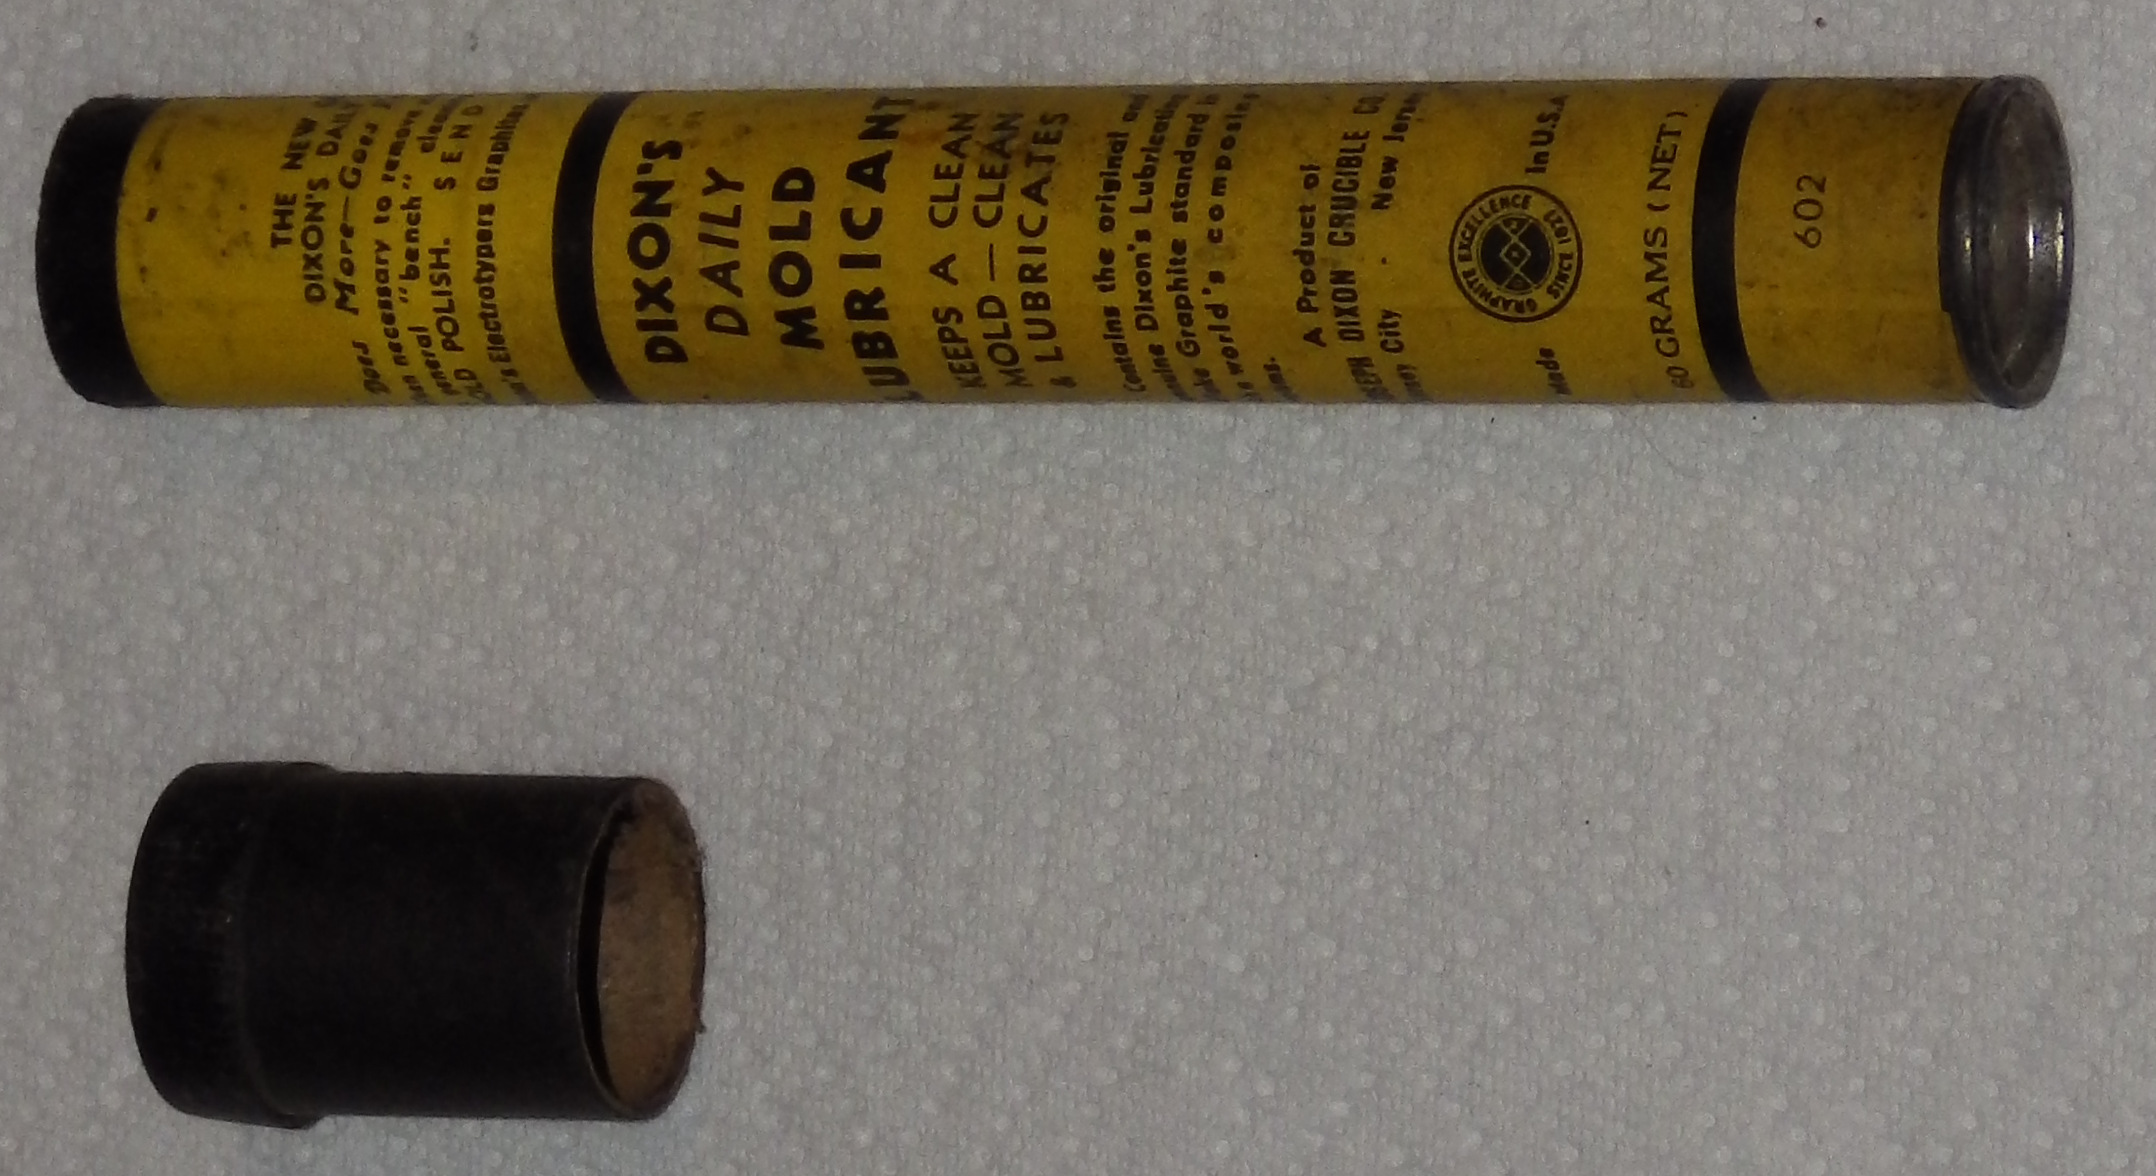
Not everything you find in old shops which says "Dixon's" and "Mold" is Dixon's Mold Polish. Dixon also made a "Mold Lubricant." It is not used on the Thompson.
It is now the standard (and required) operating procedure in one of the most active Thompson-based type foundries that any time the screw which tightens the Gib of the Vertical Mold Blade is loosened, this fact must be indicated by marking it distinctively. At present they use a bright yellow "banker's" clip on the screw to do this.
The reason for this is that it is easy to forget to tighten the VMB Gib upon reassembly. There is no visual or tactile indication that the VMB Gib has not been tightened. Neither is there any particular tool which may be associated with this item (so for it one cannot establish a maintenance procedure in which a tool left on the bench indicates a step unfinished). If, however, the machine casts with the VMB Gib (and thus the VMB) loose, the result is a dangerous and (at very least) time-consuming vertical squirt. This squirt can be of sufficient size, for example, to destroy the plastic light fixture cover on the ceiling above the machine. Experienced operators have been known to forget to tighten the VMB Gib screw (resulting in this squirt) more than once.
The subject of lubrication will also be covered in the Thompson ../ Lubrication Notebook.
The 1942 Parts Price List calls out an "Oil Can (large, long spout)" as a standard tool supplied with the Thompson. It is not assigned a Lanston Monotype part number, and therefore was probably a commercial item.
Although the Monotype-Thompson manual goes into some detail about general machine oiling, neither it nor the 1942 Parts Price List actually specify the oil to be used.
For the general oiling of all parts of the machine except the Mold, high-temperature parts, and greased parts, an ordinary non-detergent machine oil of about SAE 30 weight or ISO 68 weight is appropriate.
It is my own personal preference to use well-identified industrial oils rather than the nameless concoctions available at my local farm store. At the present time, I'm using Mobil "DTE Heavy Medium," an ISO 68 weight Circulating Oil; it seems to work well. An equivalent weight Hydraulic Oil would also work.
In a posting to the LETPRESS e-mail list on 2012-06-28, Keelan Lightfoot shared the following quite illuminating thoughts on the matter of non-detergent vs. detergent oils:
"Detergent oil keeps contaminants in suspension, which makes it easy to remove them using a filter in a circulated oil system. In applications where the oil isn't circulated and filtered, the detergent properties only serve to keep the contaminants where you don't want them. When spot-oiling letterpress equipment, this probably isn't a problem. But when you're oiling machines that rely on a sump full of oil with gears partially submerged in it, you want to gunk to settle to the bottom. This is why you're supposed to use non-detergent oil in air compressor s and lawn mowers."
So while the Thompson does not have a sump, it would seem that the use of a detergent oil (such as a modern motor oil) can't help the machine and might hurt it. The Thompson wasn't designed for detergent oils.
In the Thompson as documented by Lanston Monotype in the 1956 manual, there are two grease cups: one "above the bearing at the rear of the machine" and one on the underside of the Friction Wheel Shifter Yoke inside the Base of the machine. The latter of these may well have gone missing over the years. Some machines have been fitted with other grease fittings, typically using "zerk" connectors.
The grease specified by Lanston Monotype was "Gredag®". This was a commercially available product at the time composed of Deflocculated Acheson Graphite (the "DAG" part) and grease (see Acheson and Deflocculated Graphite). No exact modern equivalent is available.
In the absence of an exact equivalent, any good general purpose modern grease should be sufficient.
Aside: One issue which can arise with older machinery is not present here. Modern "EP" (Extreme Pressure) greases are made with any of several kinds of additives. One class of such additives is sulfur-based. These can cause corrosion on copper-based components (such as the bronze bearings often found in older machines). It is very difficult to find non-EP greases now, or to determine which kinds of EP compounds are in use. Fortunately, the reports I have from those who have completely disassembled Thompsons is that they contain no bronze bearings.
The lubrication of the Mold on the Thompson is critical, and is not accomplished with the regular lubricants used for the rest of the machine. Since genuine Thompson Mold Oil and Monotype-Thompson Paste (see below) are no longer available, modern substitutes for mold lubricants must be adopted.
The oil used to lubricate the Mold is relatively light. Standard Skyline Type Foundry practice is to use 3-in-1® (brand) "Multi-Purpose Oil" (aka "Household Oil") - the stuff in the red/white/black can, not the "3-in-1 Motor Oil" in the blue/white can. The Wikipedia article for it, which is brief but useful, describes it as "a pale spindle oil with a small amount of corrosion inhibitor and cintronella oil [for fragrance]".
According to the MSDS for it (published by its makers, the WD-40 Corp.) its viscosity is "112 SUS (23.31 cSt) @ 100 deg. F."
Since I tend to prefer industrial lubricants, I am presently using an industrial spindle oil of approximately the same viscosity: Mobil Velocite No. 10 (22 cSt @ 100 deg. F.) Although I have certainly not cast as much type as Skyline, it seems to be working well. When purchased in gallon quantities, it is roughly 1/4 the price of 3-in-1. It does not smell of citronella.
The 1942 Parts Price List calls out two Lanston Monotype products for Mold lubrication:
Thompson Mold Oil. This is noted as being "for use on Thompson Molds only," so we know that it is not the same as, for example, Monotype Type-&-Rule Caster Mold Oil.
Monotype-Thompson Paste. For use on the Molds, mixed with Thompson Mold Oil. See p. 12 of the 1956 manual.
This is the least satisfactory area of Thompson lubrication.
The Lanston Monotype documentation (e.g., the 1956 manual) specifically cautions against using oil on the Melting Pot Levers:
"Oil should not be used on any of the MELTING POT LEVERS as it will burn off and cause the parts to stick or cut." (p. 14, 1956 manual)
Lanston recommends to methods: a mutton tallow and graphite mixture (preferred), or Gredag (alternative). As discussed earlier, Gredag is no longer available.
Of the various tallows, it turns out that mutton tallow is the best for high-temperature work; it was used extensively in the 19th century in steam engine practice. It is still available for two uses: as a folk remedy, and for muzzleloading firearms. It is much less expensive when purchased for the latter purpose (Dixie Gun Works, p/n LA1002).
Graphite of course is also readily available. One must be a little careful if ordering from McMaster-Carr (usually a reliable supplier). The problem is that they don't quite specify what they sell; if you order McMaster's "Powdered Graphite Lubricant," what you get is actually Asbury No. 205. This is a low-grade graphite with considerable "free crystalline silica" (quartz) and ash. A graphite such as the former Dixon's (now Asbury Carbons) No. 635 or Microfyne (both familiar to Linotype operators) would be more appropriate.
As I write this, I've got a pound of mutton tallow on my desk and a fine collection of various graphites, and intentions to try this someday.
It would also be interesting to experiment with two other alternatives:
In practice, since mutton tallow and graphite sounds a bit medieval and Gredag is unavailable, it is not uncommon to lubricate the Thompson Pot Levers with the same general machine oil used on the rest of the machine.
Do not neglect the tools for the pot. Routine pot agitation and the maintenance of the correct level of dross on the pot are important aspects of good casting. Also, any time you swing the pot back, you should be prepared for the possibility that the Choker Valve might be stuck open and that the entire Pot will drain into the base of the machine. Be prepared to execute the standard emergency procedures for a leaky or stuck nozzle; this includes having all required tools prepared for immediate use. If the Choker sticks open and the Nozzle flows freely, things happen very fast.
Every Thompson should be equipped with a conventional hot metal Thermometer. There is a small well on the bottom of the pot, on the right side, to receive such a Thermometer. It is good practice simply to leave it in the machine at all times. Do not, ever, rely on the calibrations on the Partlow temperature controller to set the pot temperature; check it with a Thermometer.
A Thermometer, Lanston p/n b41HH, was furnished as a standard tool with the Monotype-Thompson.
New hot metal Thermometers are still available from Don Black Linecasting Services in Canada ( www.donblack.ca). The last time I checked, though, his Thermometers had Celsius calibrations.
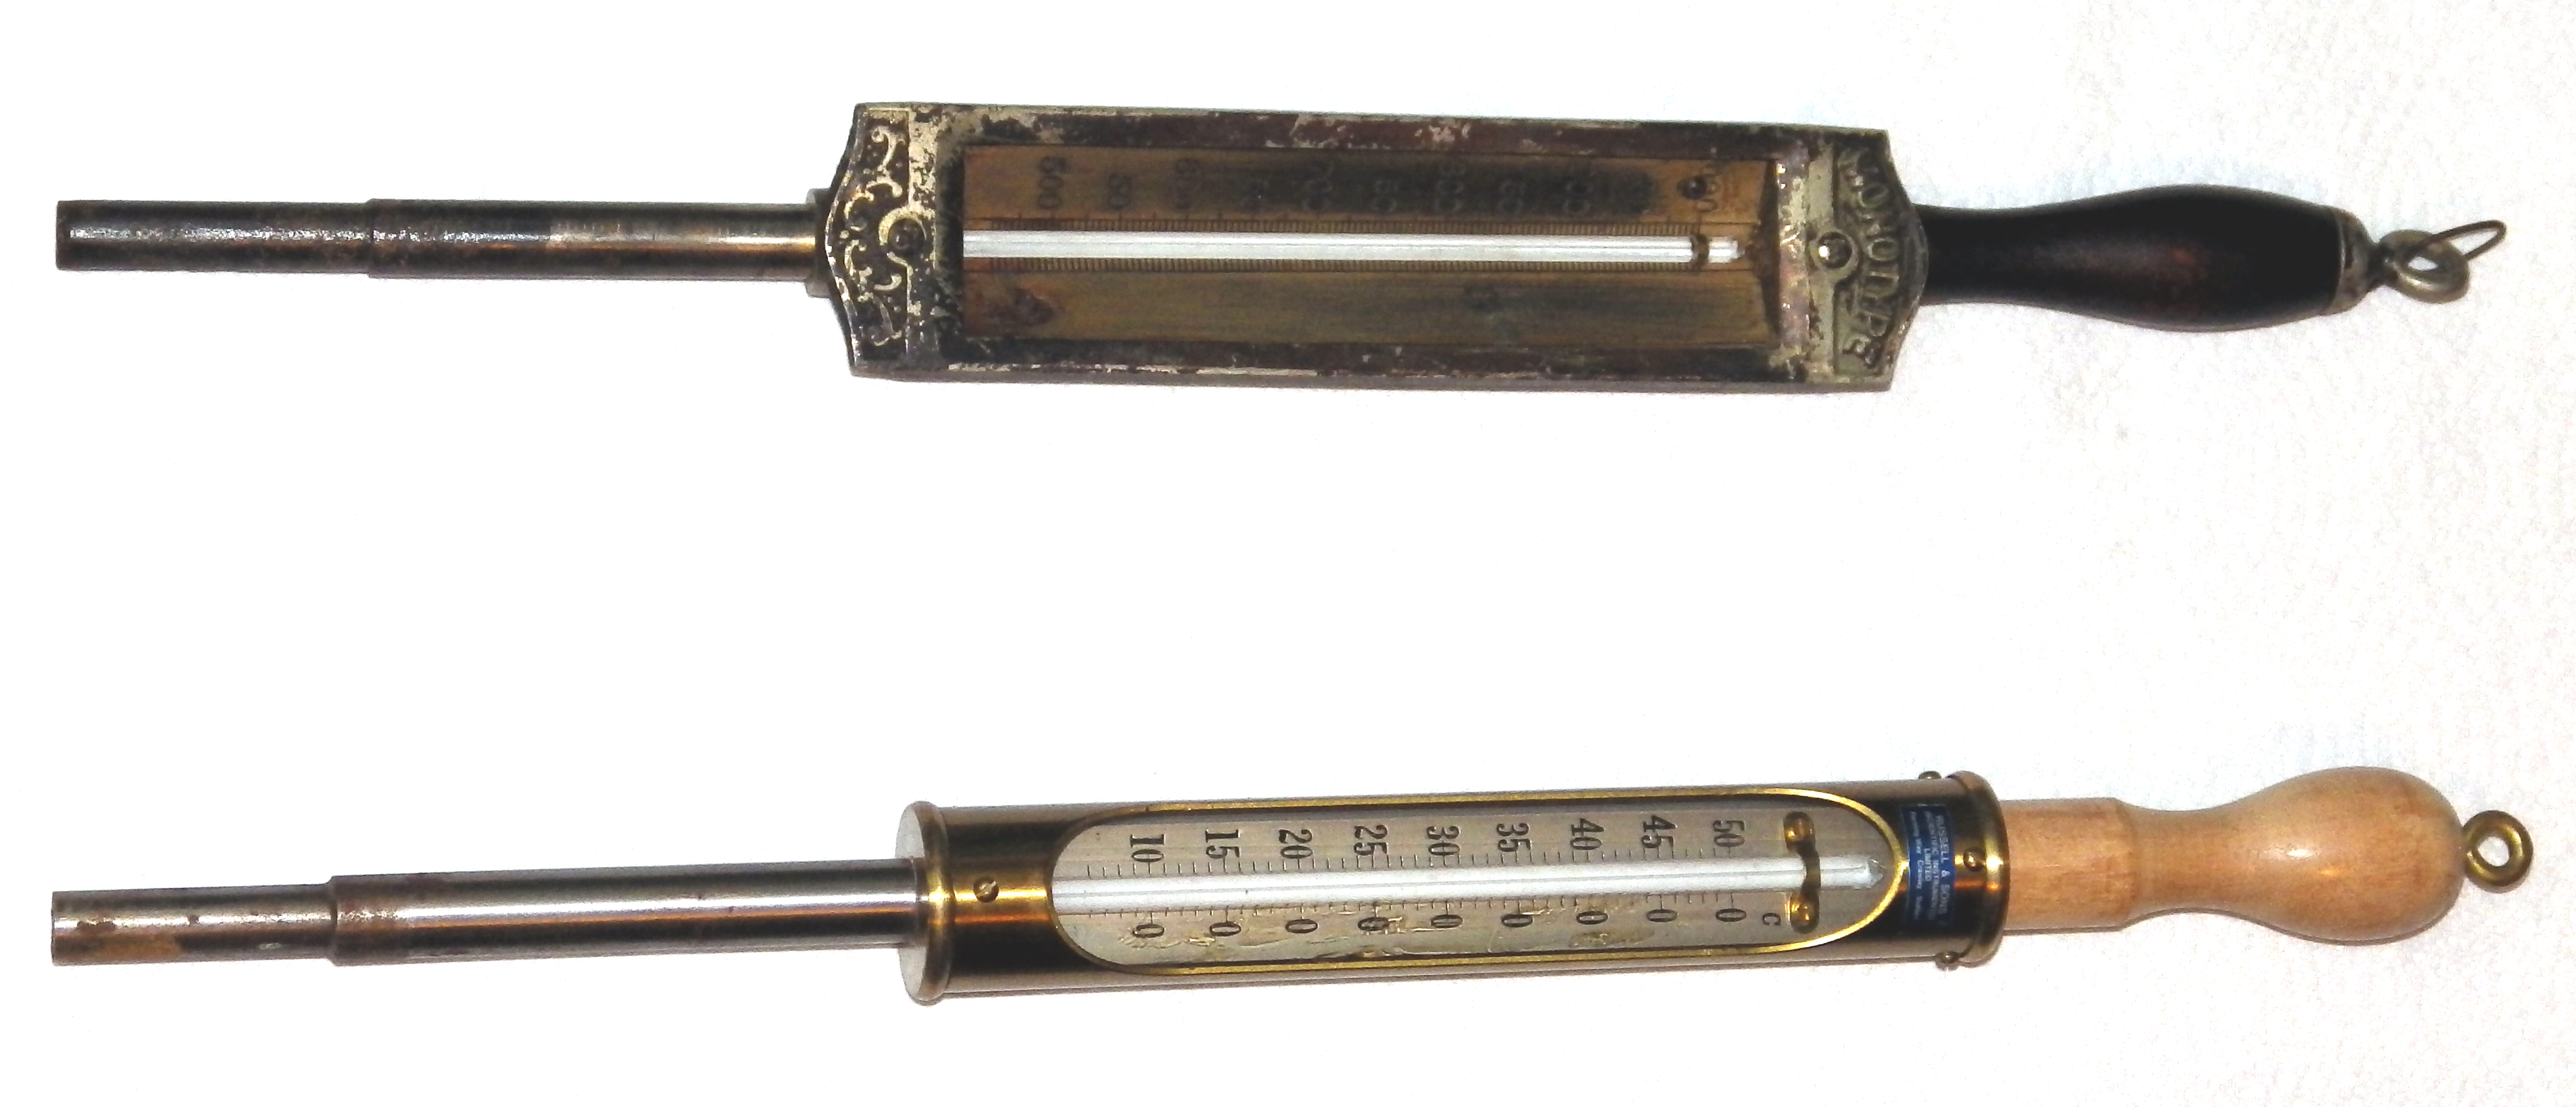
Here is a hot metal Thermometer of the type supplied by a number of makers most commonly for Linotype and Intertype linecasters. It is suitable for use with the Thompson.
The photograph below shows an original Lanston Monotype Machine Co. Thermometer (top) and a new Thermometer from Don Black Linecasting Services (bottomw).
Here is a Thermometer in place on the machine. It may be left in this position permanently during operation (indeed, that's the best way to keep an eye on the actual Pot temperature). It may be left in the Pot when the Pot cools and solidifies after operation. Doing so will not damage it. However, it will be impossible to remove the Thermometer from the cooled (solid) Pot.
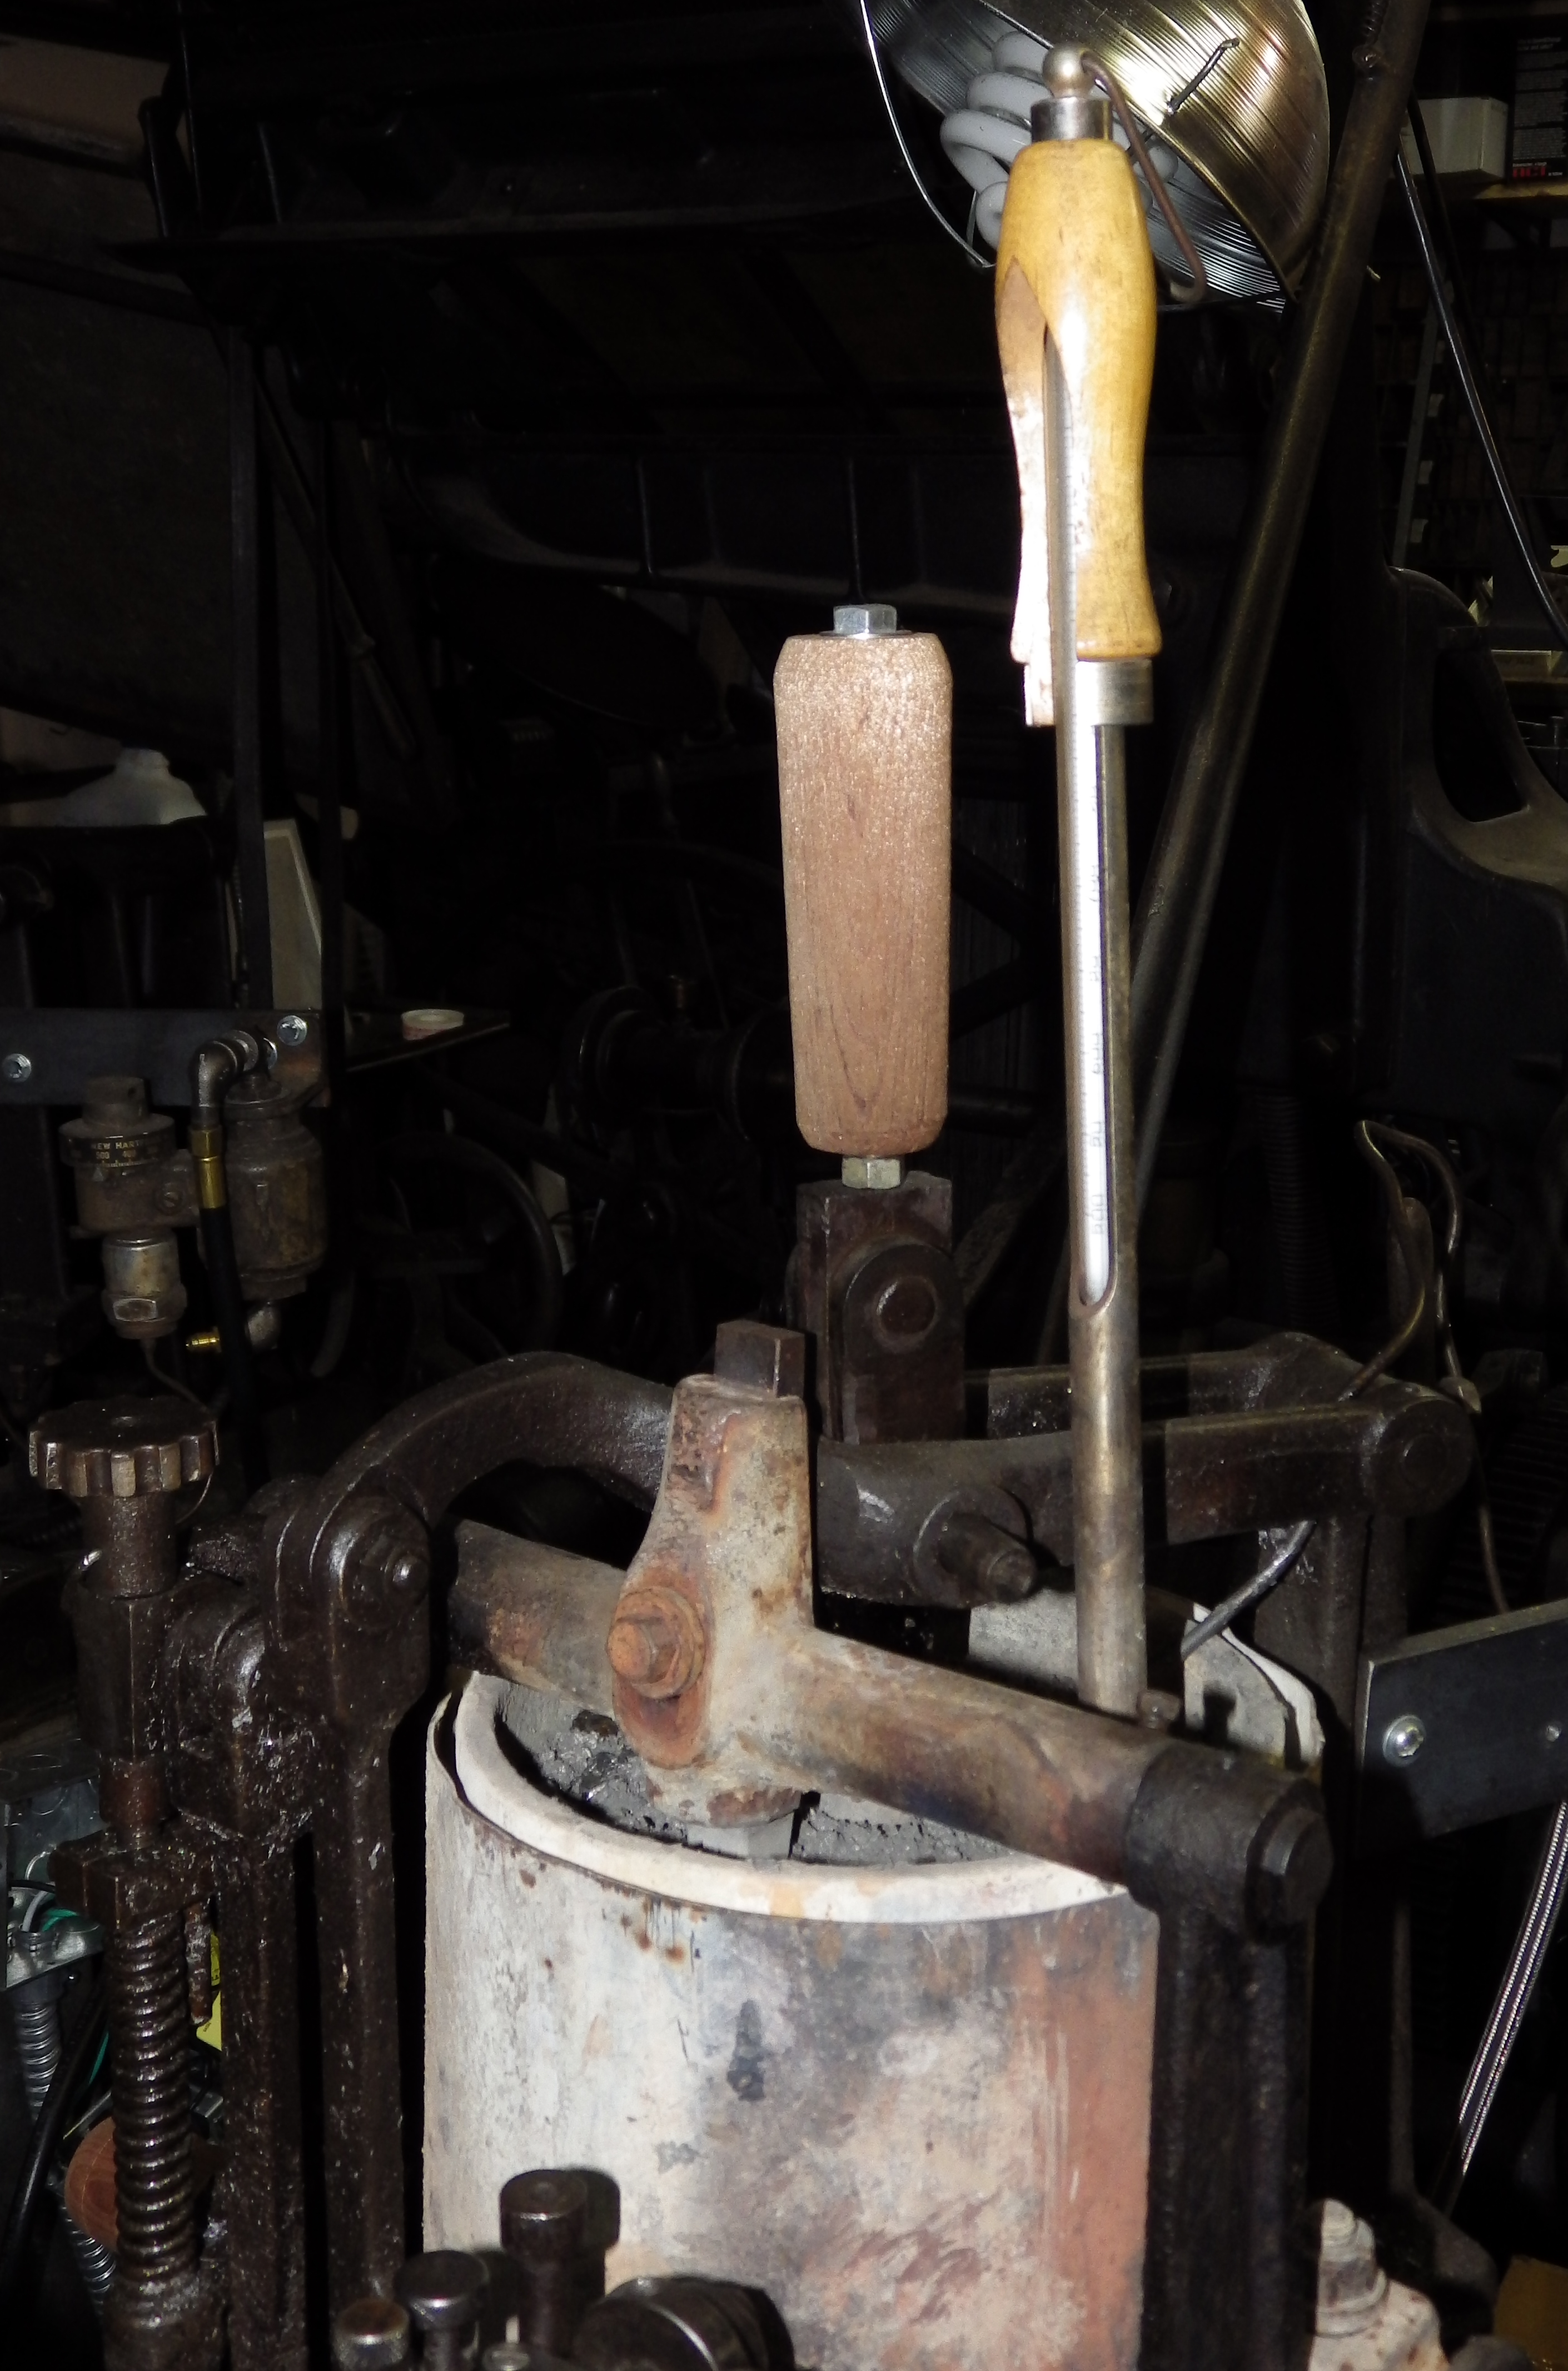
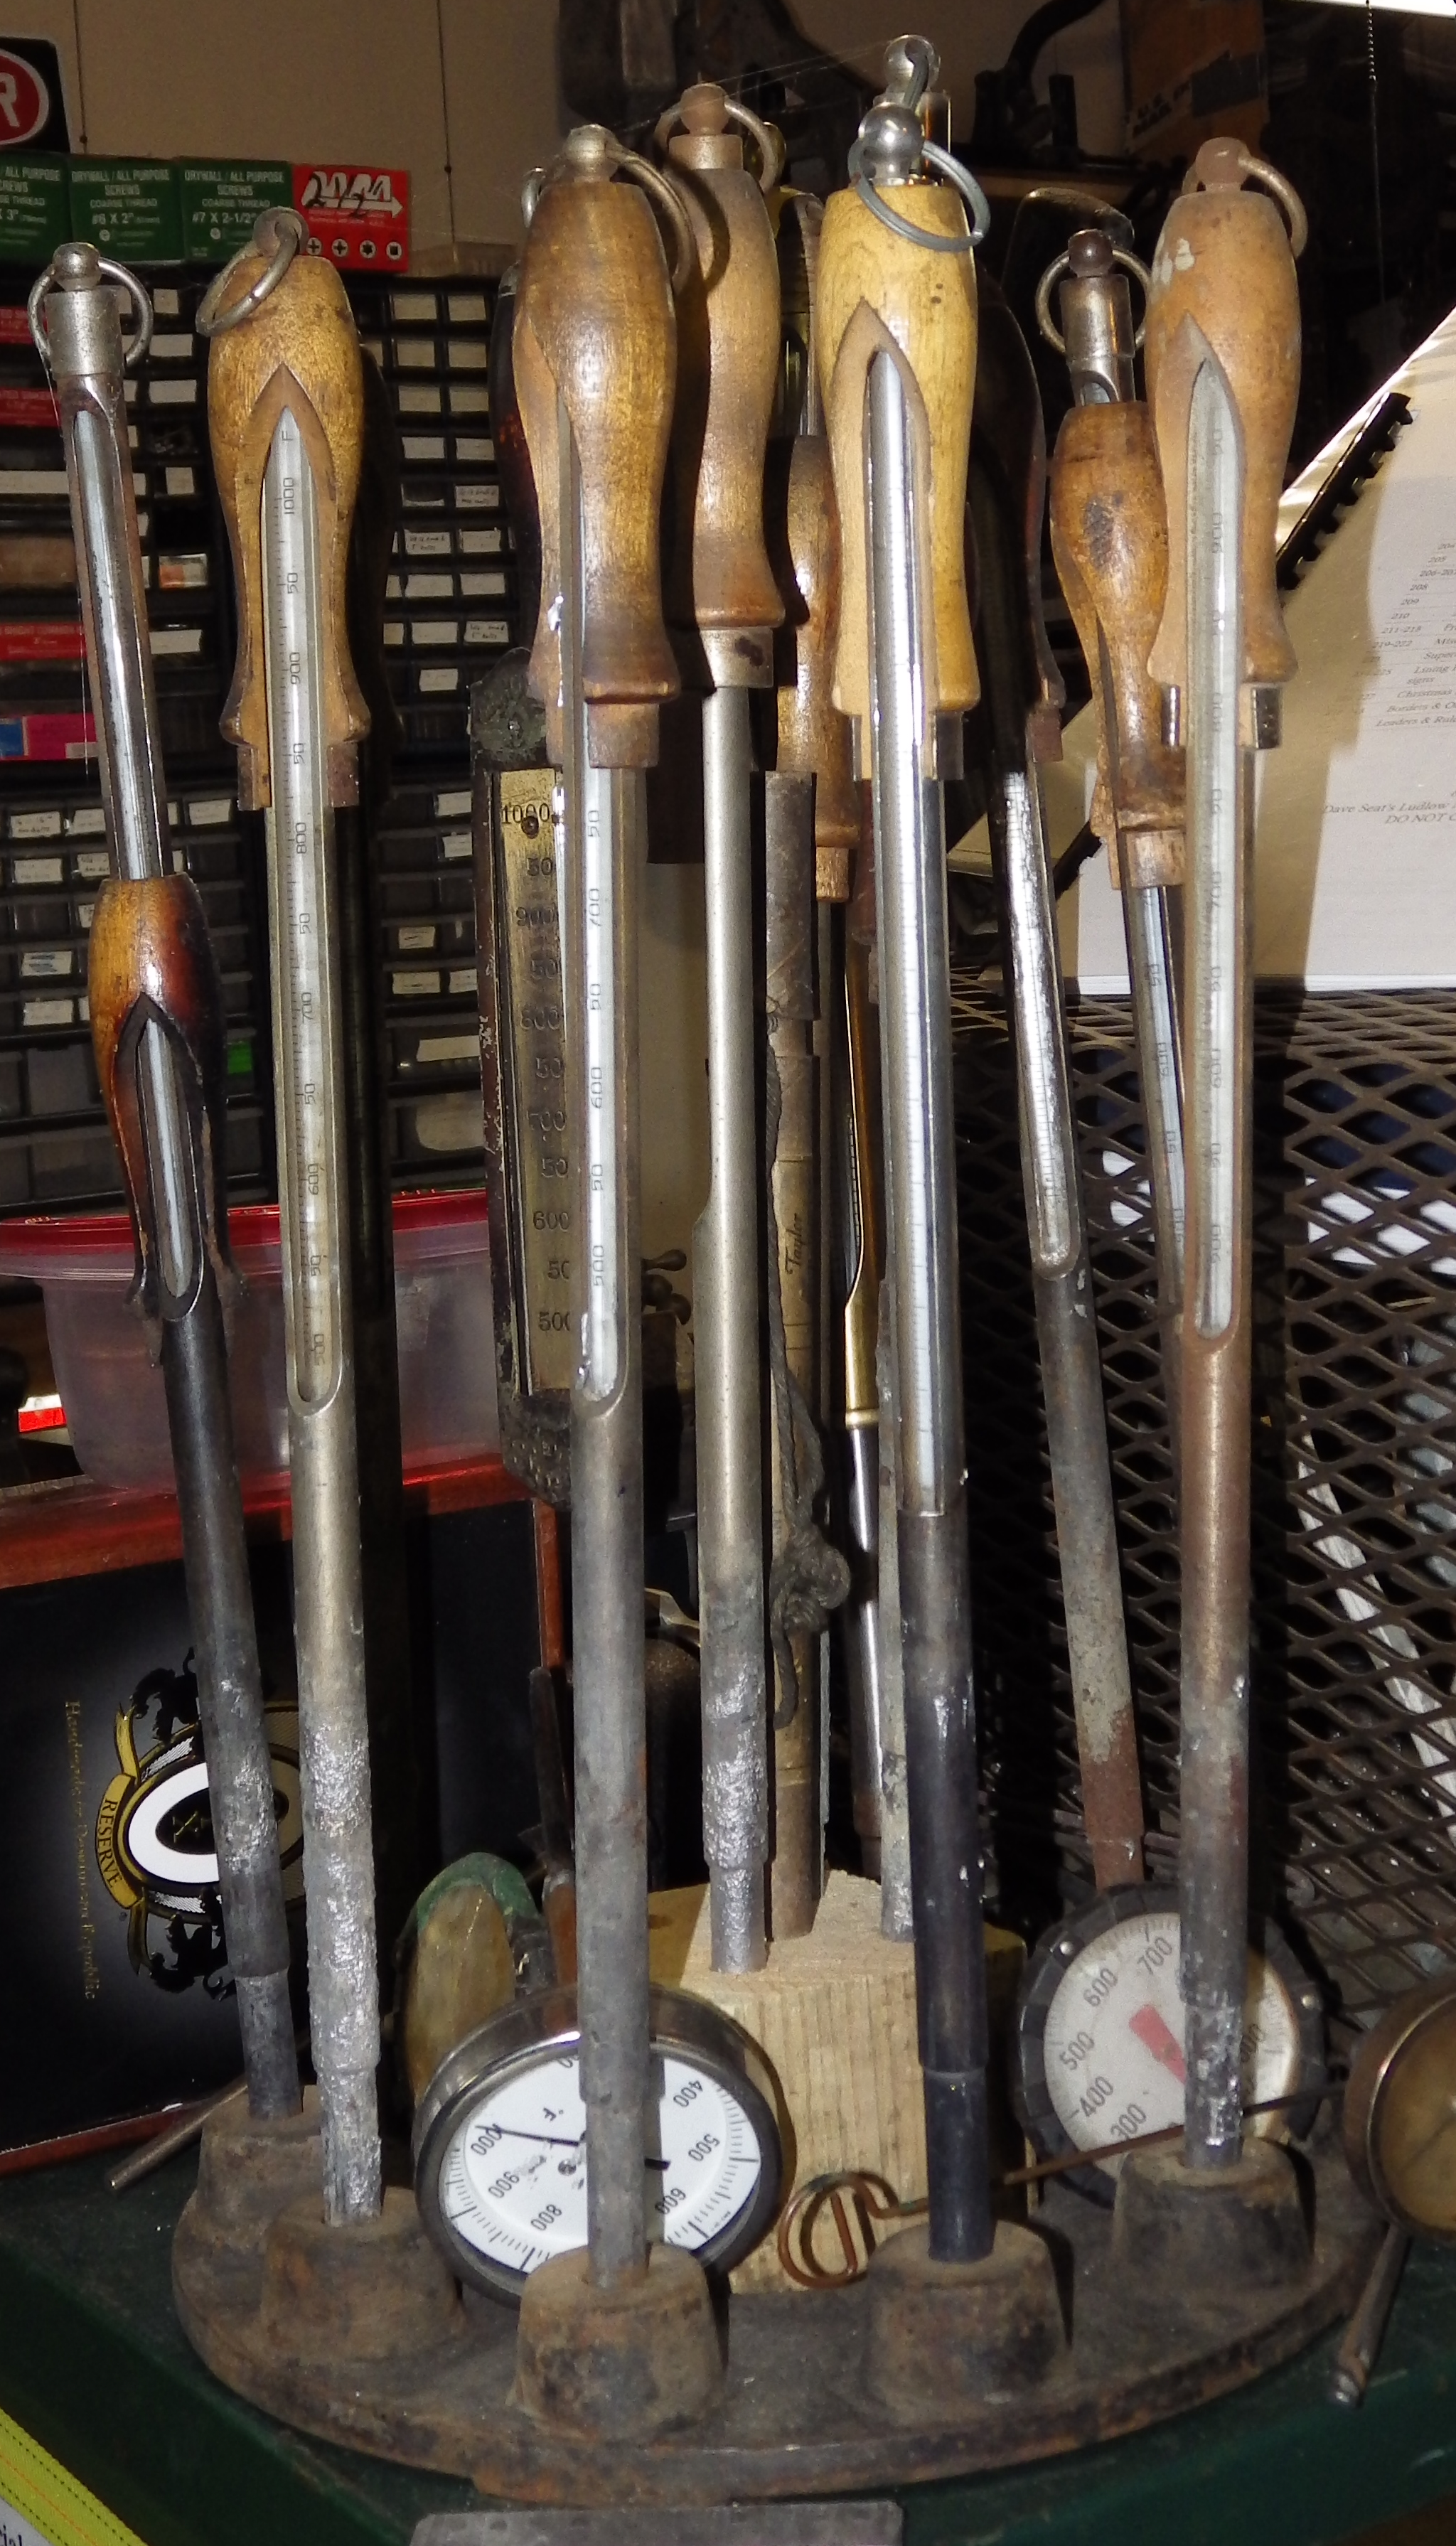
Thermometers should be stored upright, so that the mercury in them does not separate. This may be done in a variety of ways, but I've found that an old cast iron press roller stand works as well as if it had been made for this purpose.
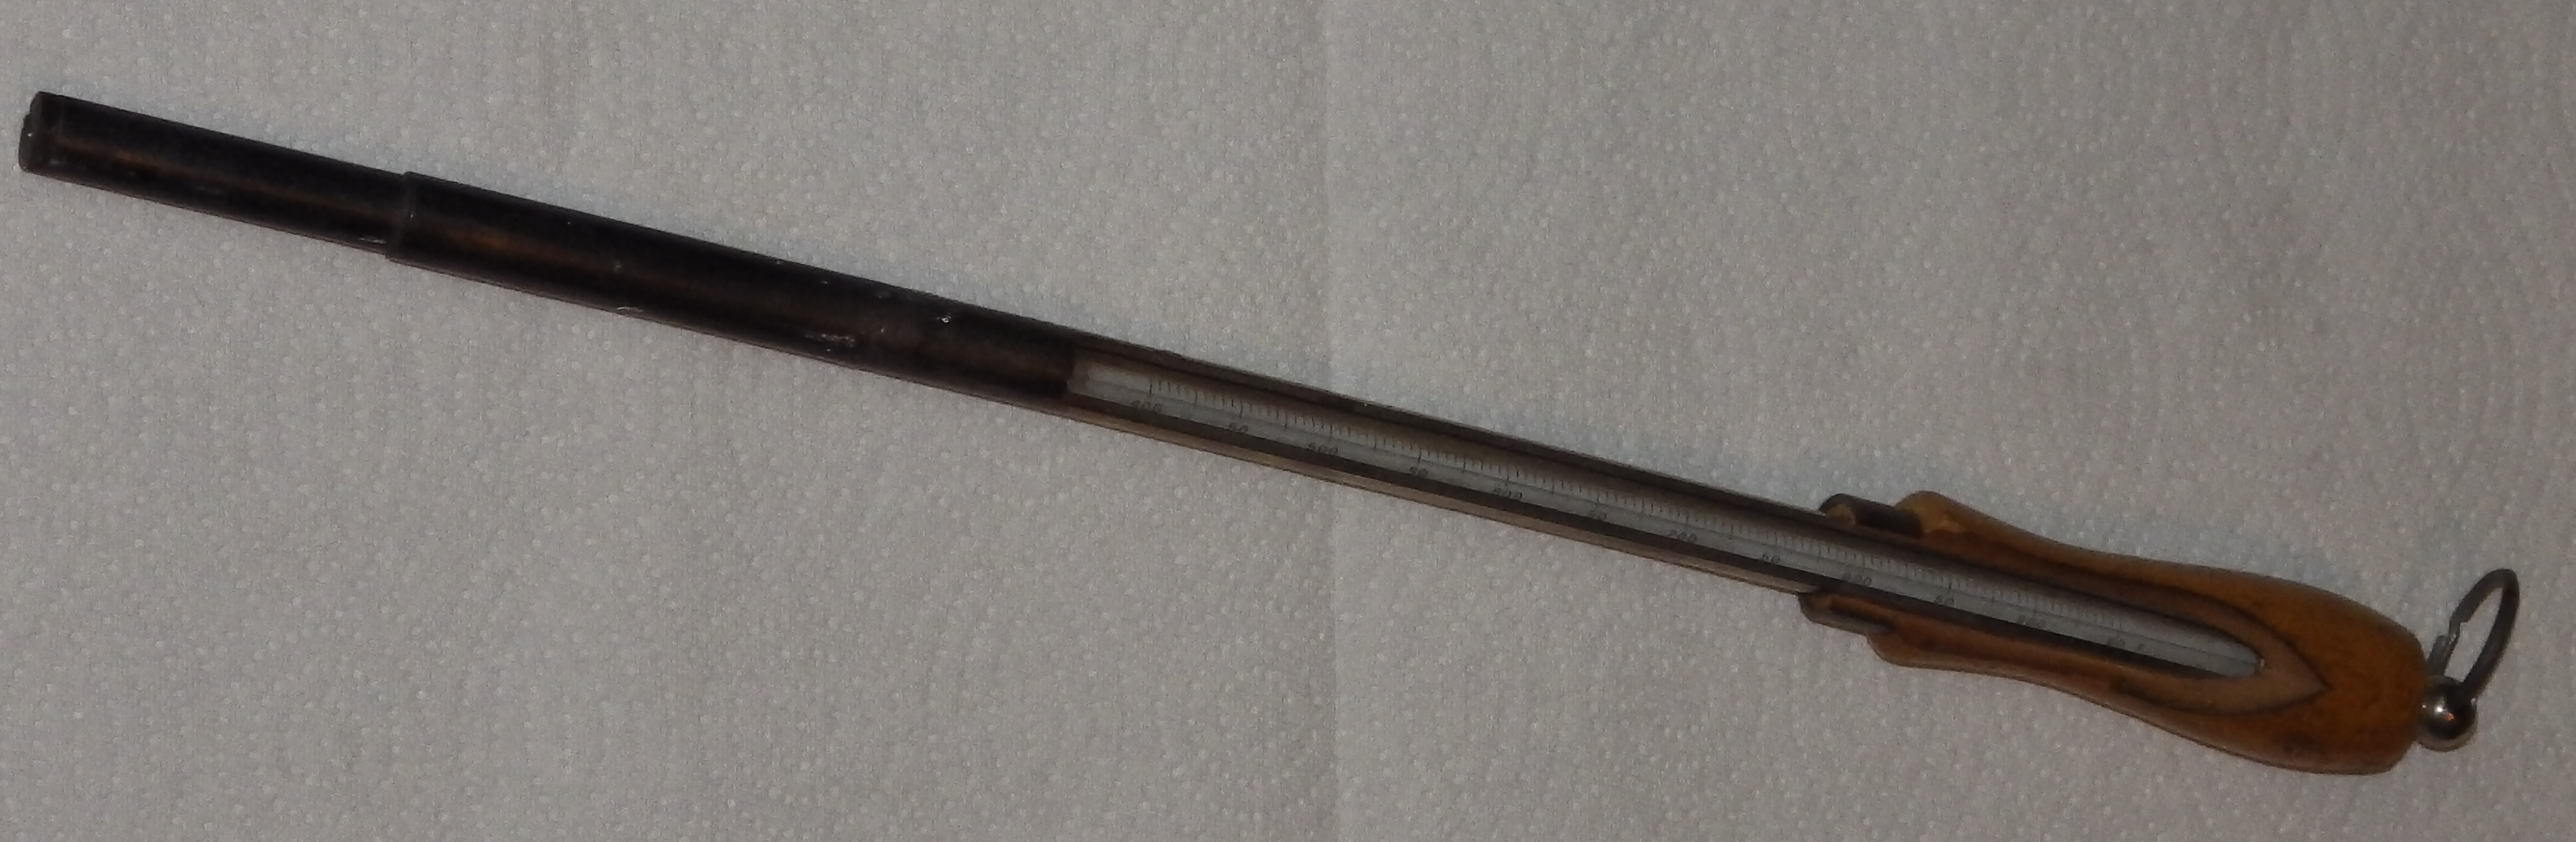
A different style of Thermometer was also sold for linecasting work which typically was handheld, with a solid wire probe and a dial for indicating temperature. While this style of Thermometer will work for spot-checks on the Thompson, it is not really convenient as it cannot be left mounted in the Pot.
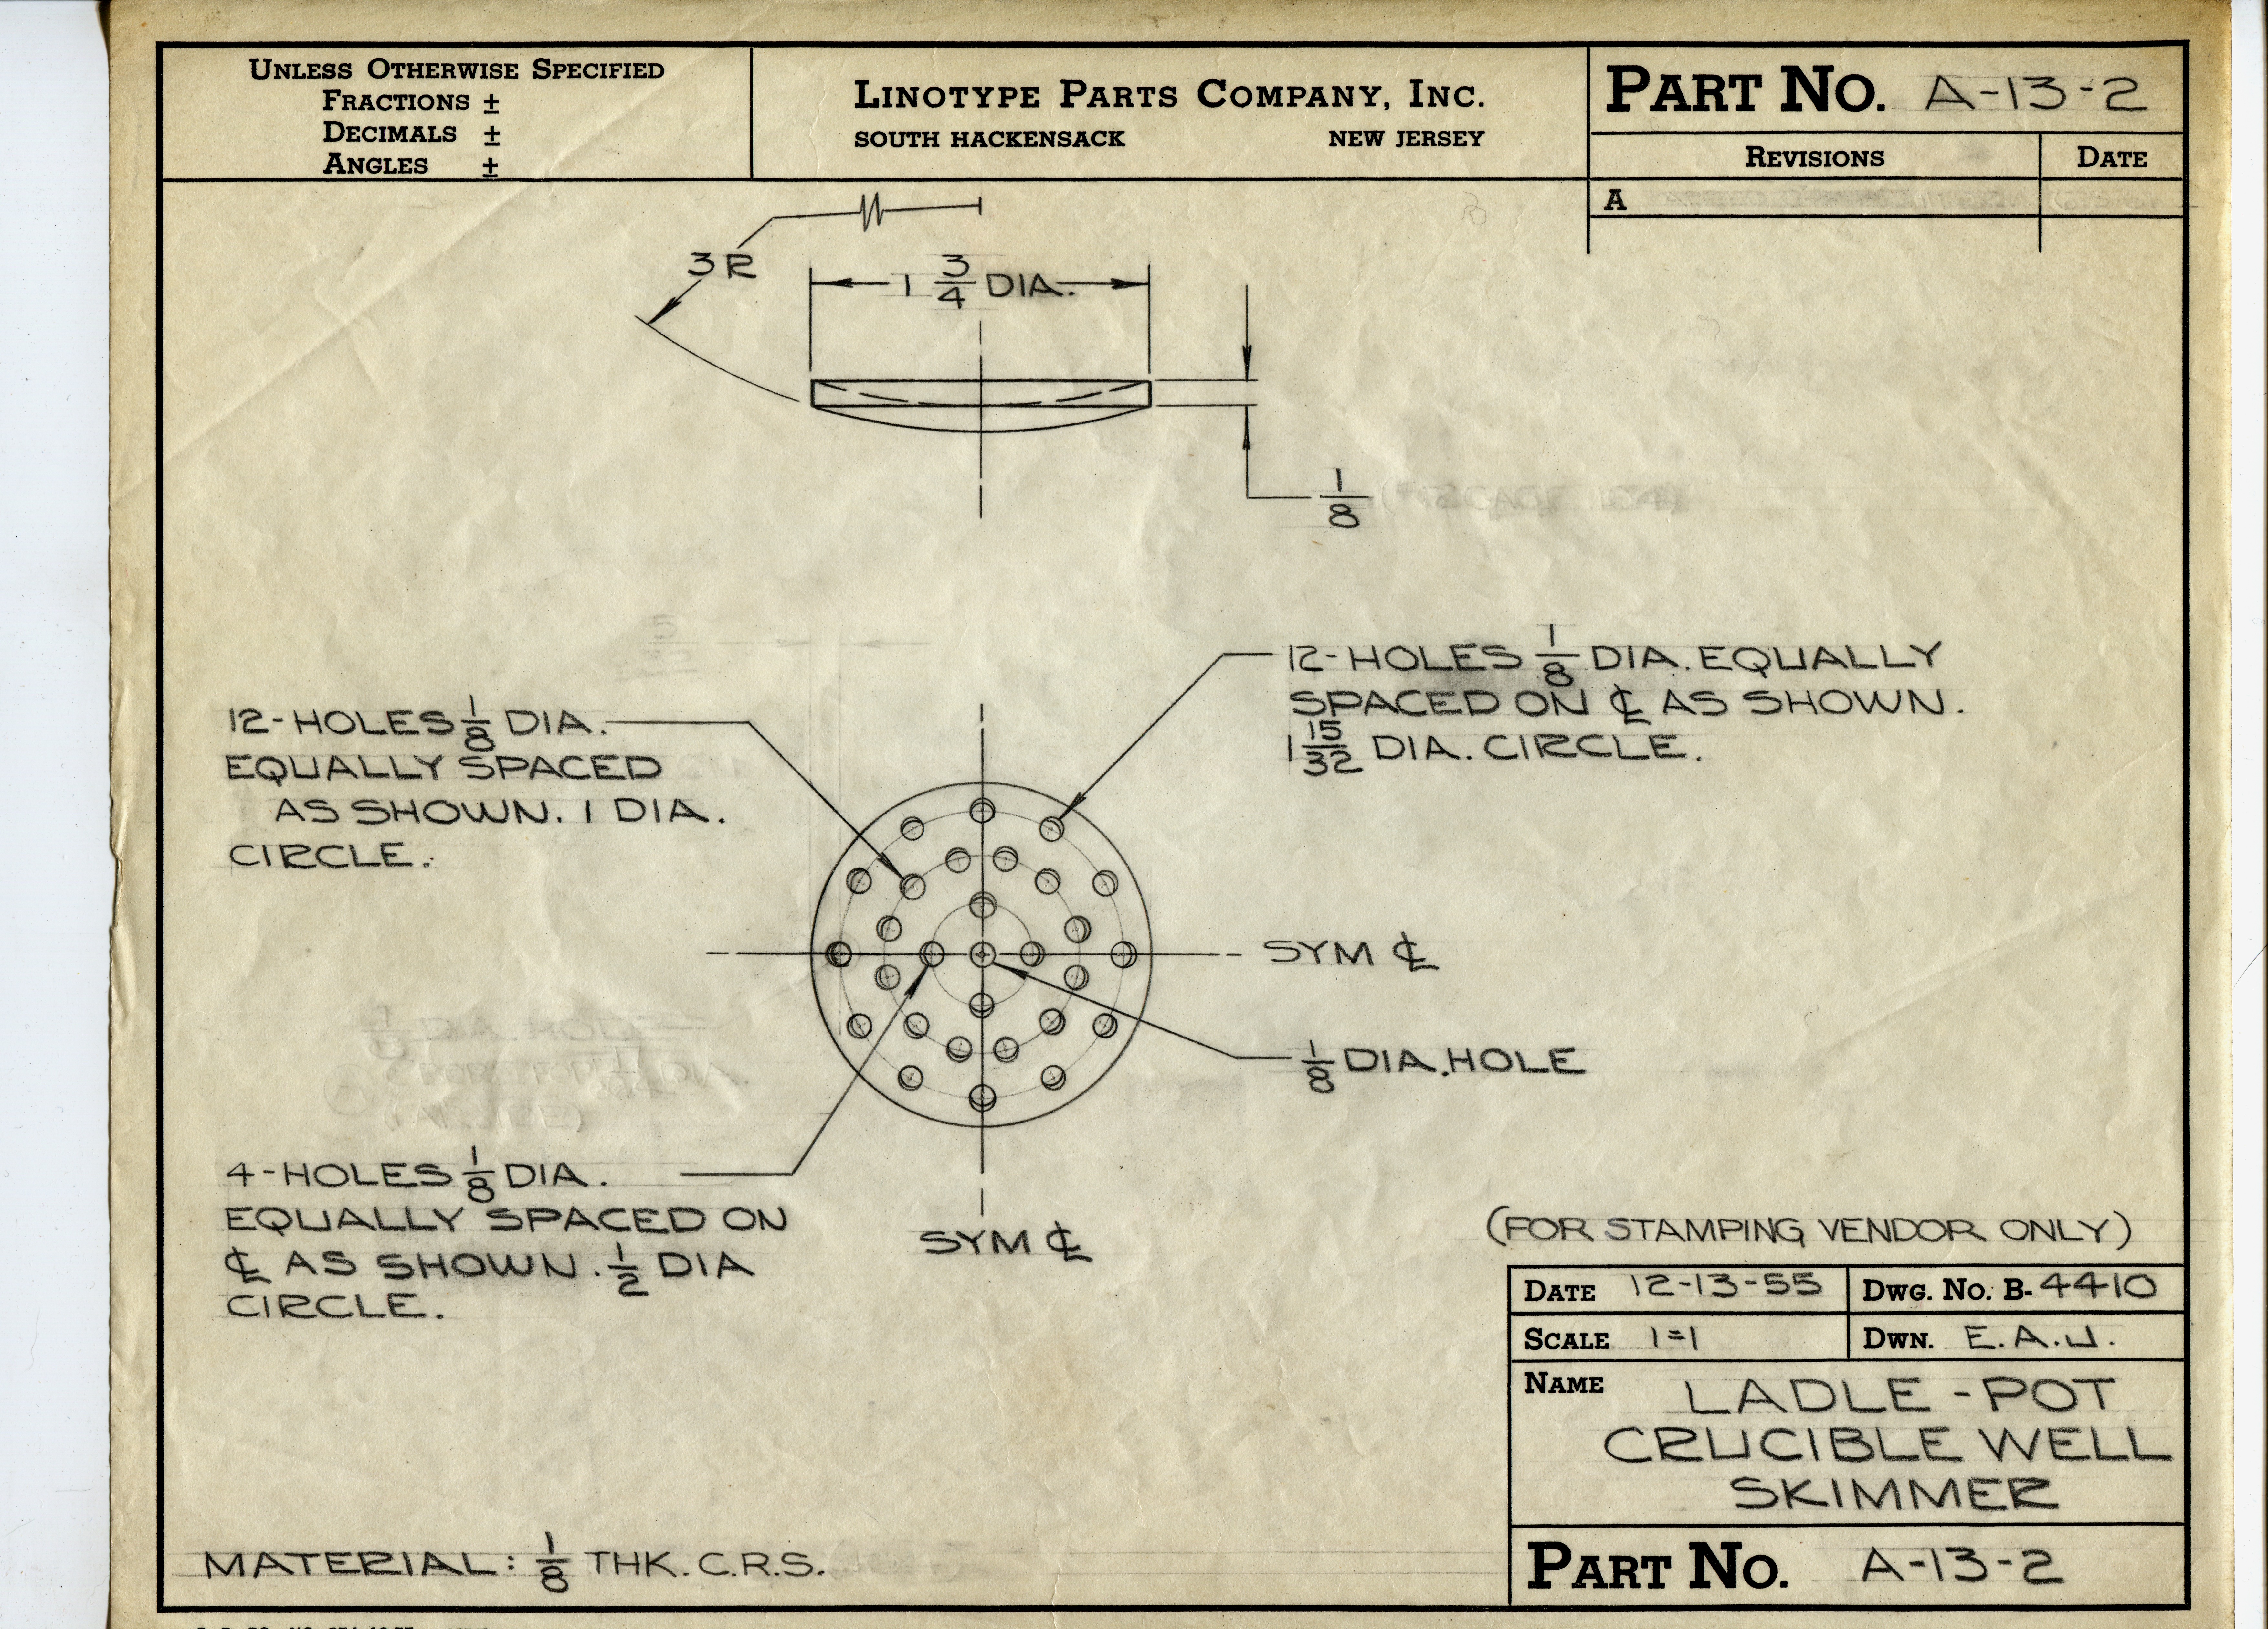
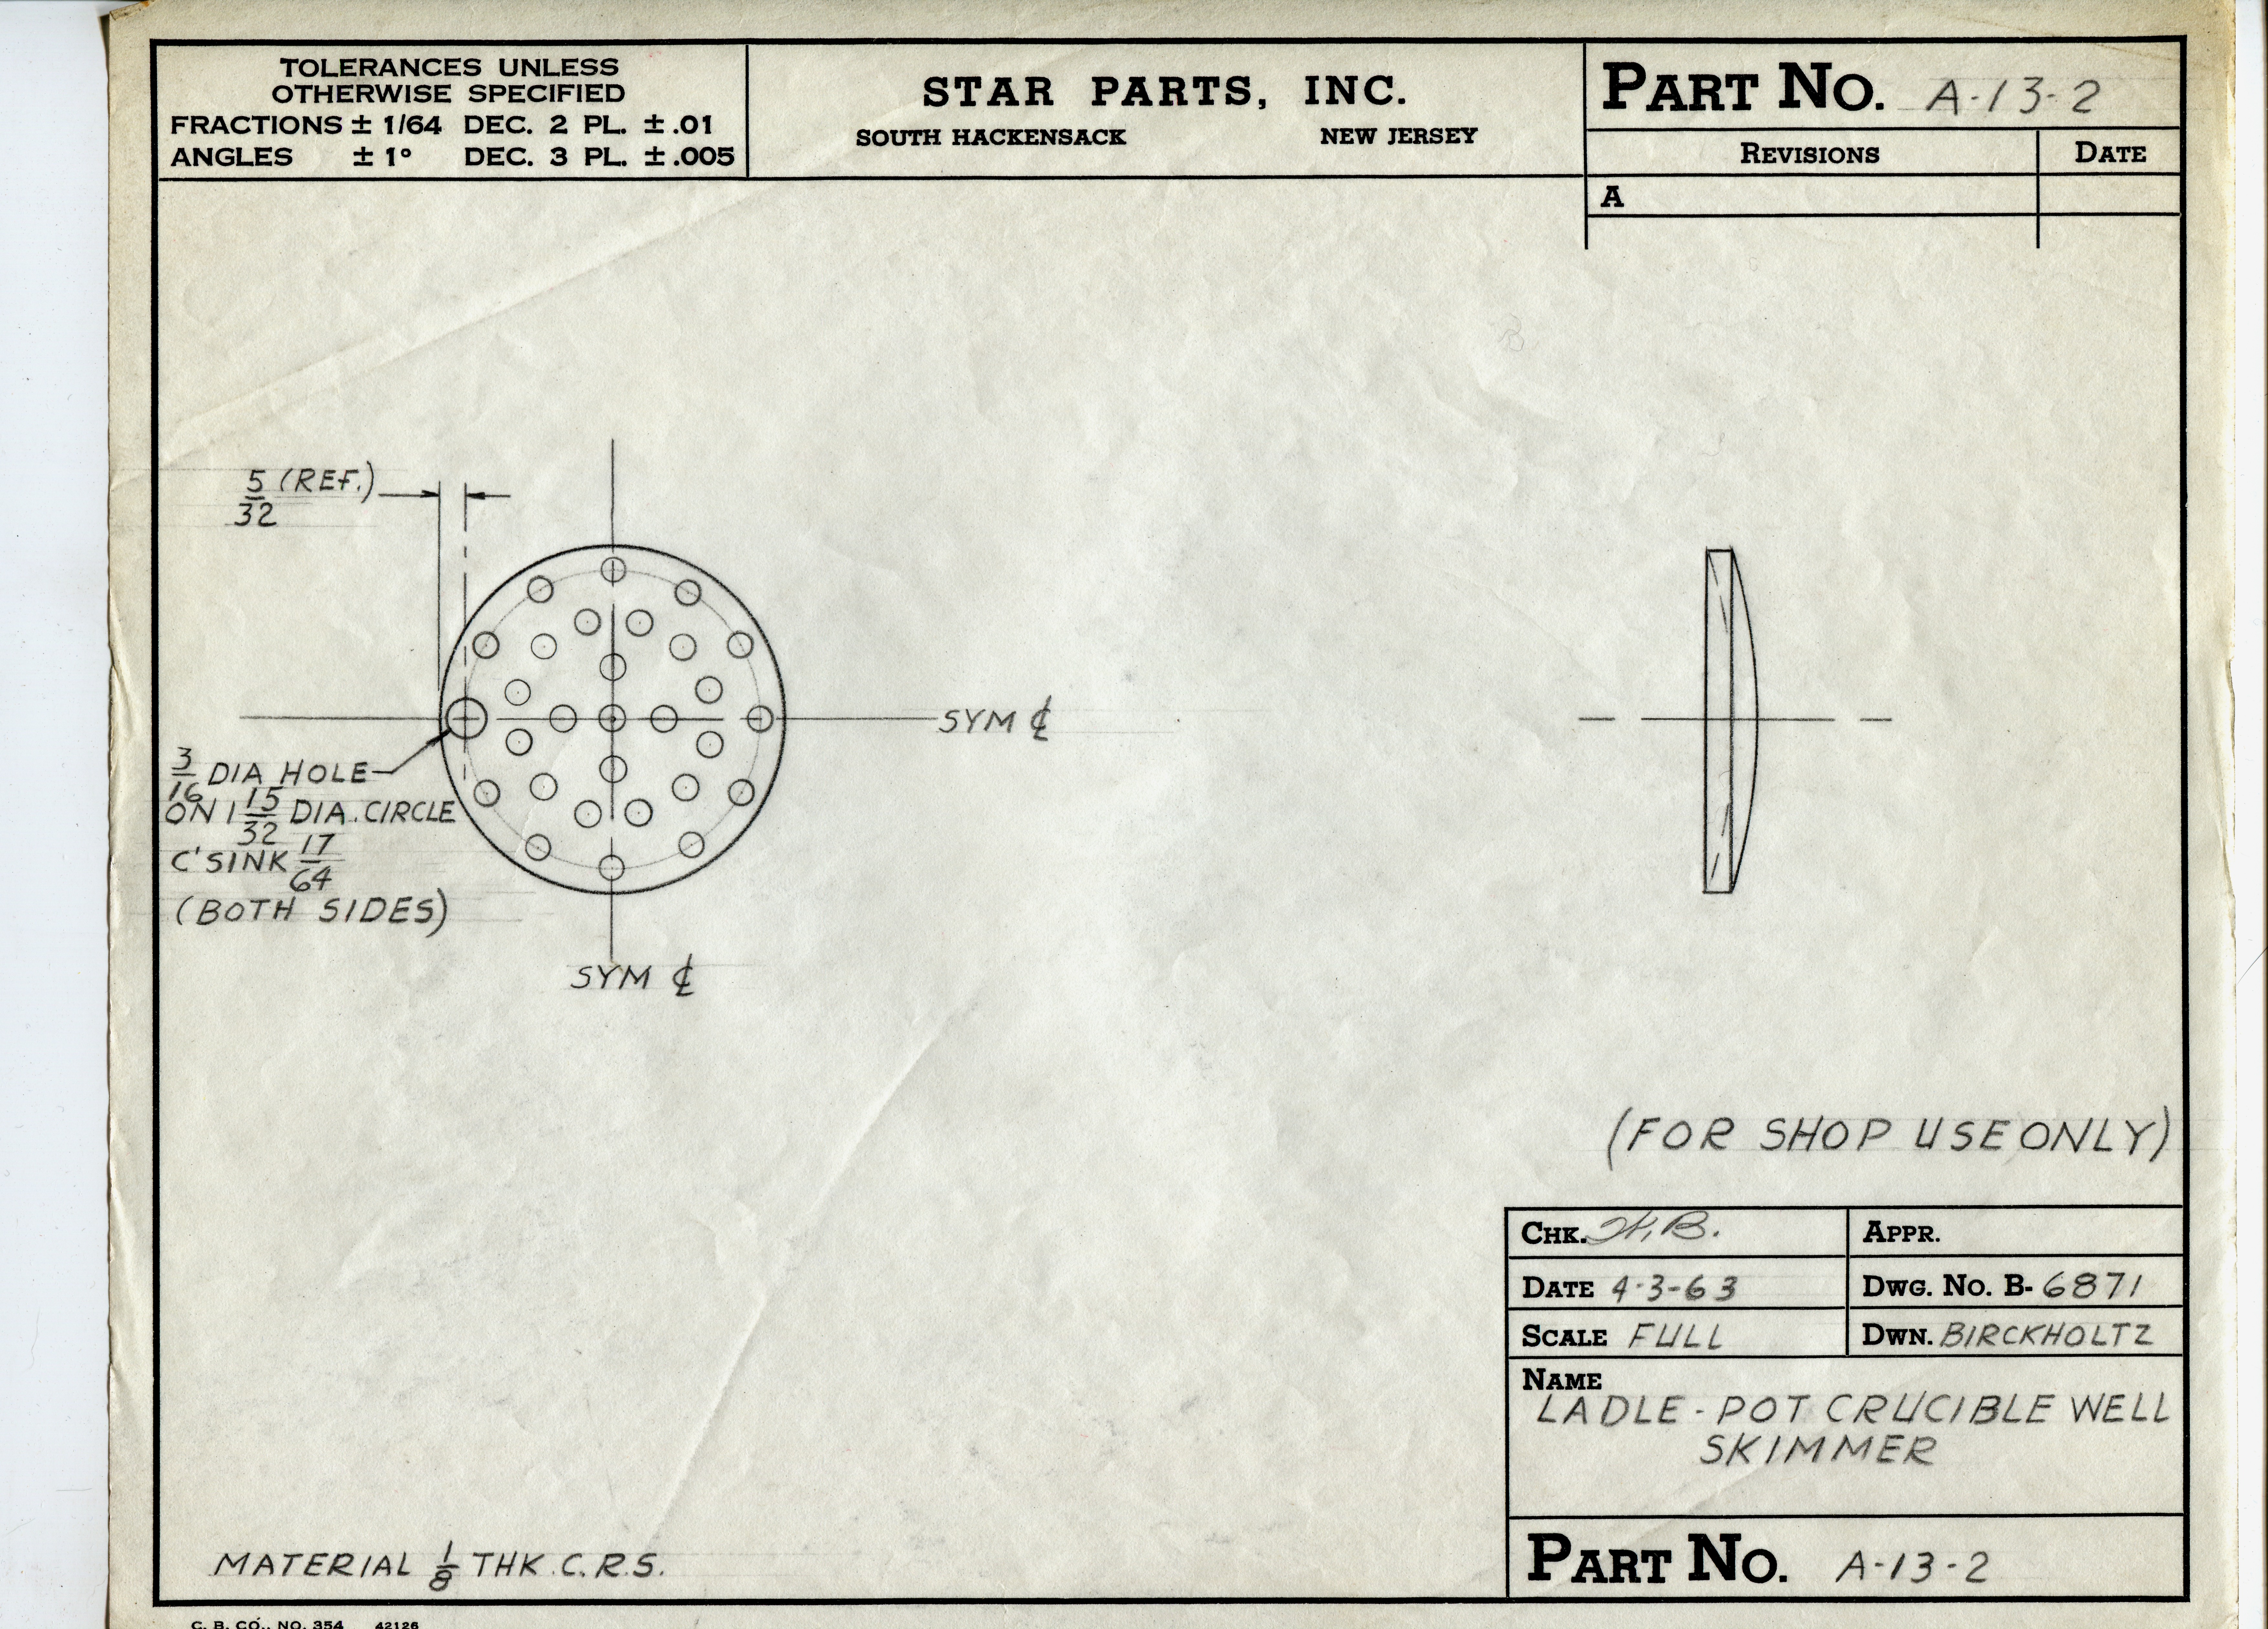
The 1942 Parts Price List calls out a "Skimmer (small)" as p/n X8L.
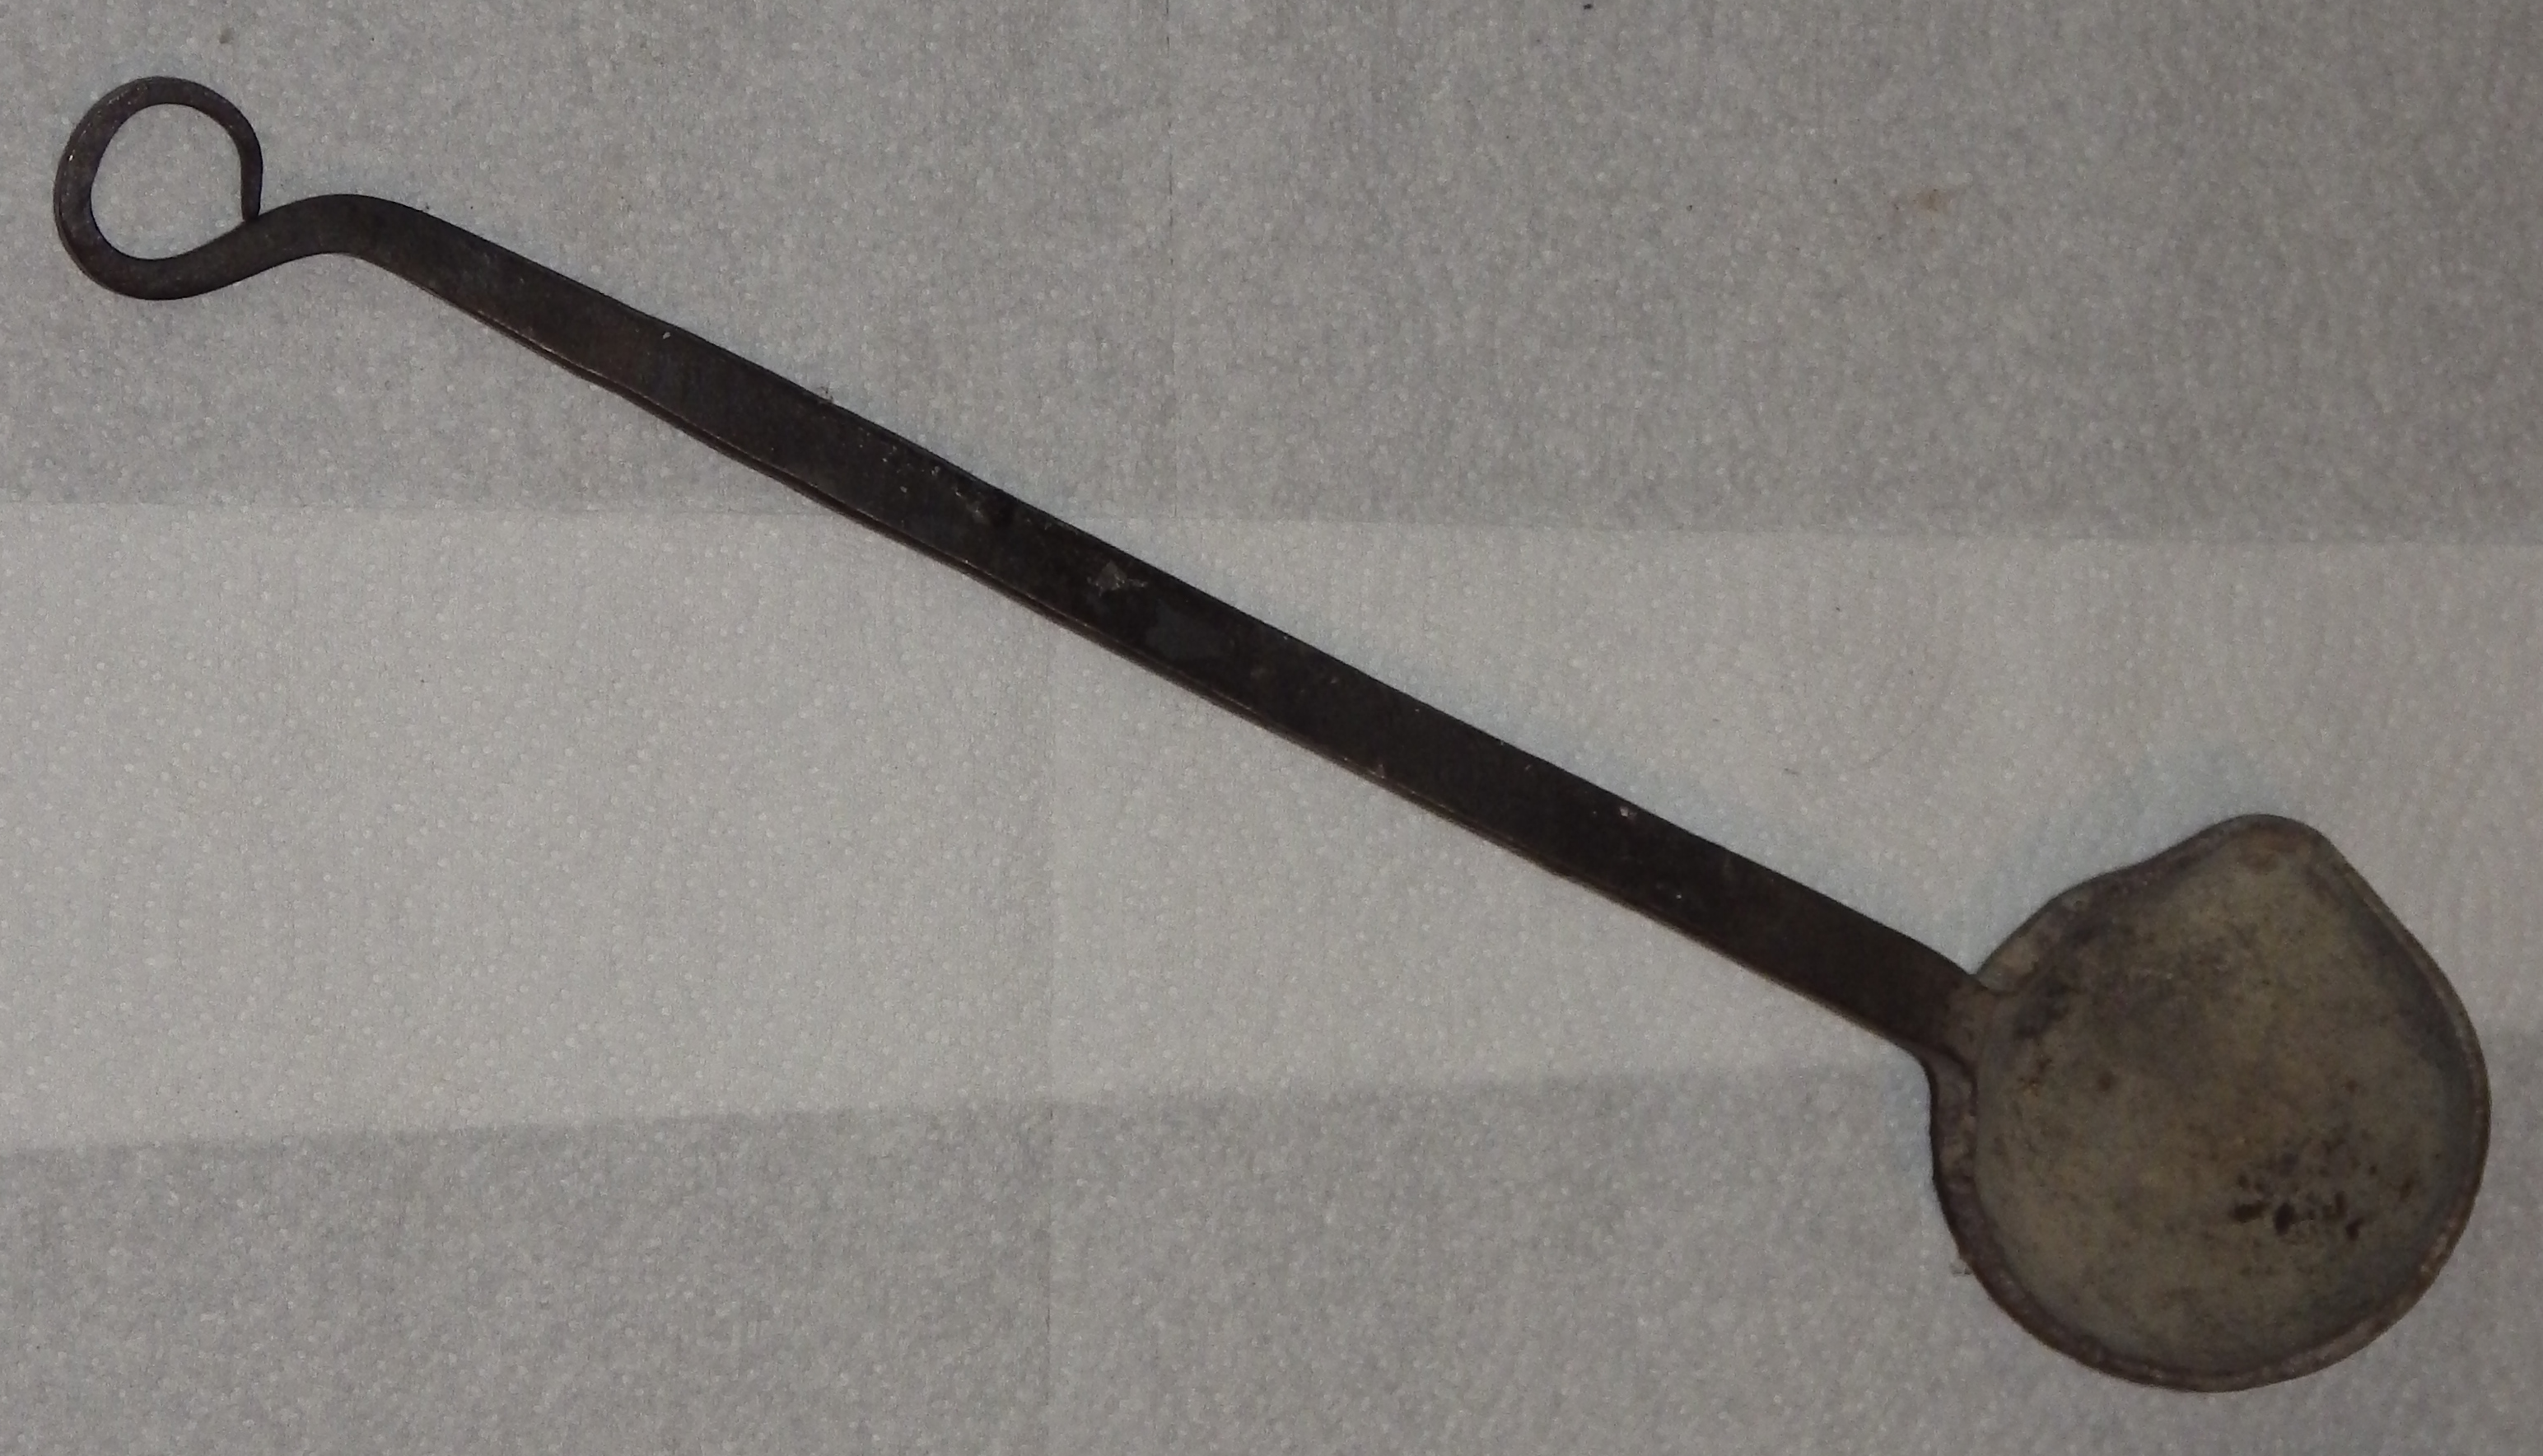
The pot skimmer made by the former Star Parts Co. (which was the Linotype Parts Company before that) for Linotype operation is an excellent pot skimmer for the Thompson. It is Star Parts no. A-13-2. This is of course no longer available, but through the courtesy of Dave Seat of Hot Metal Services, who owns them, the original engineering drawings for the skimmer-end of two versions of it have been reprinted at Engineering Drawings, Part Numbers A (Star Parts / Linotype Parts Company): Dwg. No. B-4410 (1955-12-13) and B-6871 (1963-04-03), both entitled "Ladle - Pot Crucible Well Skimmer." For convenience these are also reprinted below.
This is a conventional modern stainless steel slotted kitchen spoon. All parts of the spoon and its handle should be steel; plastic melts.
[I'm not yet illustrating the Slotted Spoon because I don't yet have one of my own that I like sufficiently well to recommend.]
When adapting modern kitchen and workshop tools to Thompson use, be aware of two things:
The dross as skimmed from the pot is hot. It should be received into a metal receptacle unless cooled first. (Some operators filter the dross, which accomplishes this cooling.)
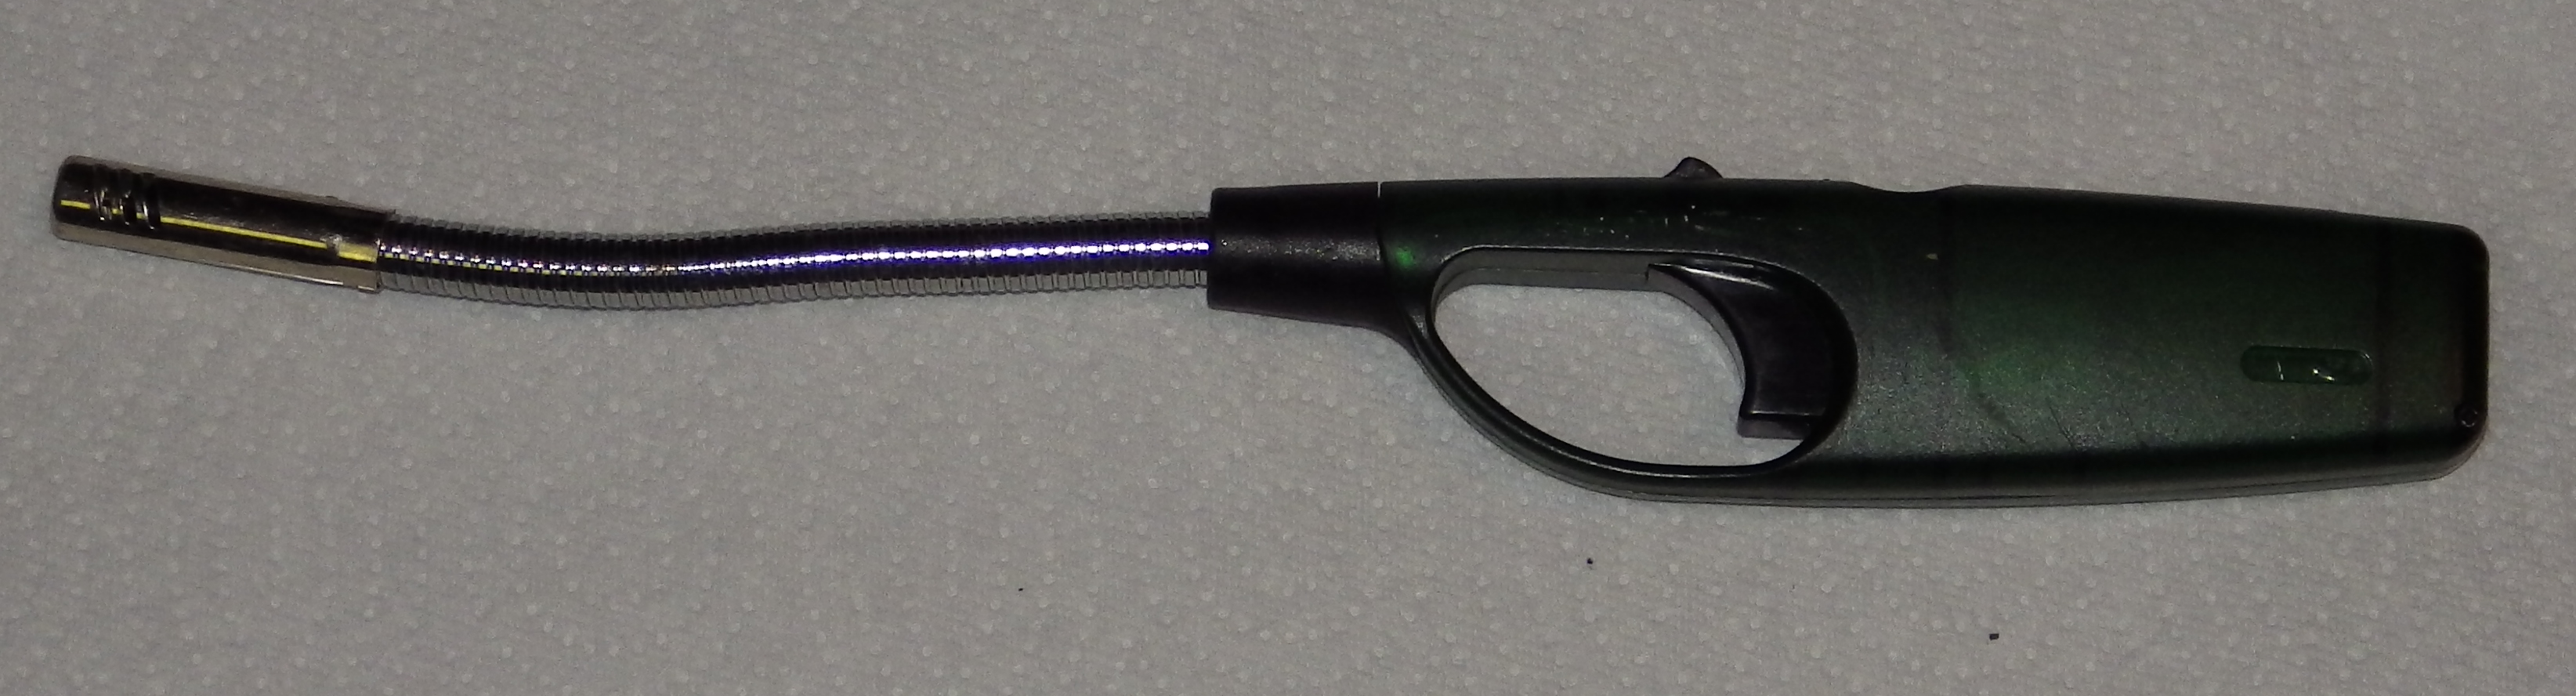
If the Pot is gas-fired, a lighter is necessary to start it. An ordinary long barbeque grill lighter works well.
The 1942 Parts Price List calls out a "Ladle (small)" as a standard tool for the Thompson. It was not assigned a Lanston Monotype part number; presumably it was a commercial item.
It is useful to have a small ladle for removing typemetal from the Pot, but this isn't done frequently. It is more important that you have a Large Ladle (see below) for handling emergency situations when the Pot is swung back and the Nozzle is flowing freely.
Some use standard leather welder's gloves, but I do not find these to be sufficient. Leather actually transmits heat quite well, and it can retain moisture which can vaporize. I prefer an actual temperature-resistant glove of Kevlar® or other appropriate material. These are readily available from industrial and laboratory safety supply companies.
A Choker Tripping Tool was furnished as a standard tool with the Thompson. The 1942 Parts Price List calls out two different tools, 46L1 for the side jet machines (at $0.75) and the substantially more expensive 46L2 for center-jet machines ($2.00).
You should never melt down the Pot of a Thompson without the correct Choker Tripping Tool for the machine at hand.
Here is the Choker Tripping Tool for one of my Thompsons (a center-jet machine in its construction) shown, first, in isolation:
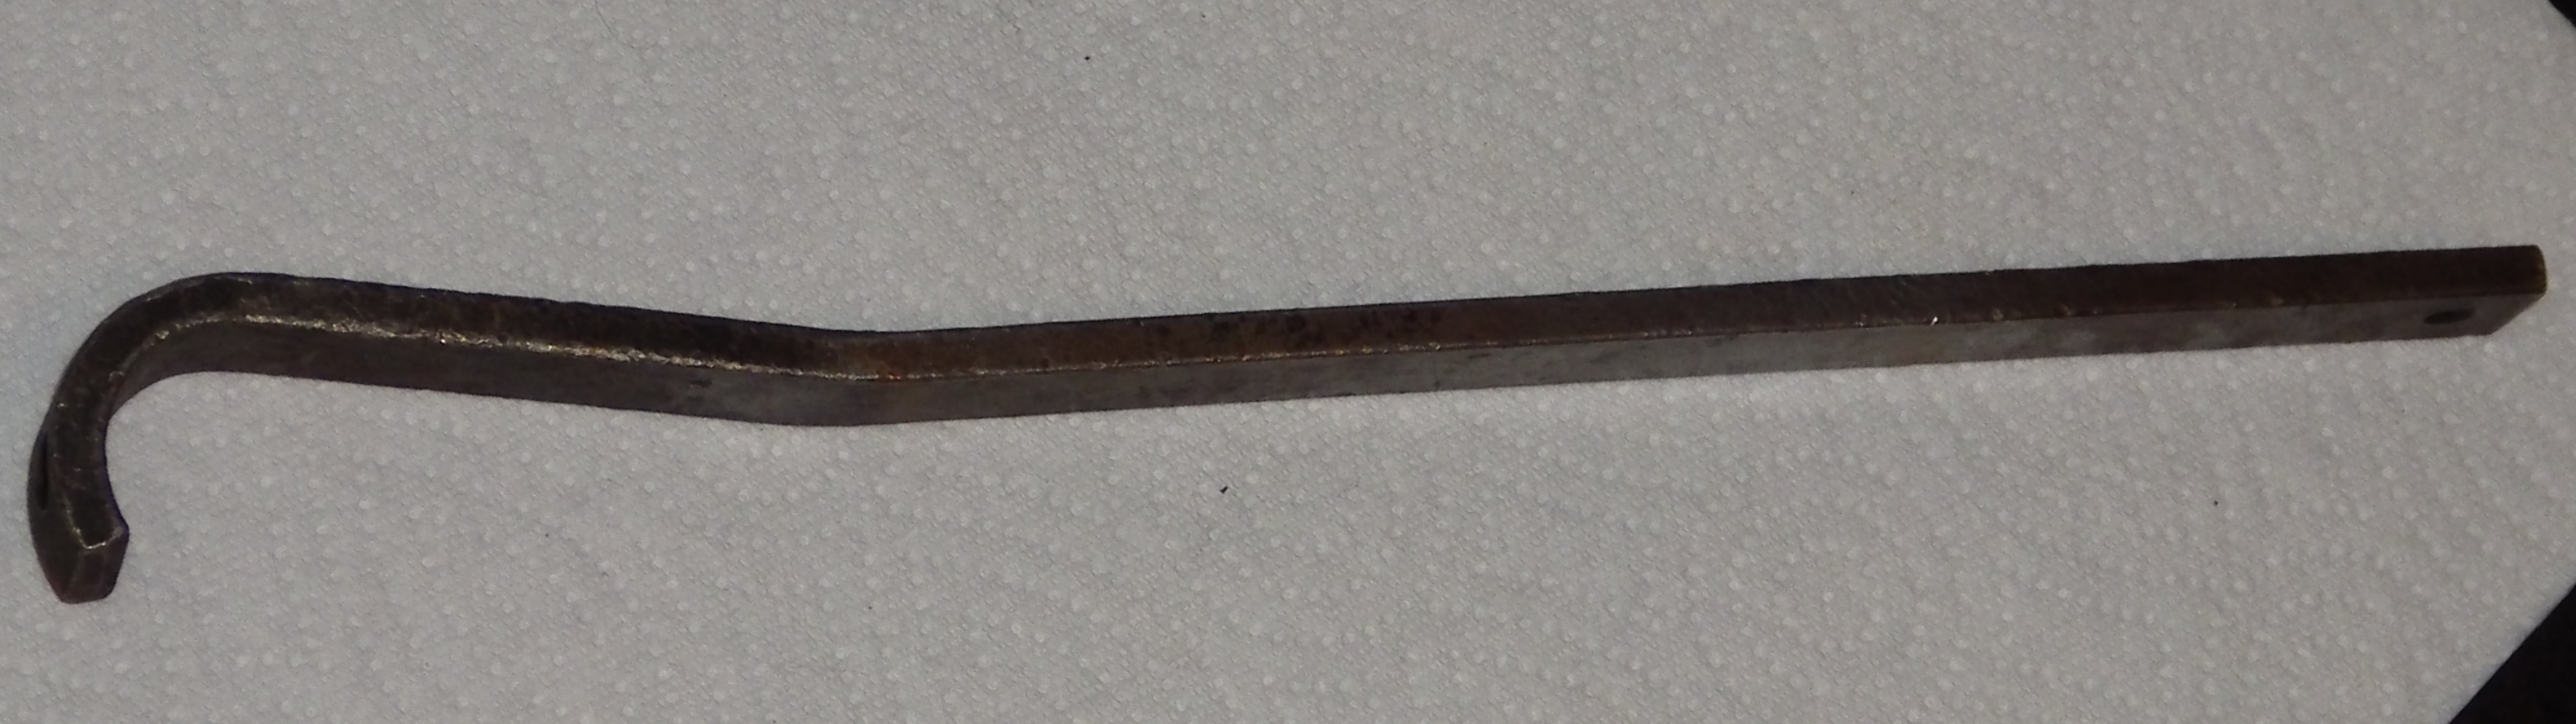
and next in place on the machine:

Though the photographs don't show it well, ther is a small hole in the curved part of the Choker Tripping Tool which fits over a corresponding stud on the machine to secure it to the machine in use.
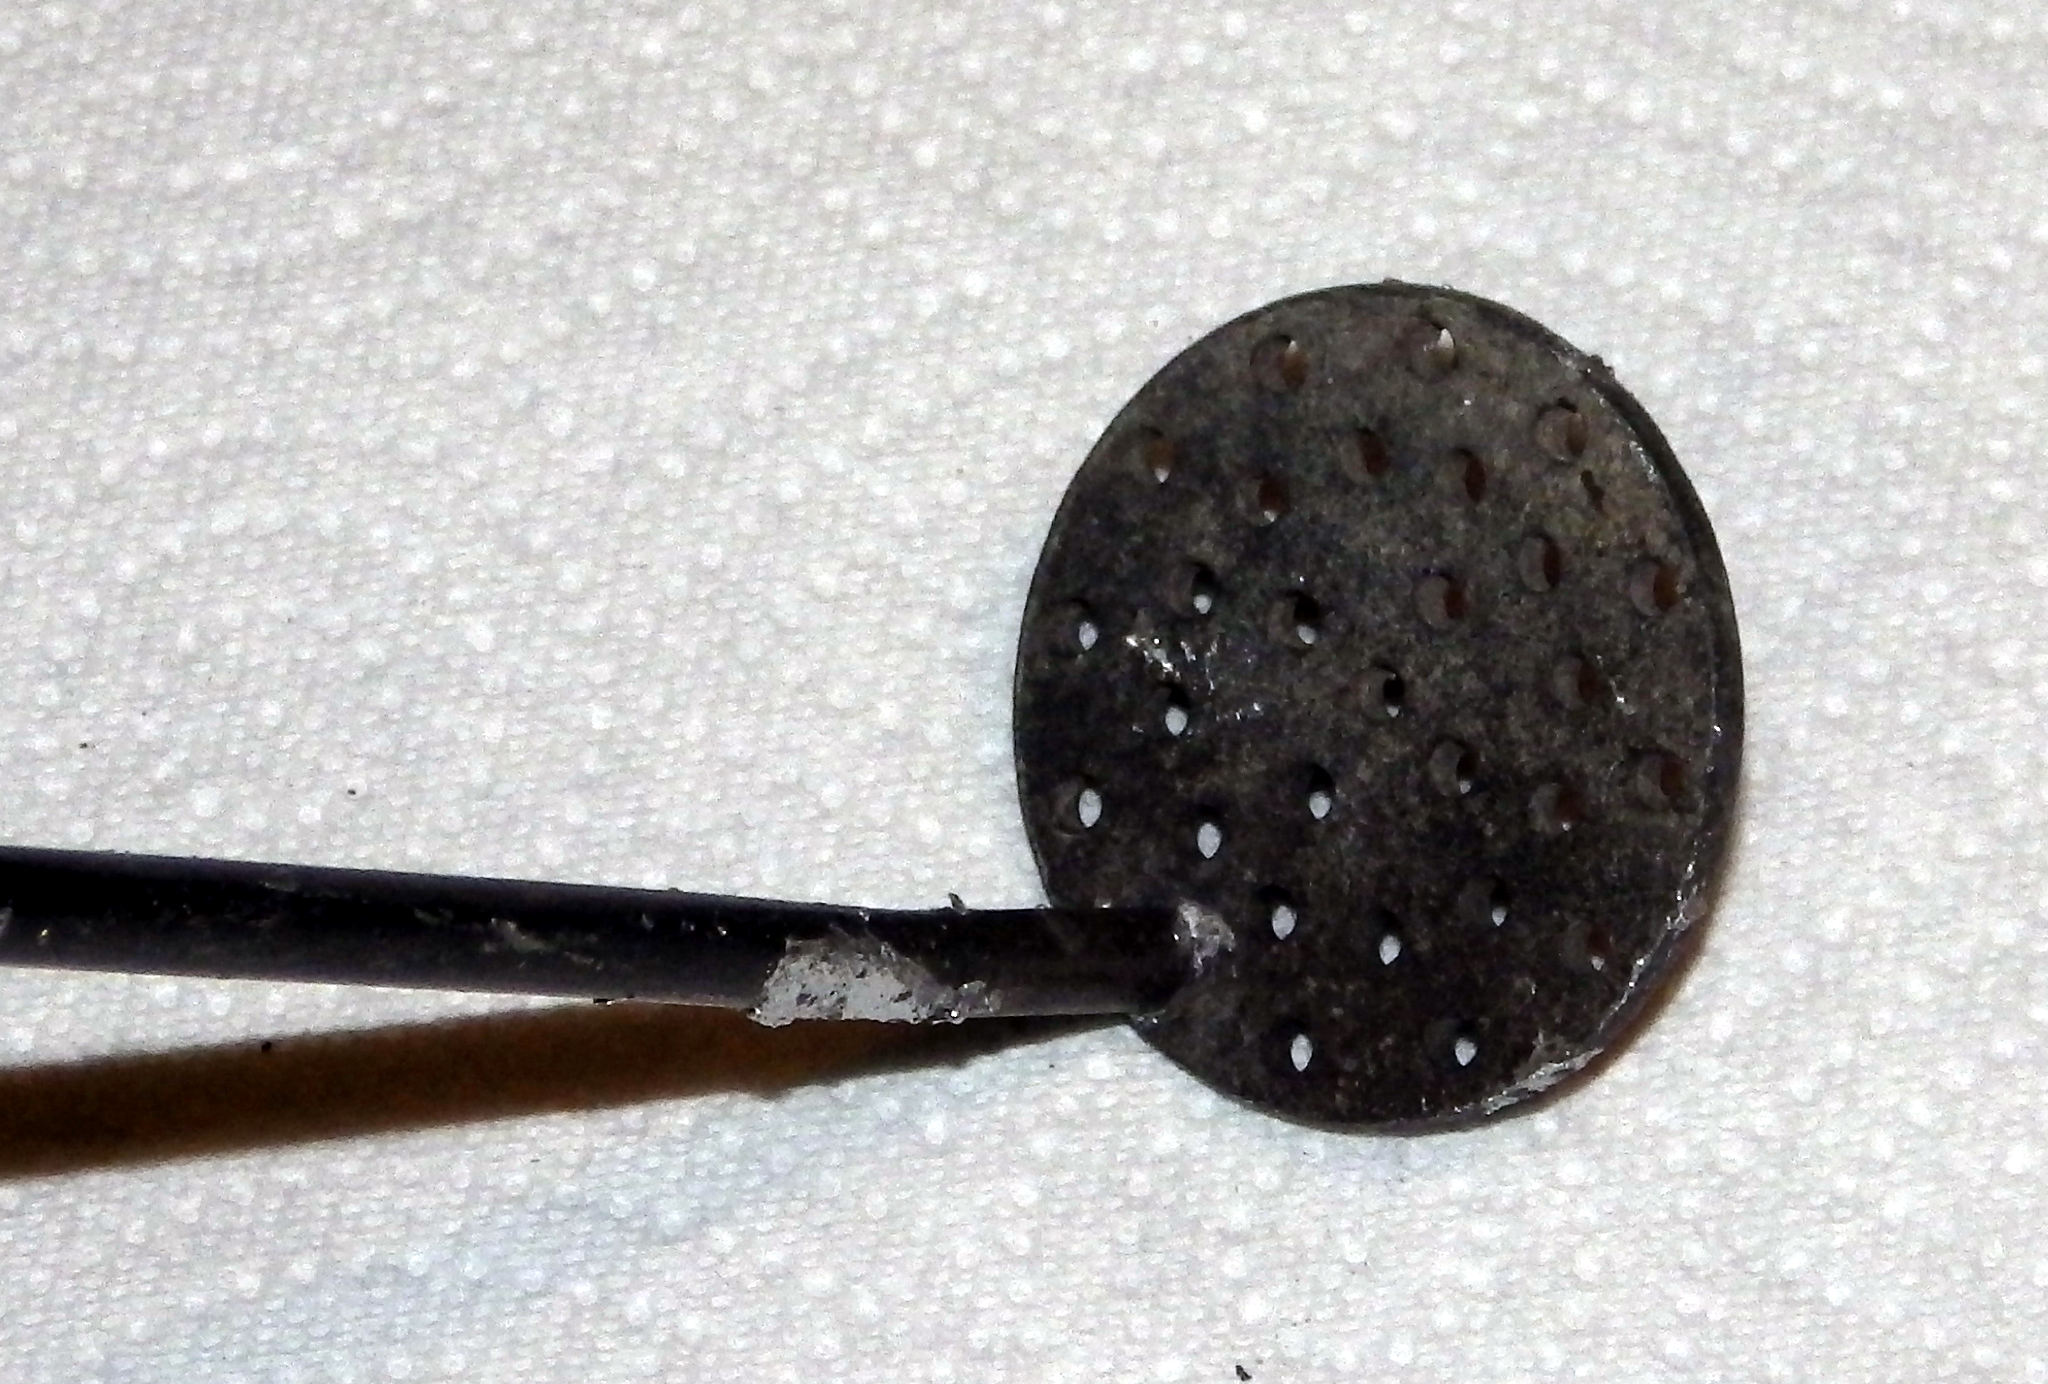
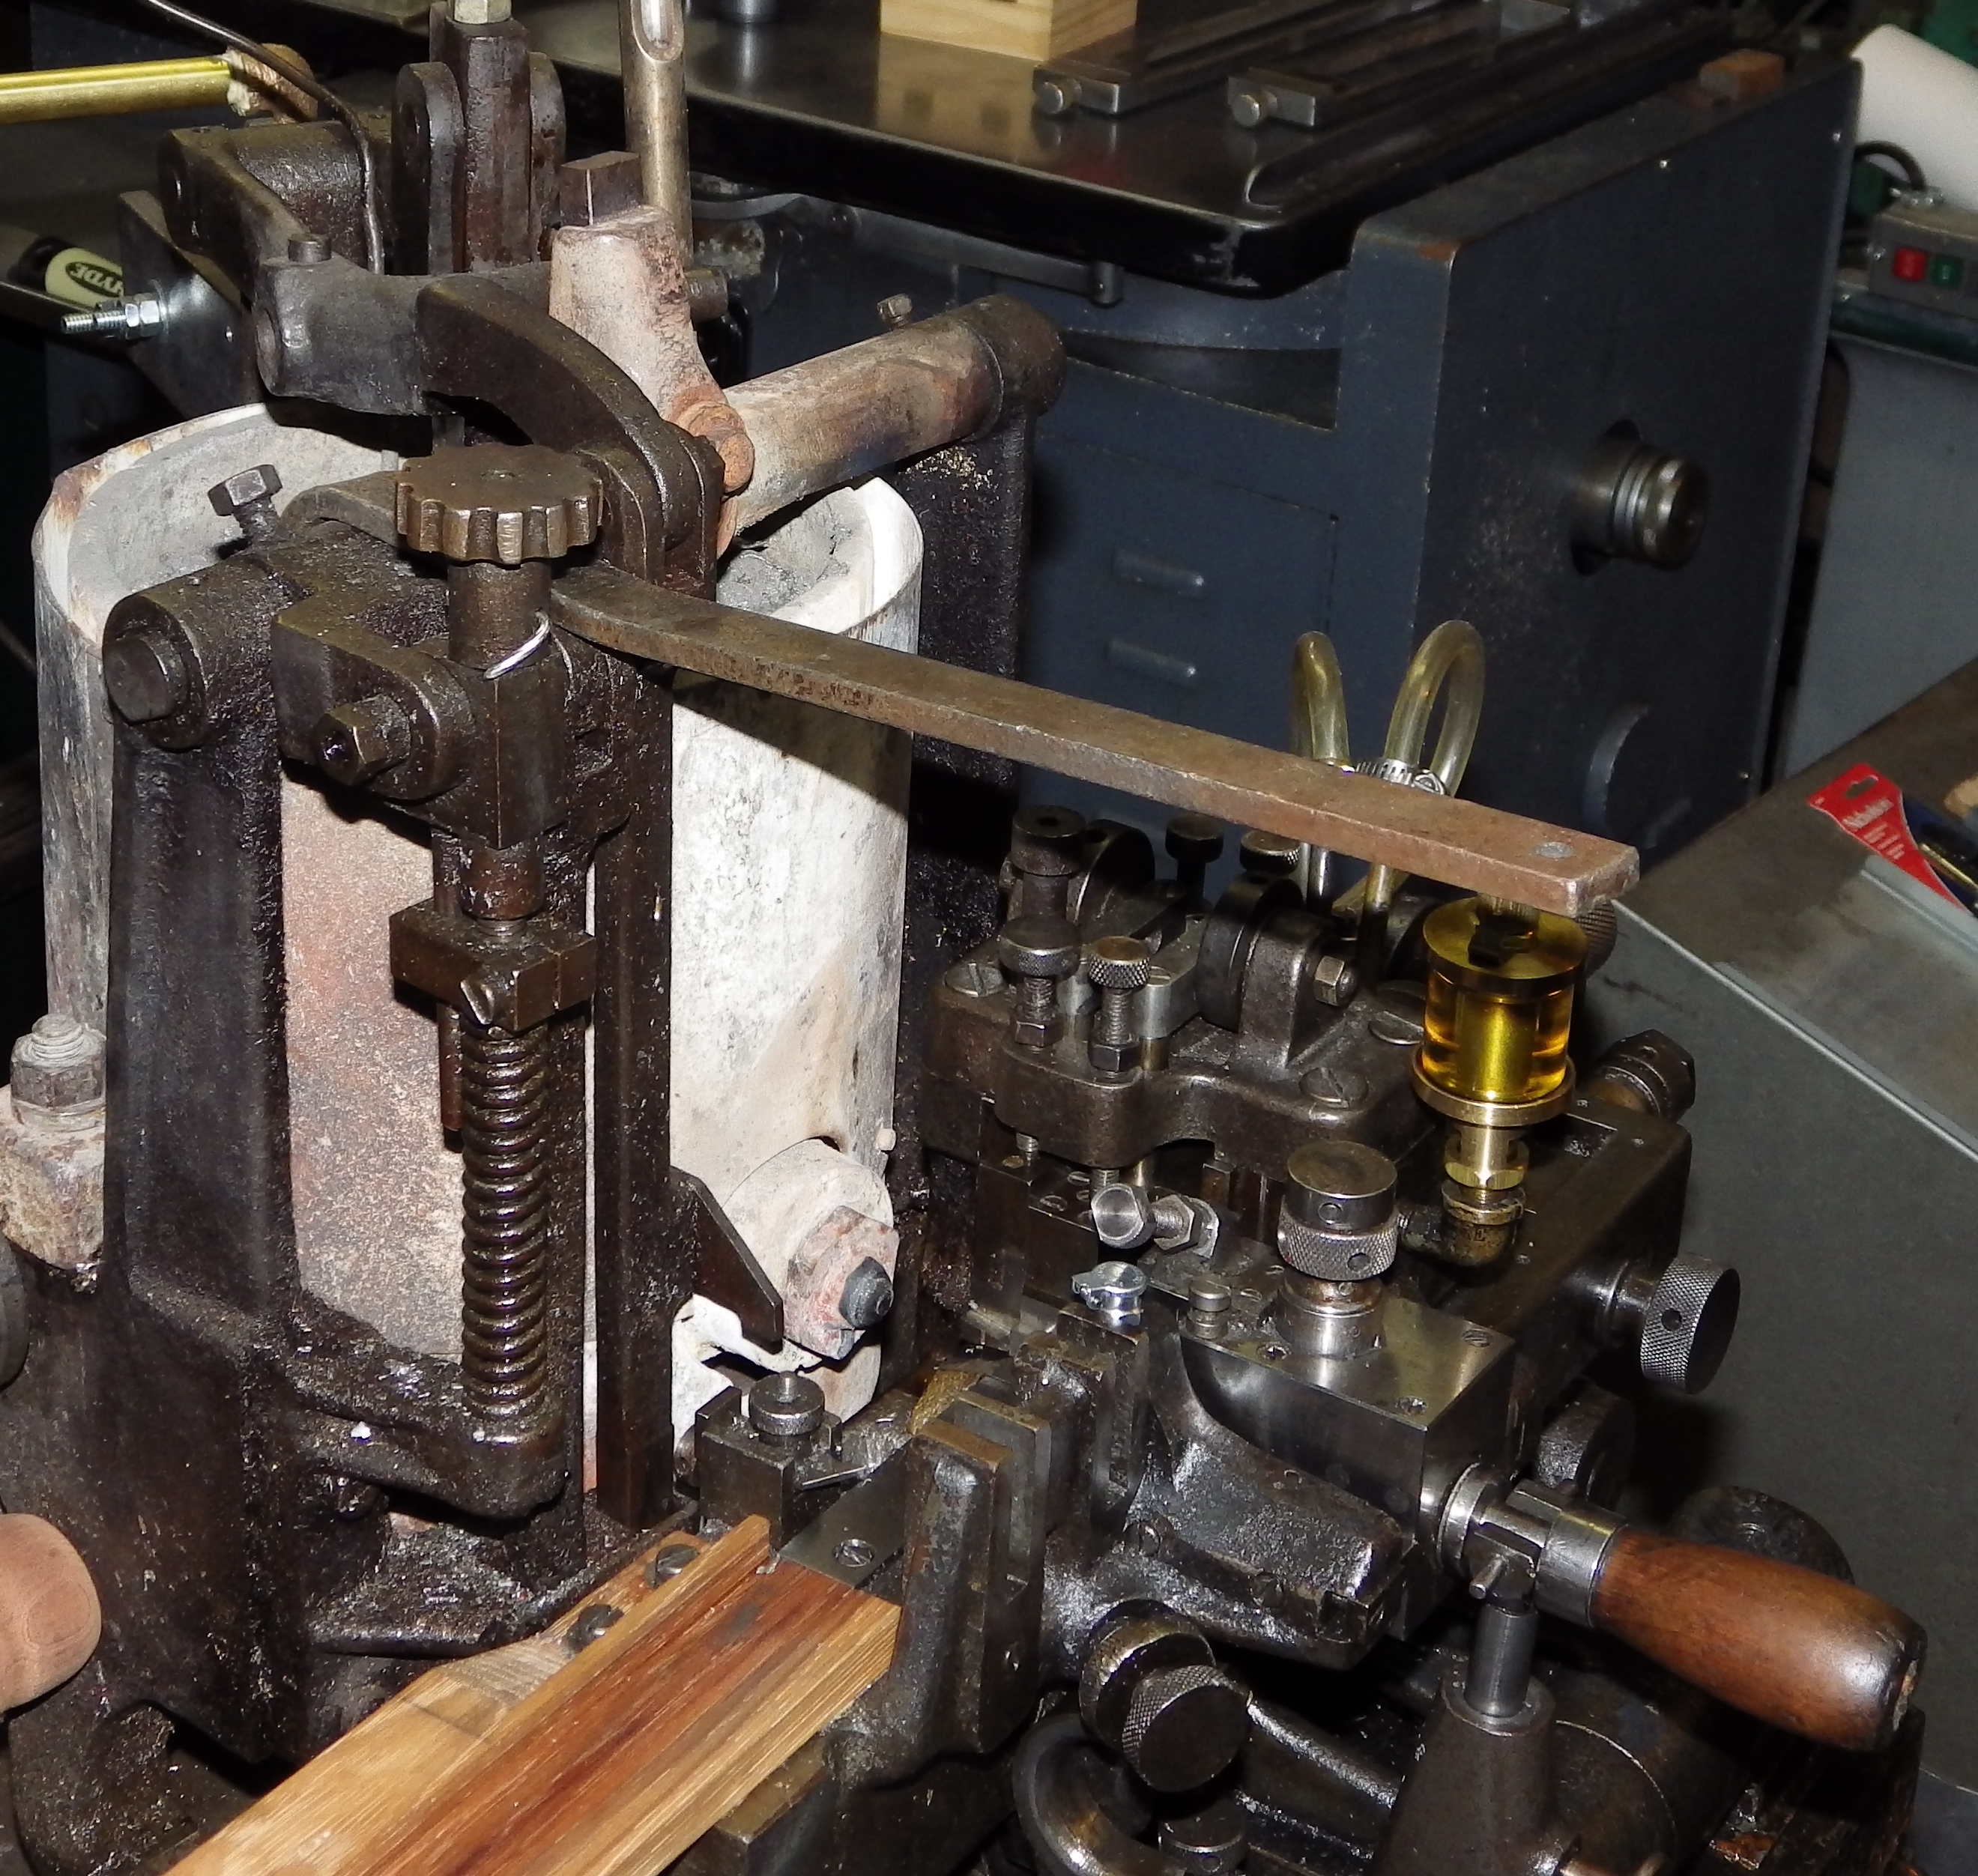
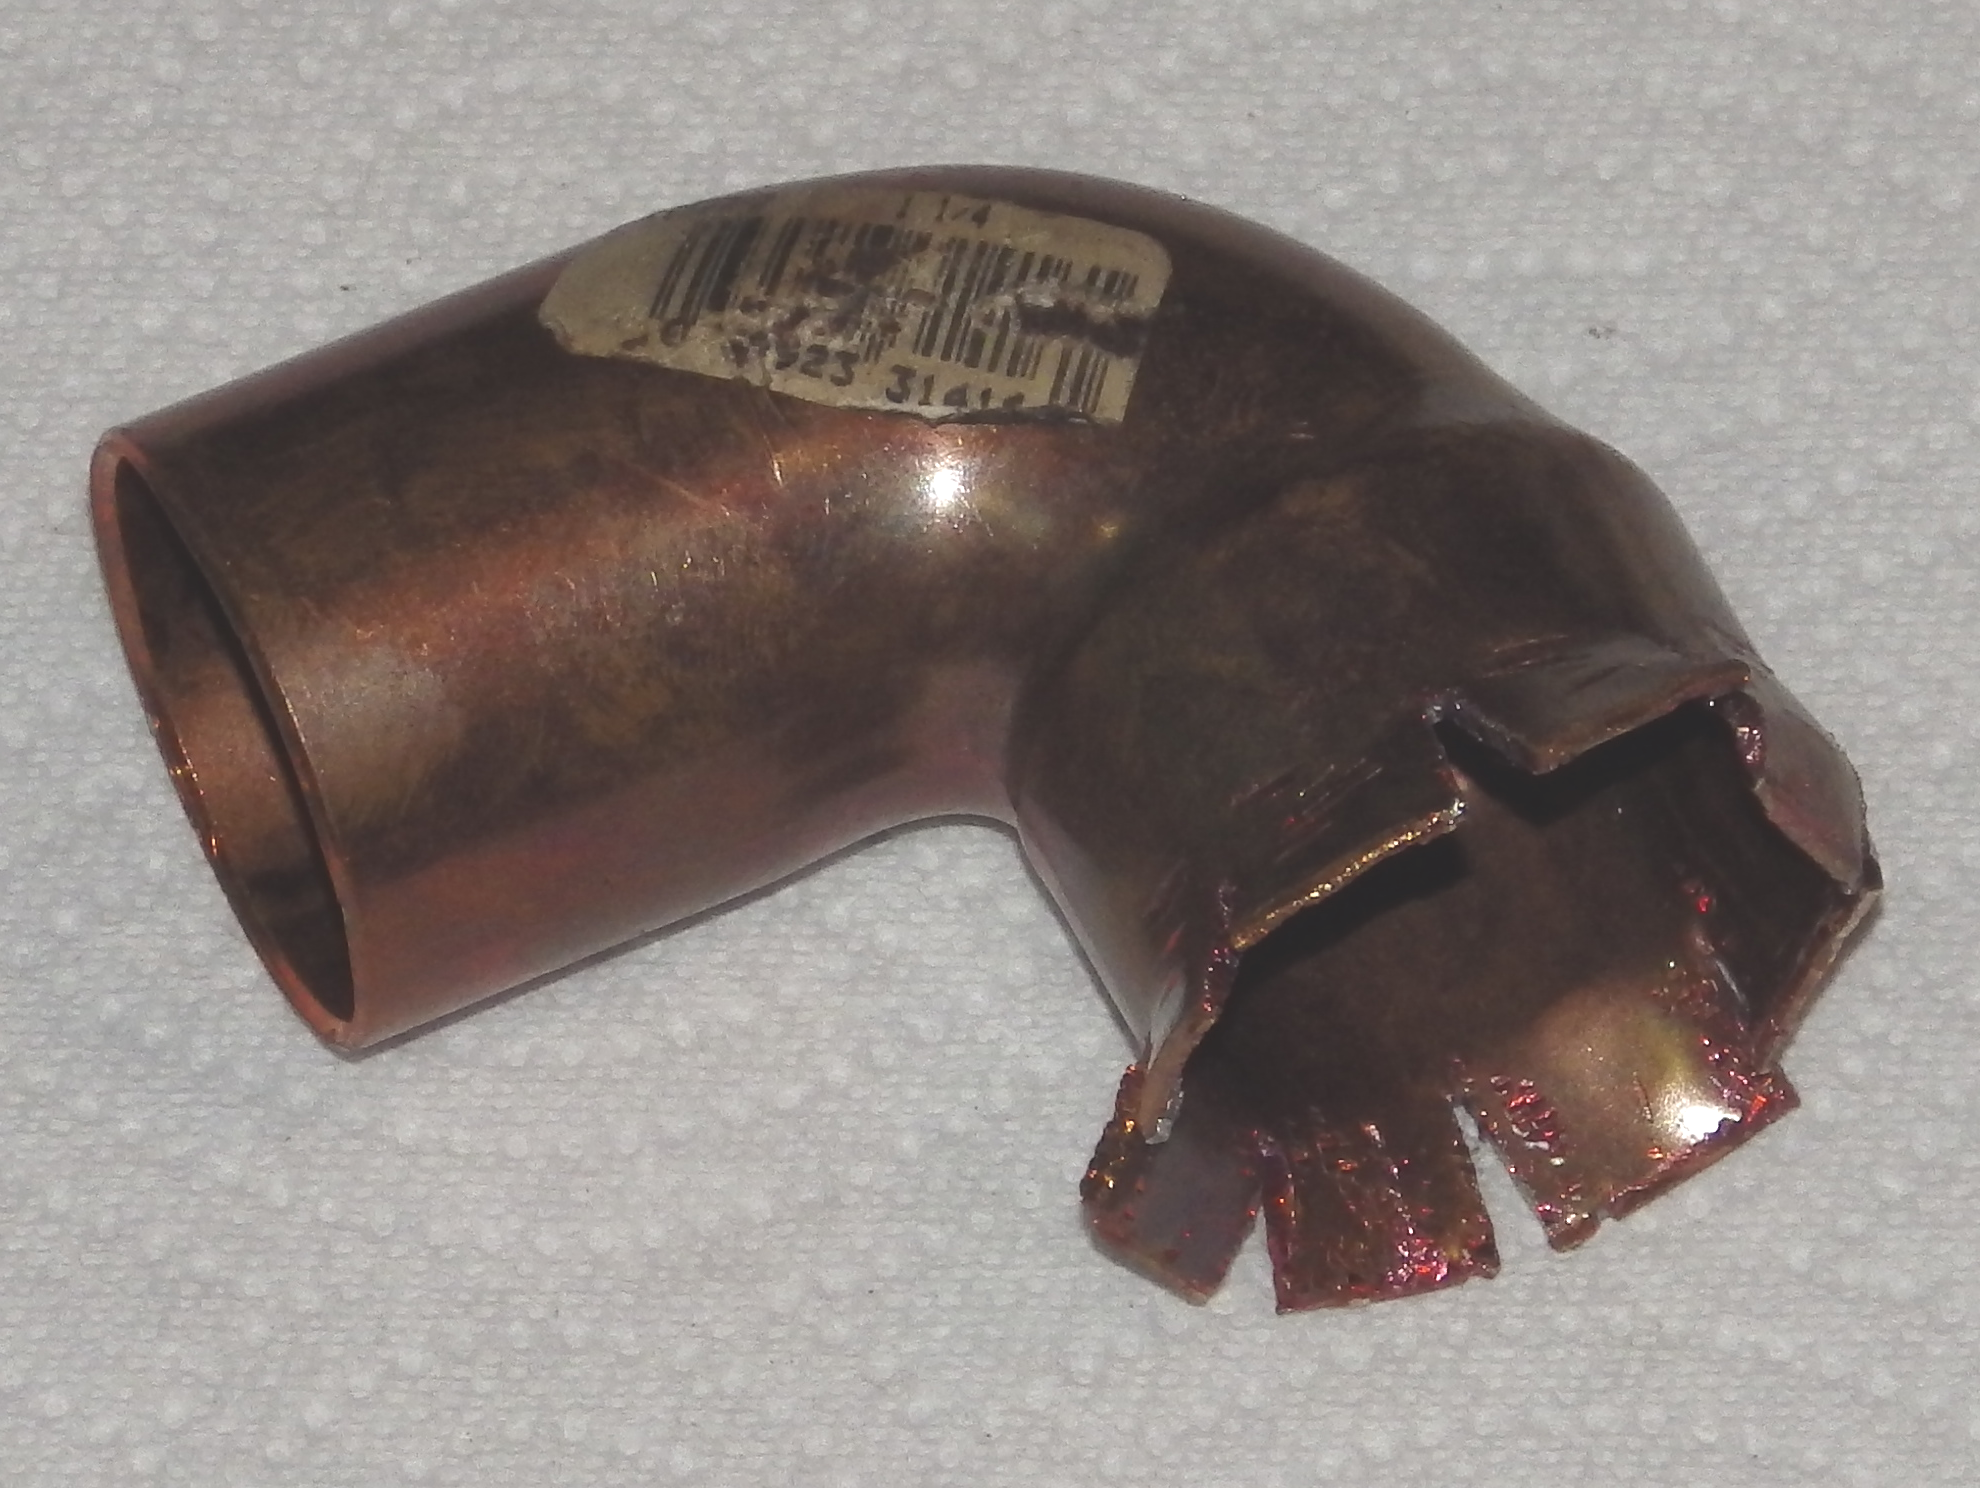
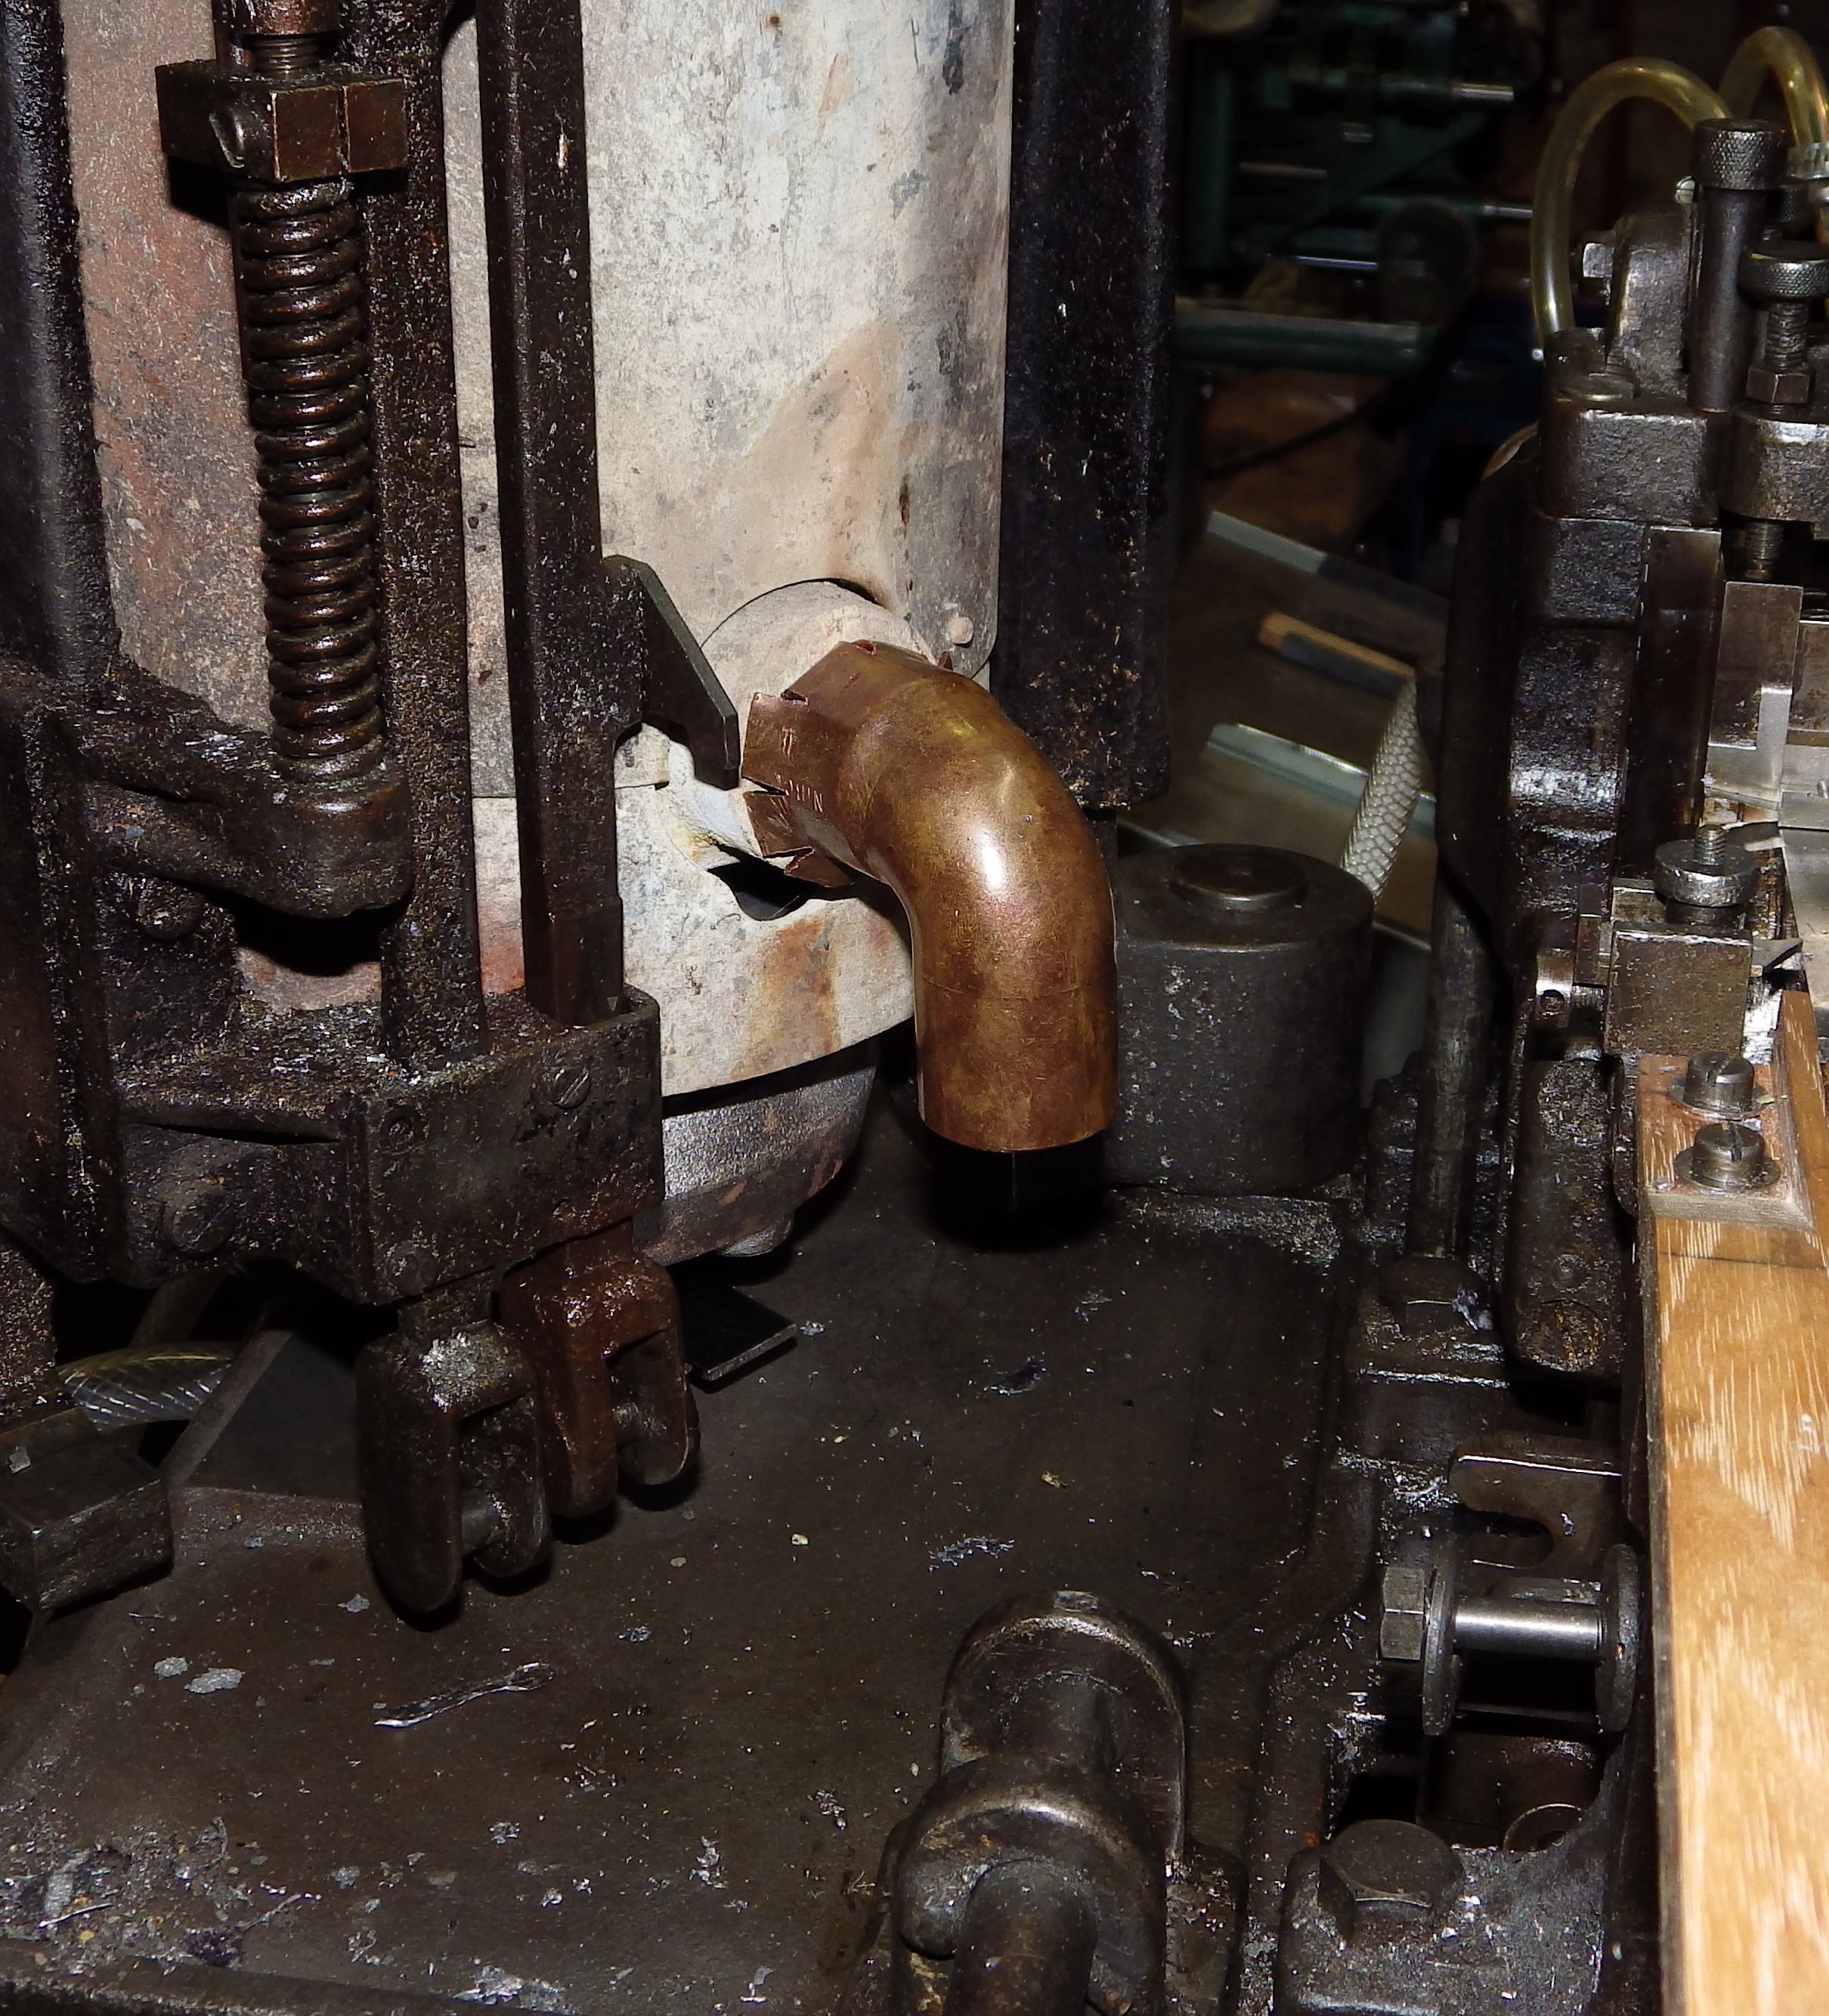
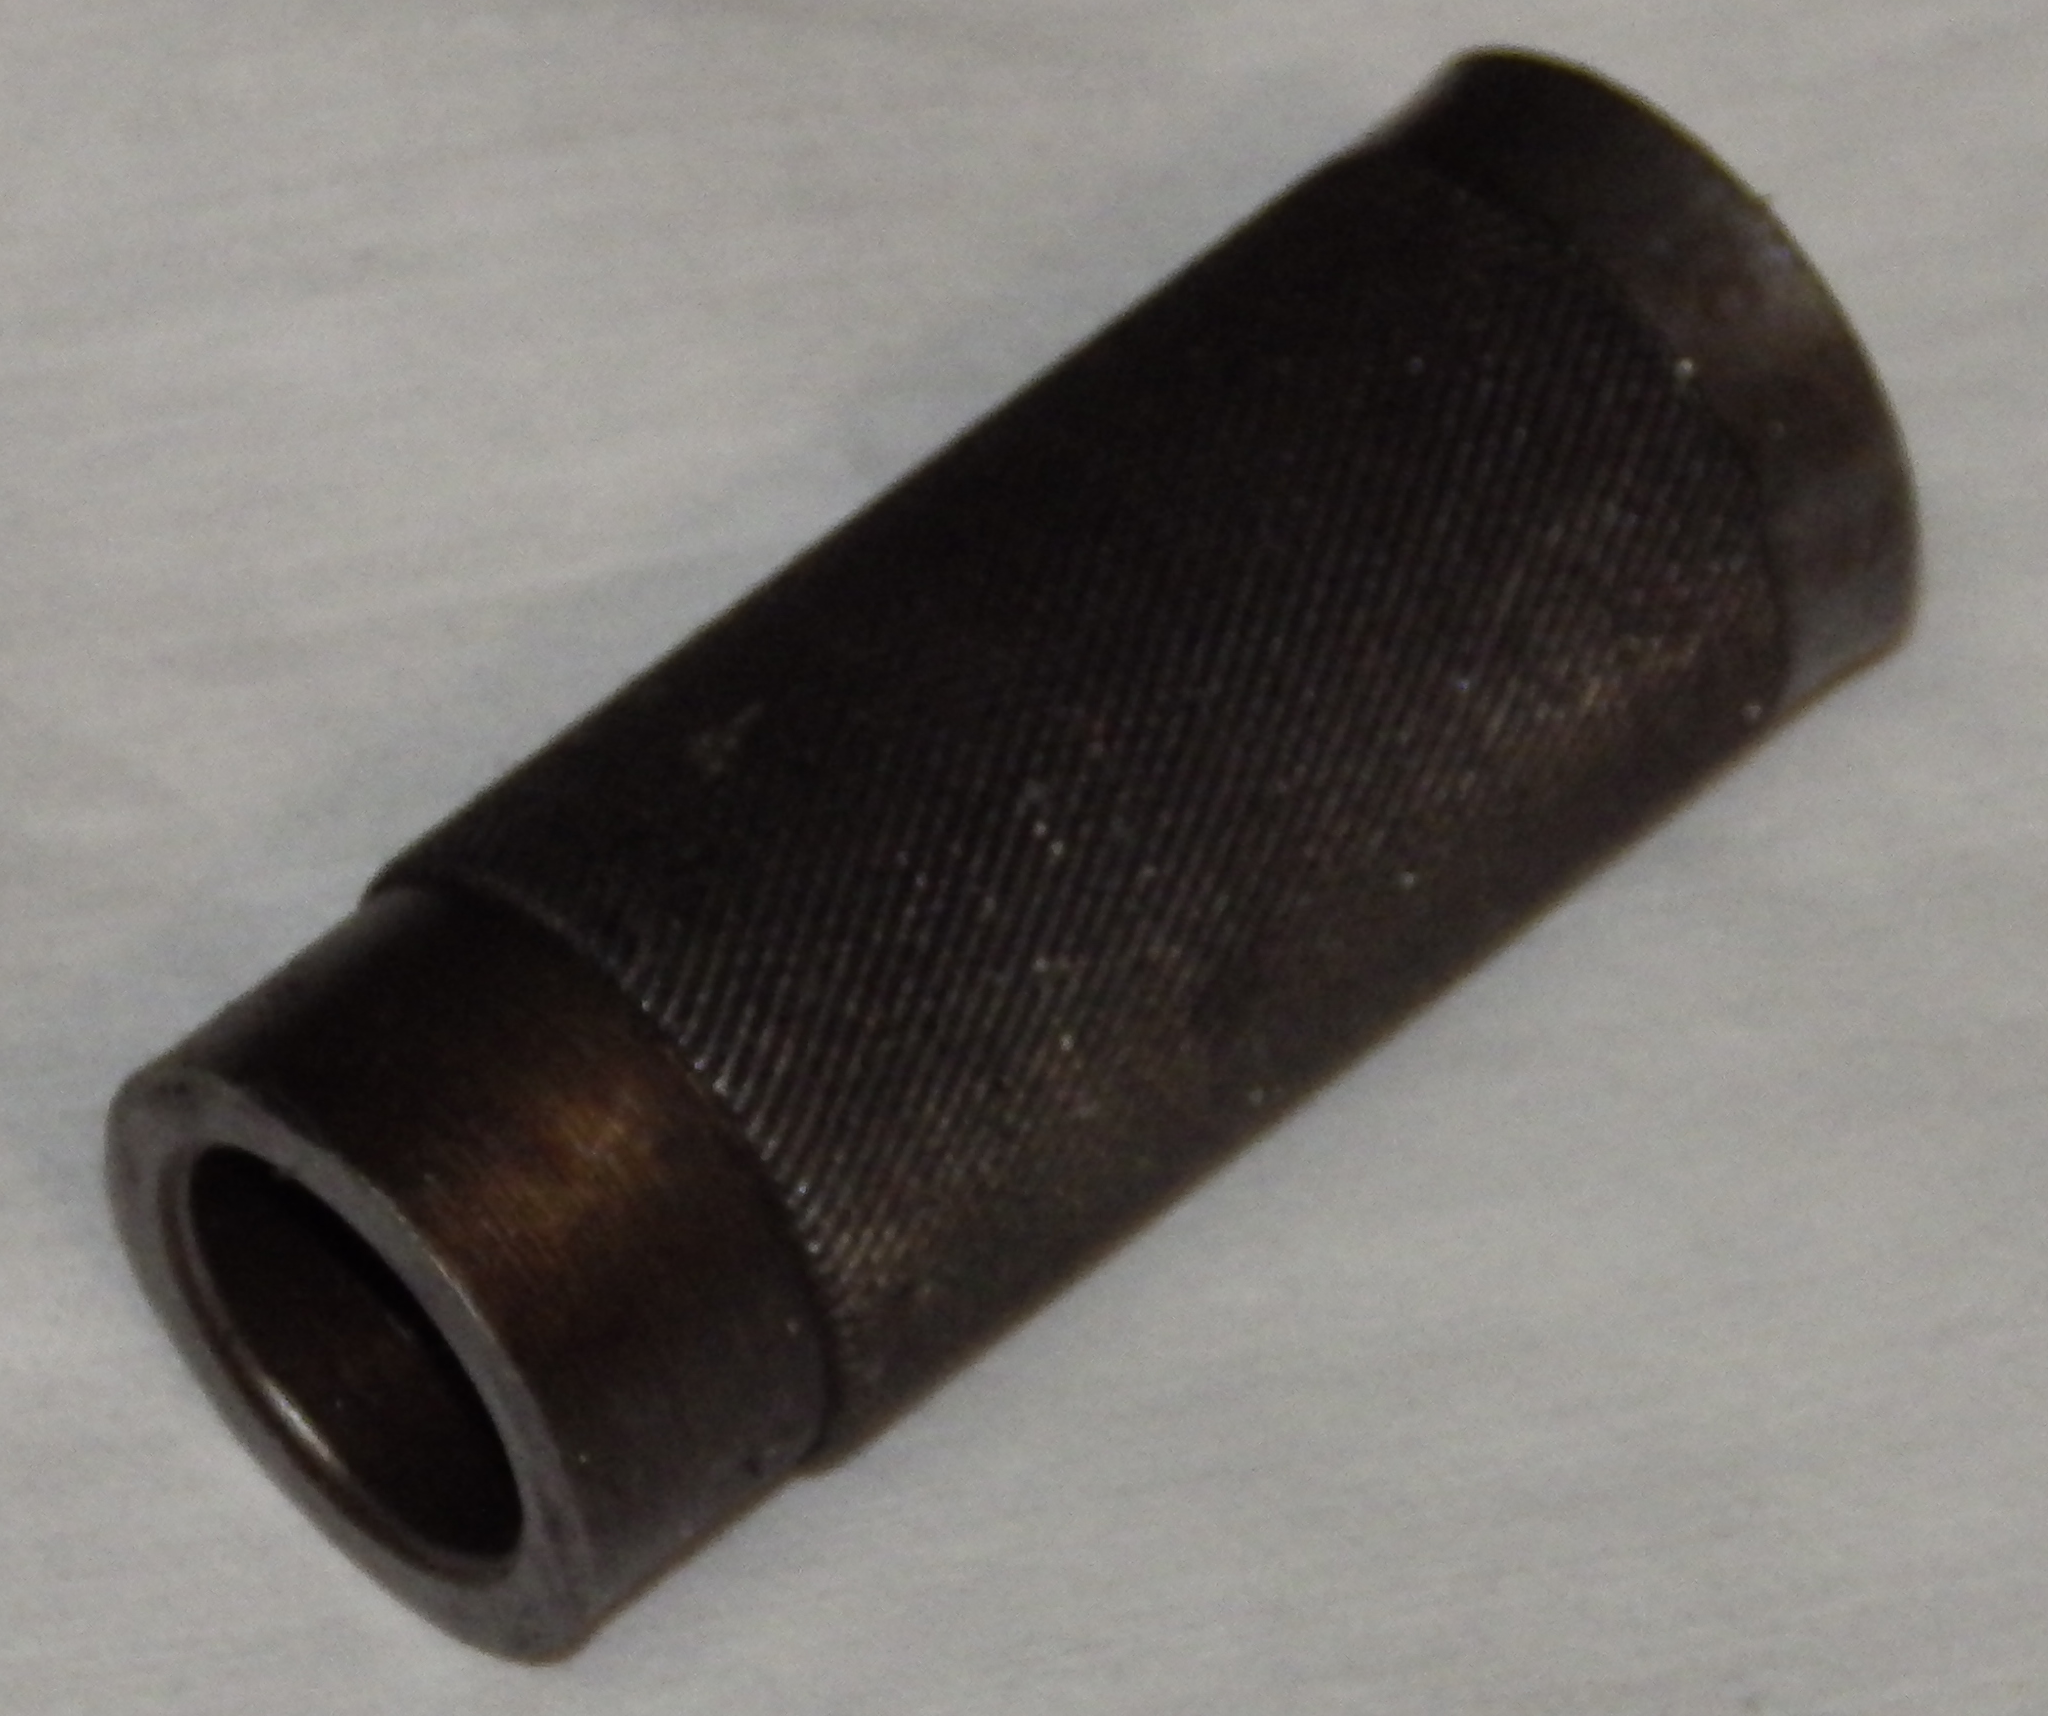
This is a device invented by Sky Shipley. It is simply a 1 1/4 inch copper pipe elbow which has been modified so that it will slip over and hang on the Nozzle. Its purpose is to cause small squirts from the Nozzle to go down, not out toward you. Every Thompson should be furnished with one.
It is well to remember that the Nozzle Deflector is usually cold when it is put on the Nozzle, but it is always hot when taken off. Use a heat-resistent glove.
It is also well to remember not to put your bare hand under the Nozzle Deflector when cleaning up the machine during operation. It deflects the molten typemetal; it does not stop it.
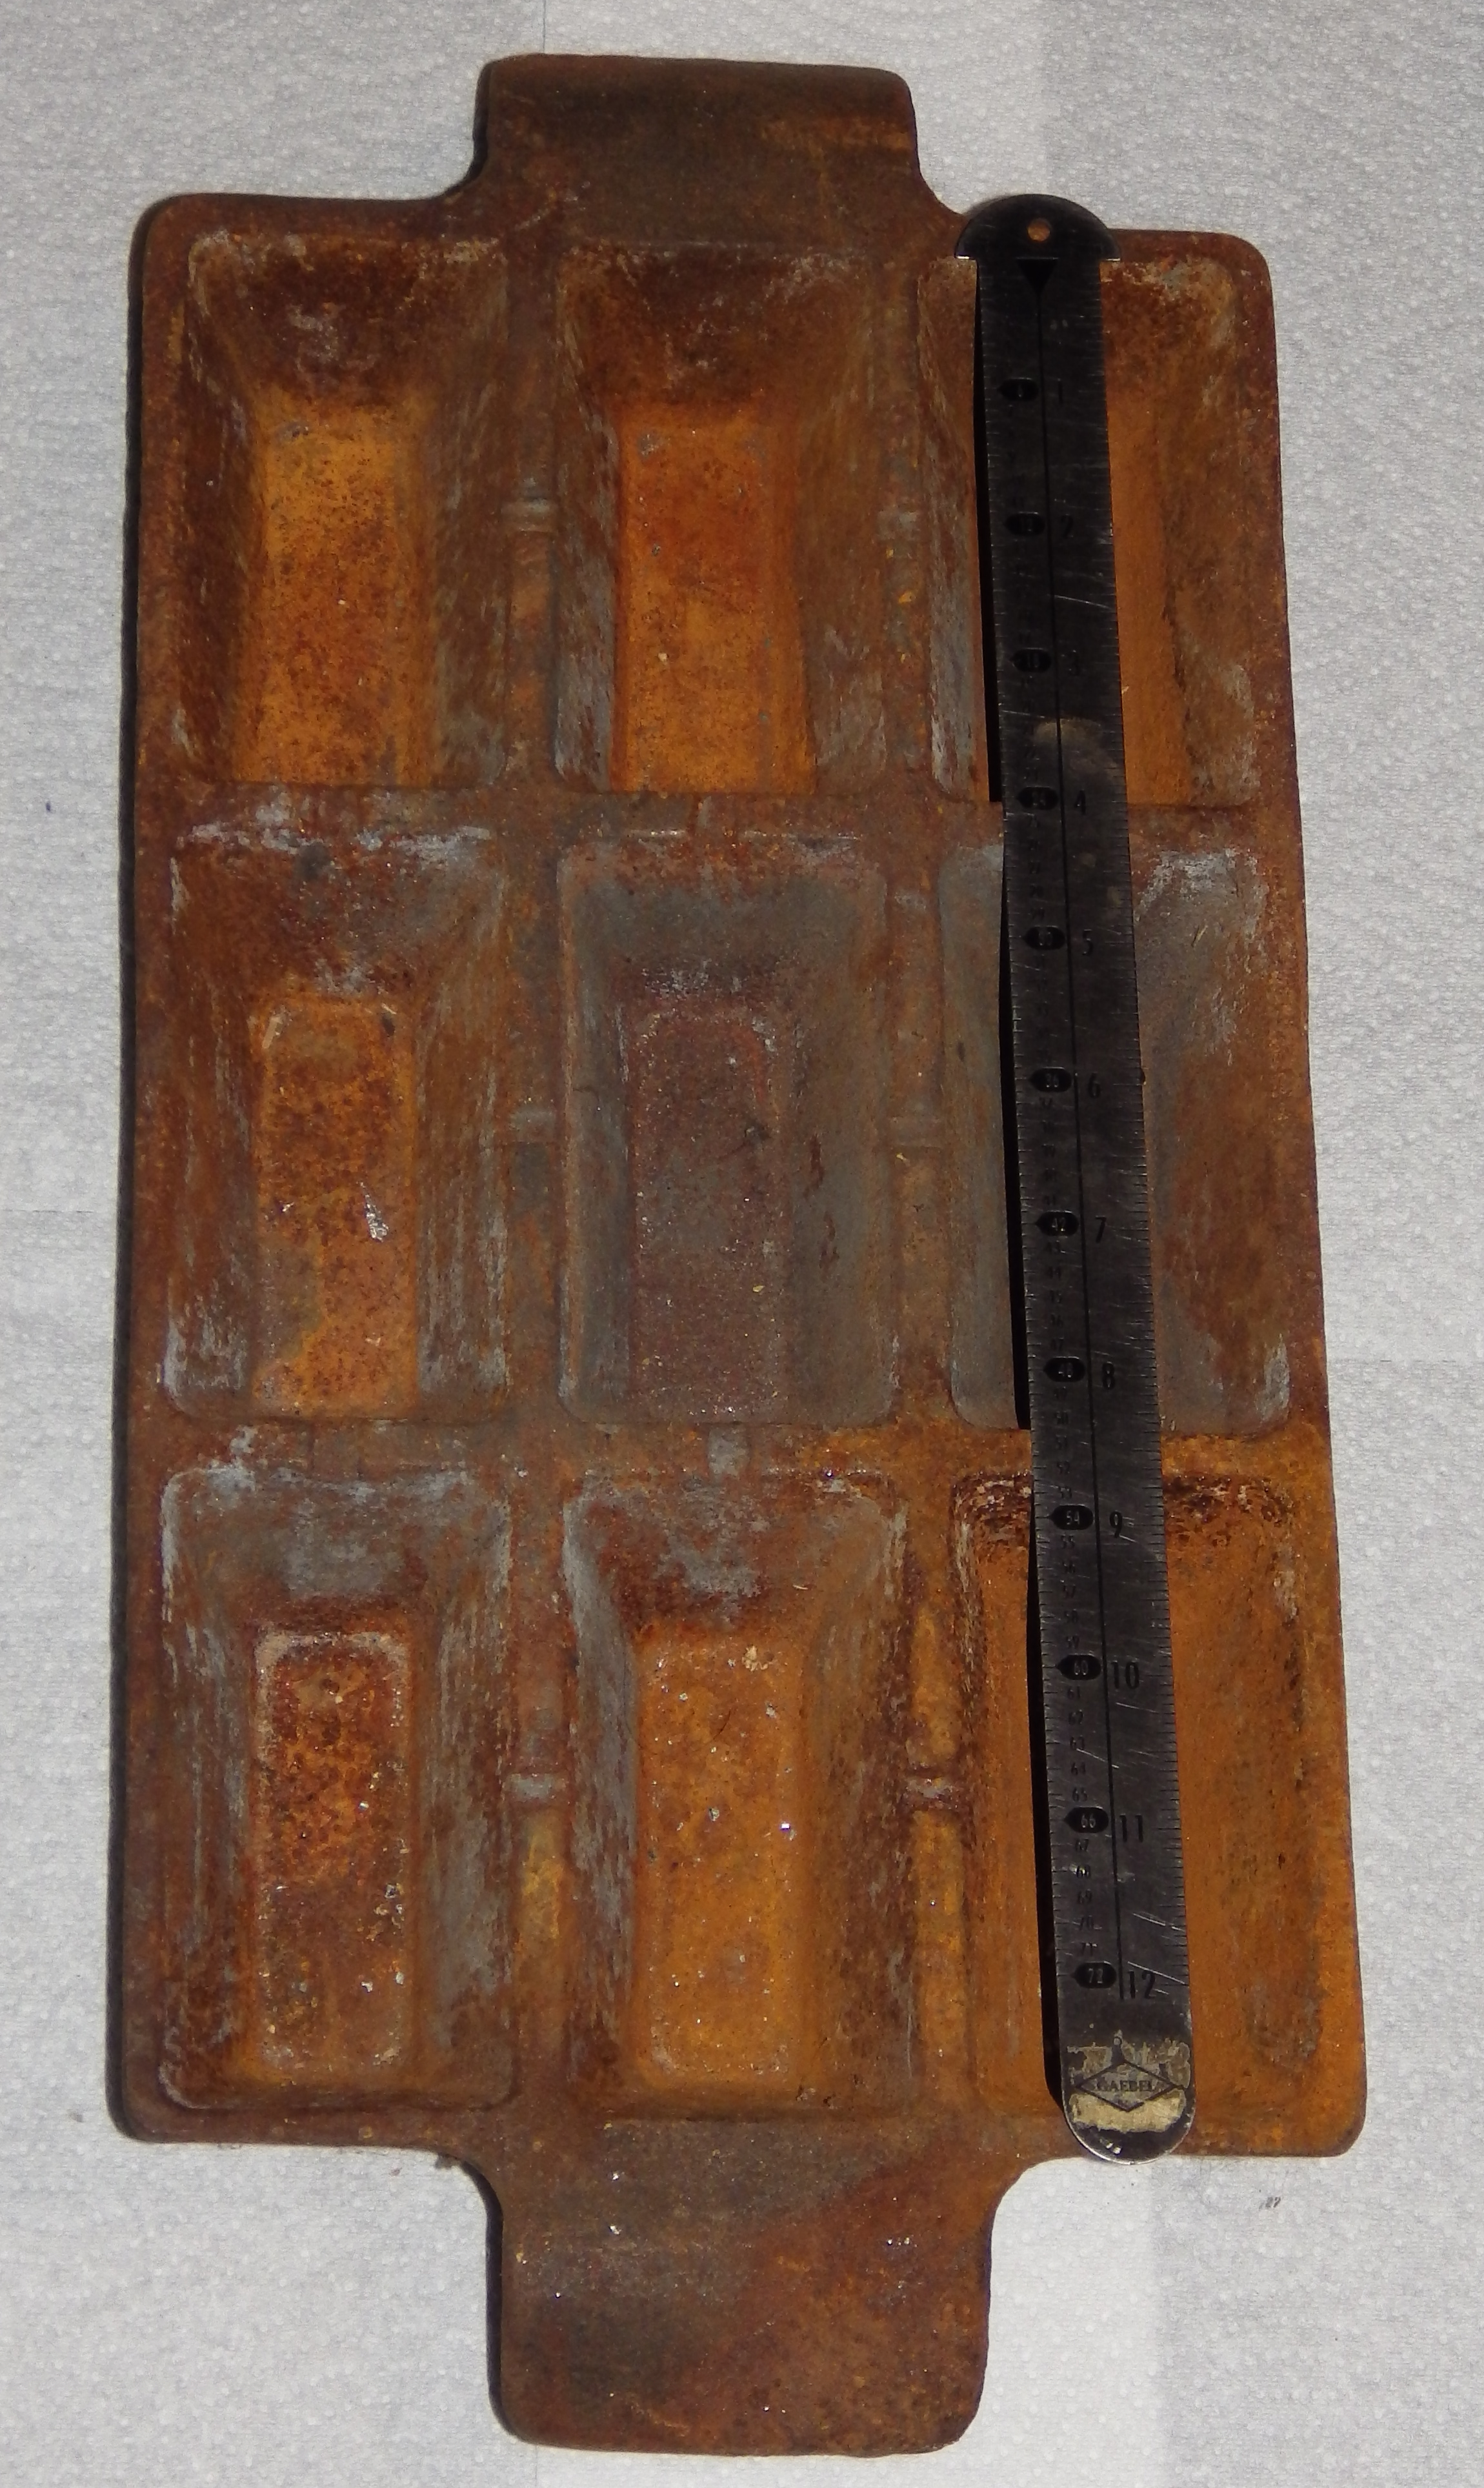
Whenever you swing the Pot back on a Thompson, there is the possibility that the Choker will stick open and the entire Pot of molten typemetal will come out through the Nozzle. You need to be prepared to receive an entire Pot's worth of typemetal into appropriate small ingot molds.
Standard Monotype small ingot molds are ideal. Here is one, with a 72 pica Line Gauge (about 12 inches) for scale. The rust doesn't matter.
If a Monotype small ingot mold cannot be found, various cast iron molds intended for other purposes (e.g., cornbread) may be used.
Failing this, other appropriately sized metal molds may be used (muffin tins, for example).
When adapting modern kitchen and workshop tools to Thompson use, be aware of two things:
Note that a standard Linotype/Intertype long ingot is too deep to be fed into the Thompson. Moreover, since the part of the mold forming the "eye" of the long ingot is at the top as you fill the mold, filling a regular Linotype mold to a lesser depth won't work (the "eye" won't be formed). Feeders using long ingots were used on the Thompson, but they required special molds.
Whenever you swing the pot back, you should always have a relatively large (but of course not unworkably huge) ladle at hand. You may need to catch moderate drippings from a leaky nozzle. However, you may also have to deal with an emergency situation where the Choker is stuck open and the Nozzle is flowing freely. For this you will need a relatively large ladle to catch the typemetal and transfer it into Ingot Molds.
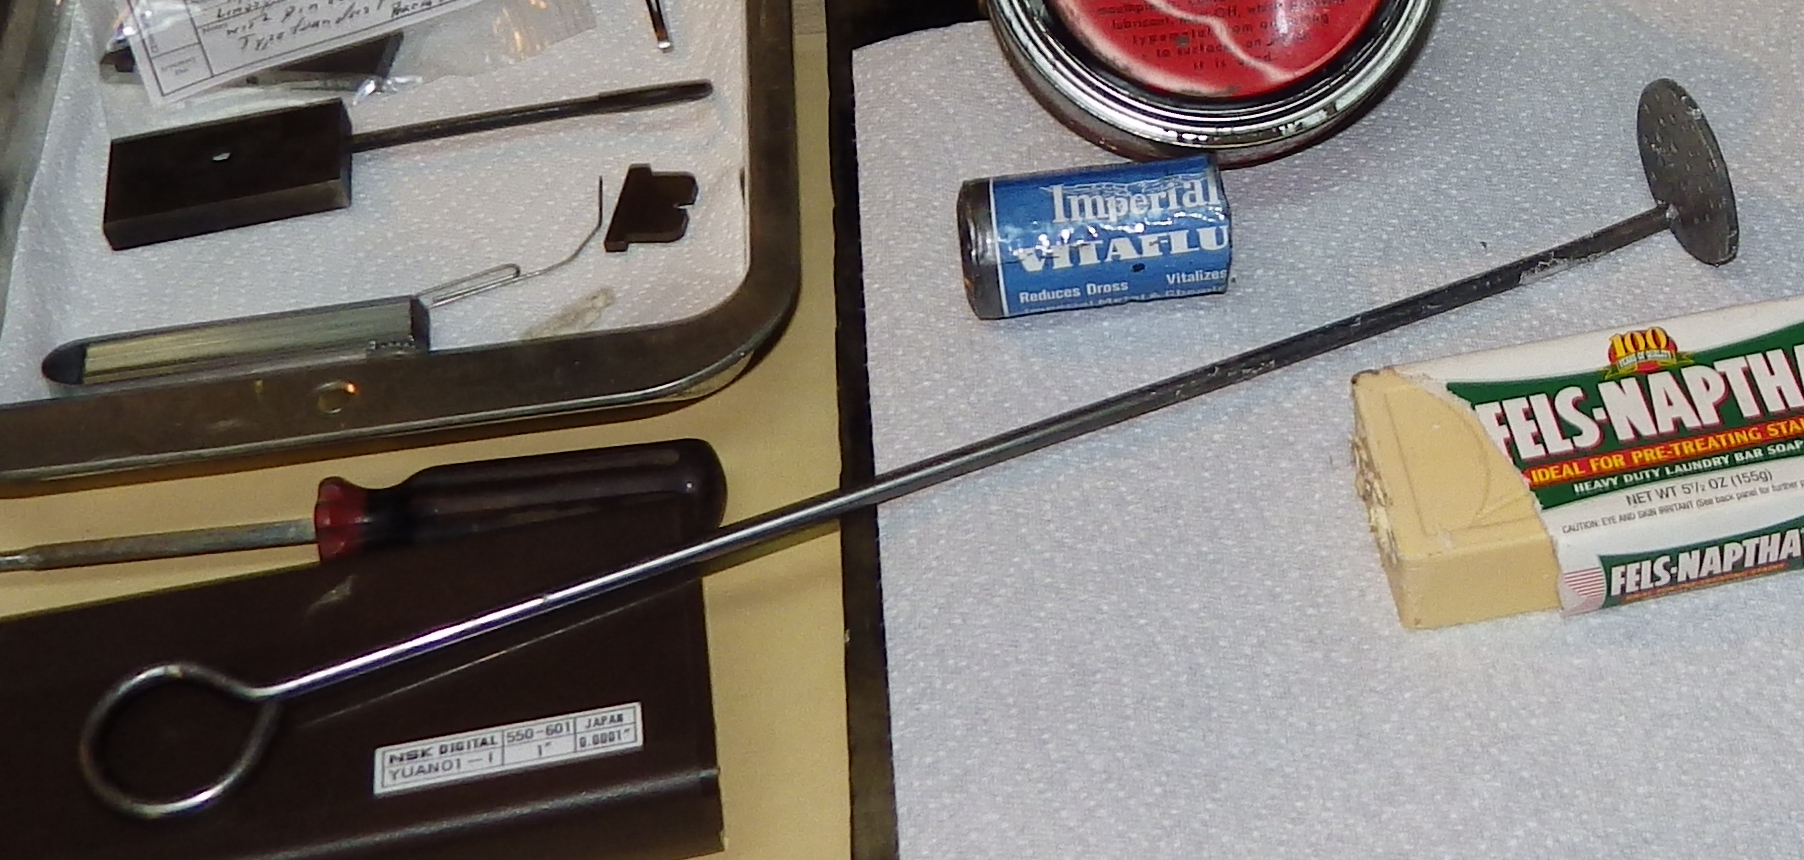
This is a sort of a miracle-cure for leaking Nozzles. If the Nozzle is dripping just a bit, apply the short end of a bar of Fels-Naptha to it. In many case it will stop the drip. Why it works I do not know.
Note that if the Nozzle is leaking a lot, or is flowing freely, then you have much bigger problems and should be taking appropriate actions for an open Nozzle and/or stuck Choker, not applying soap.
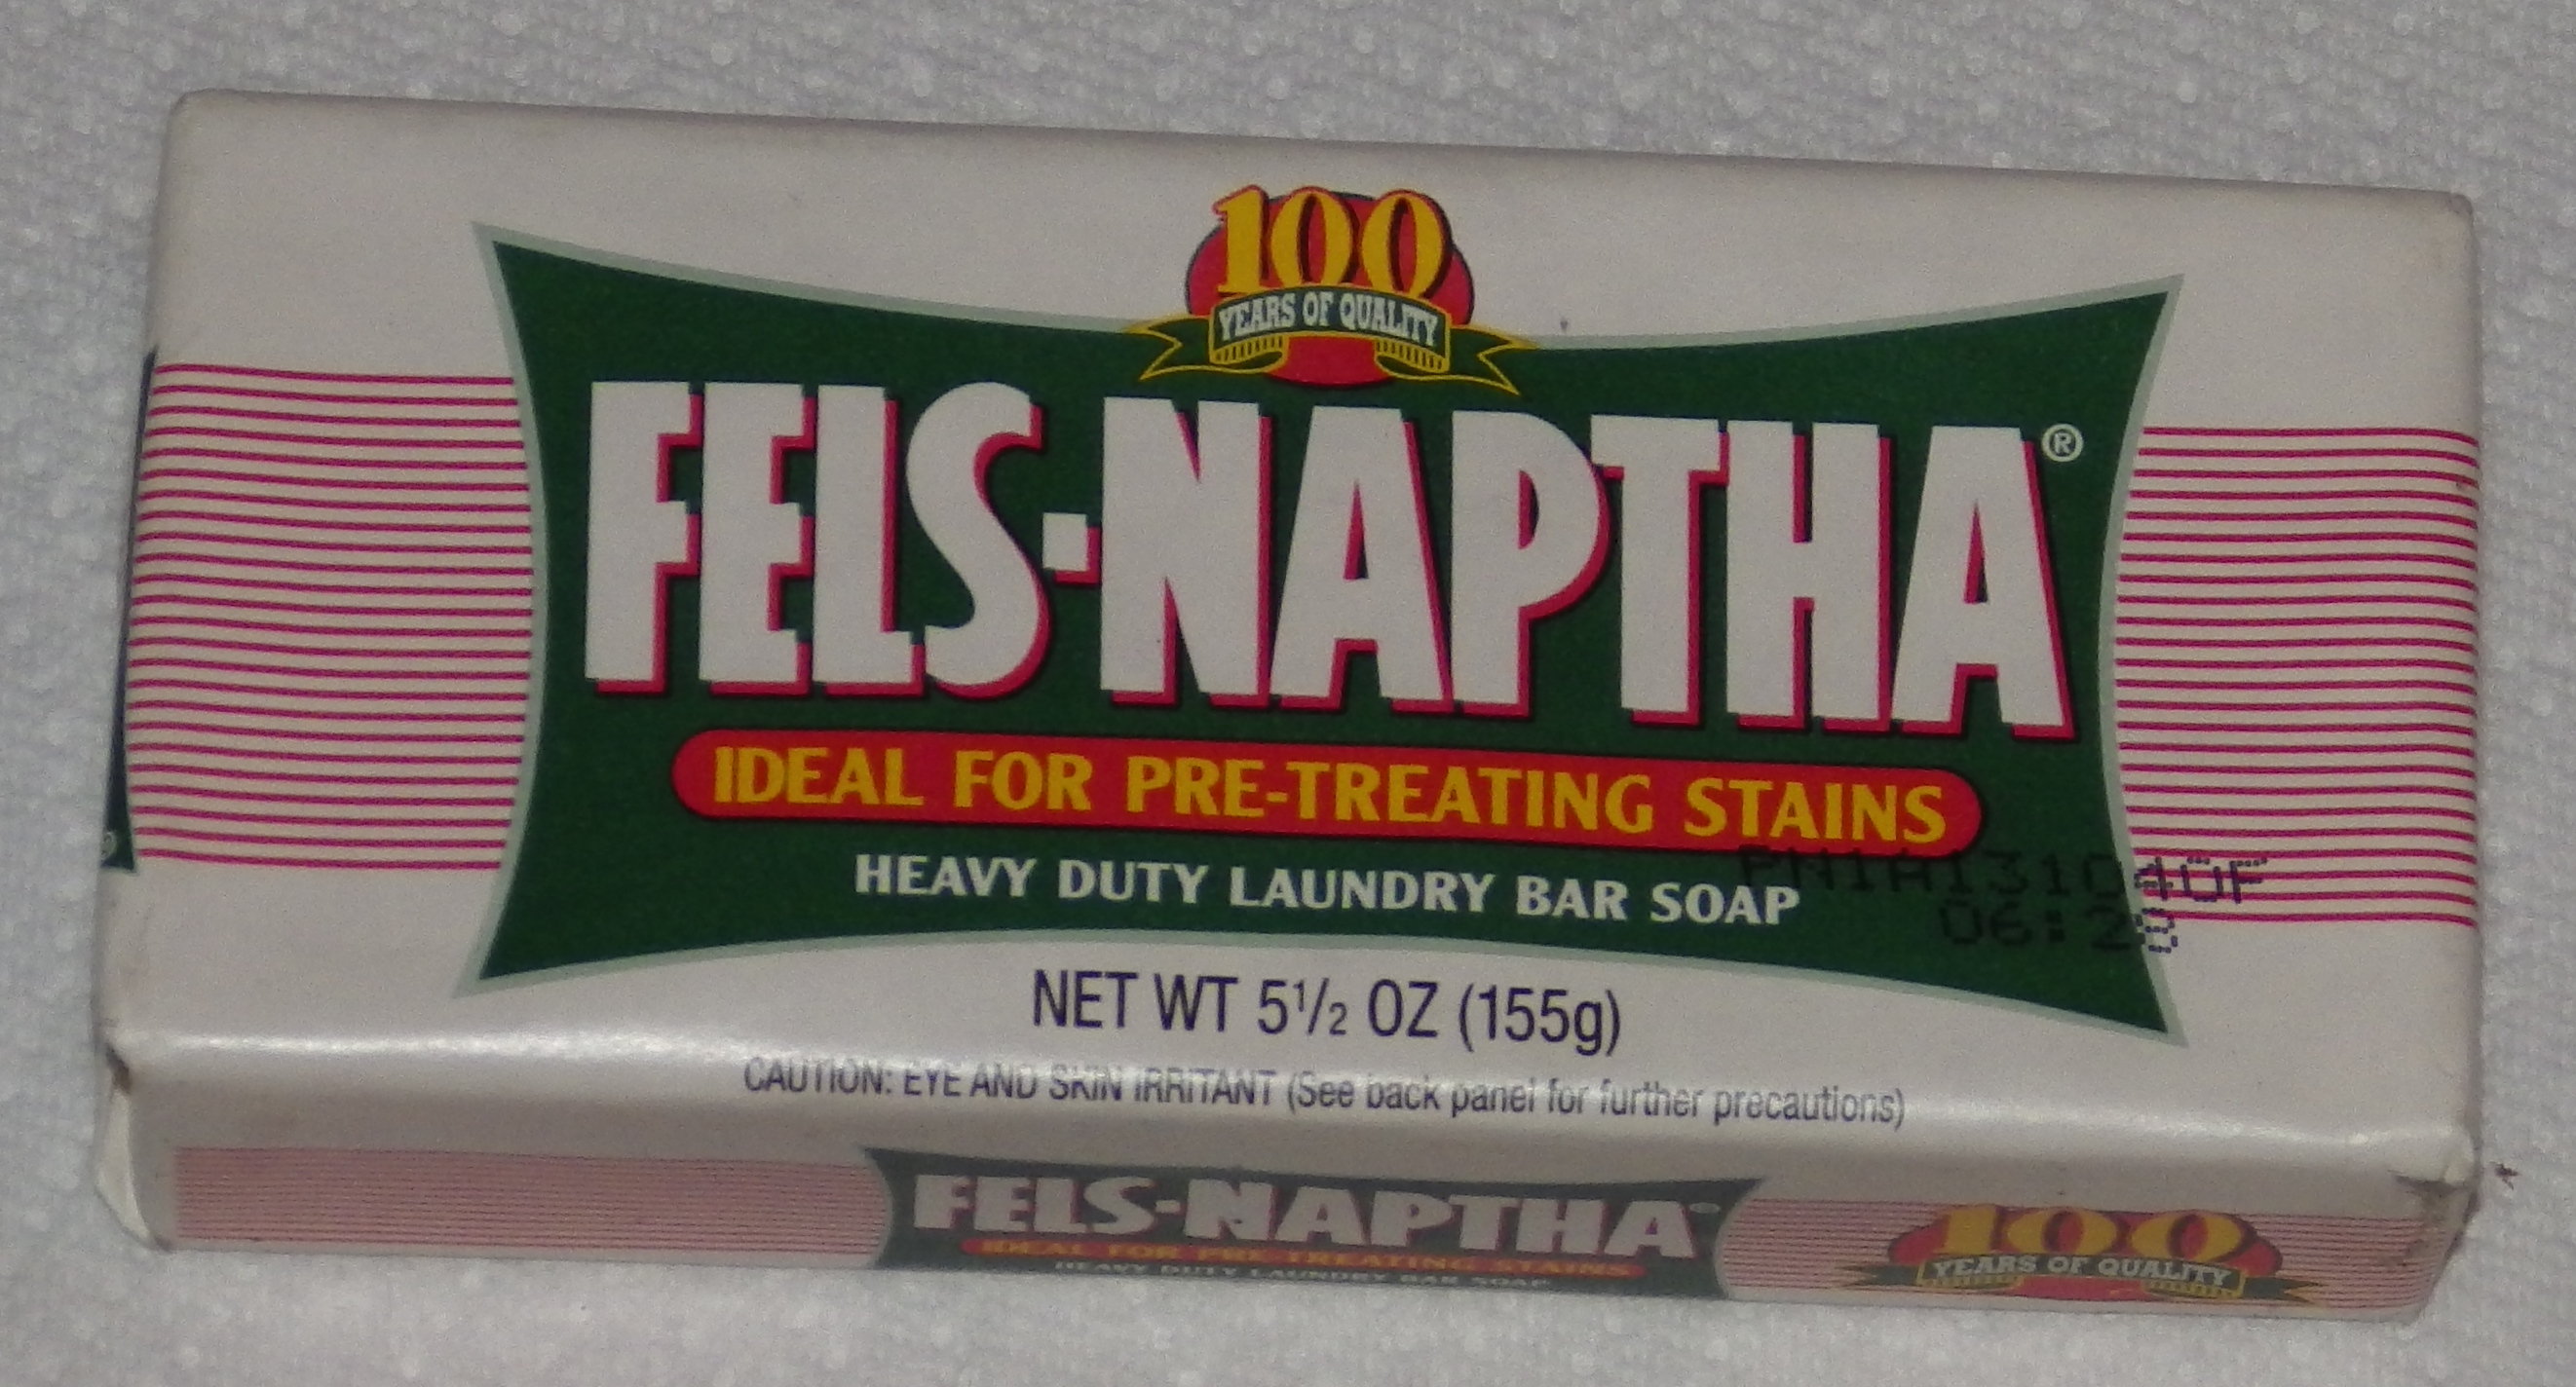
Fels-Naptha is most commonly available in hardware stores rather than supermarkets.
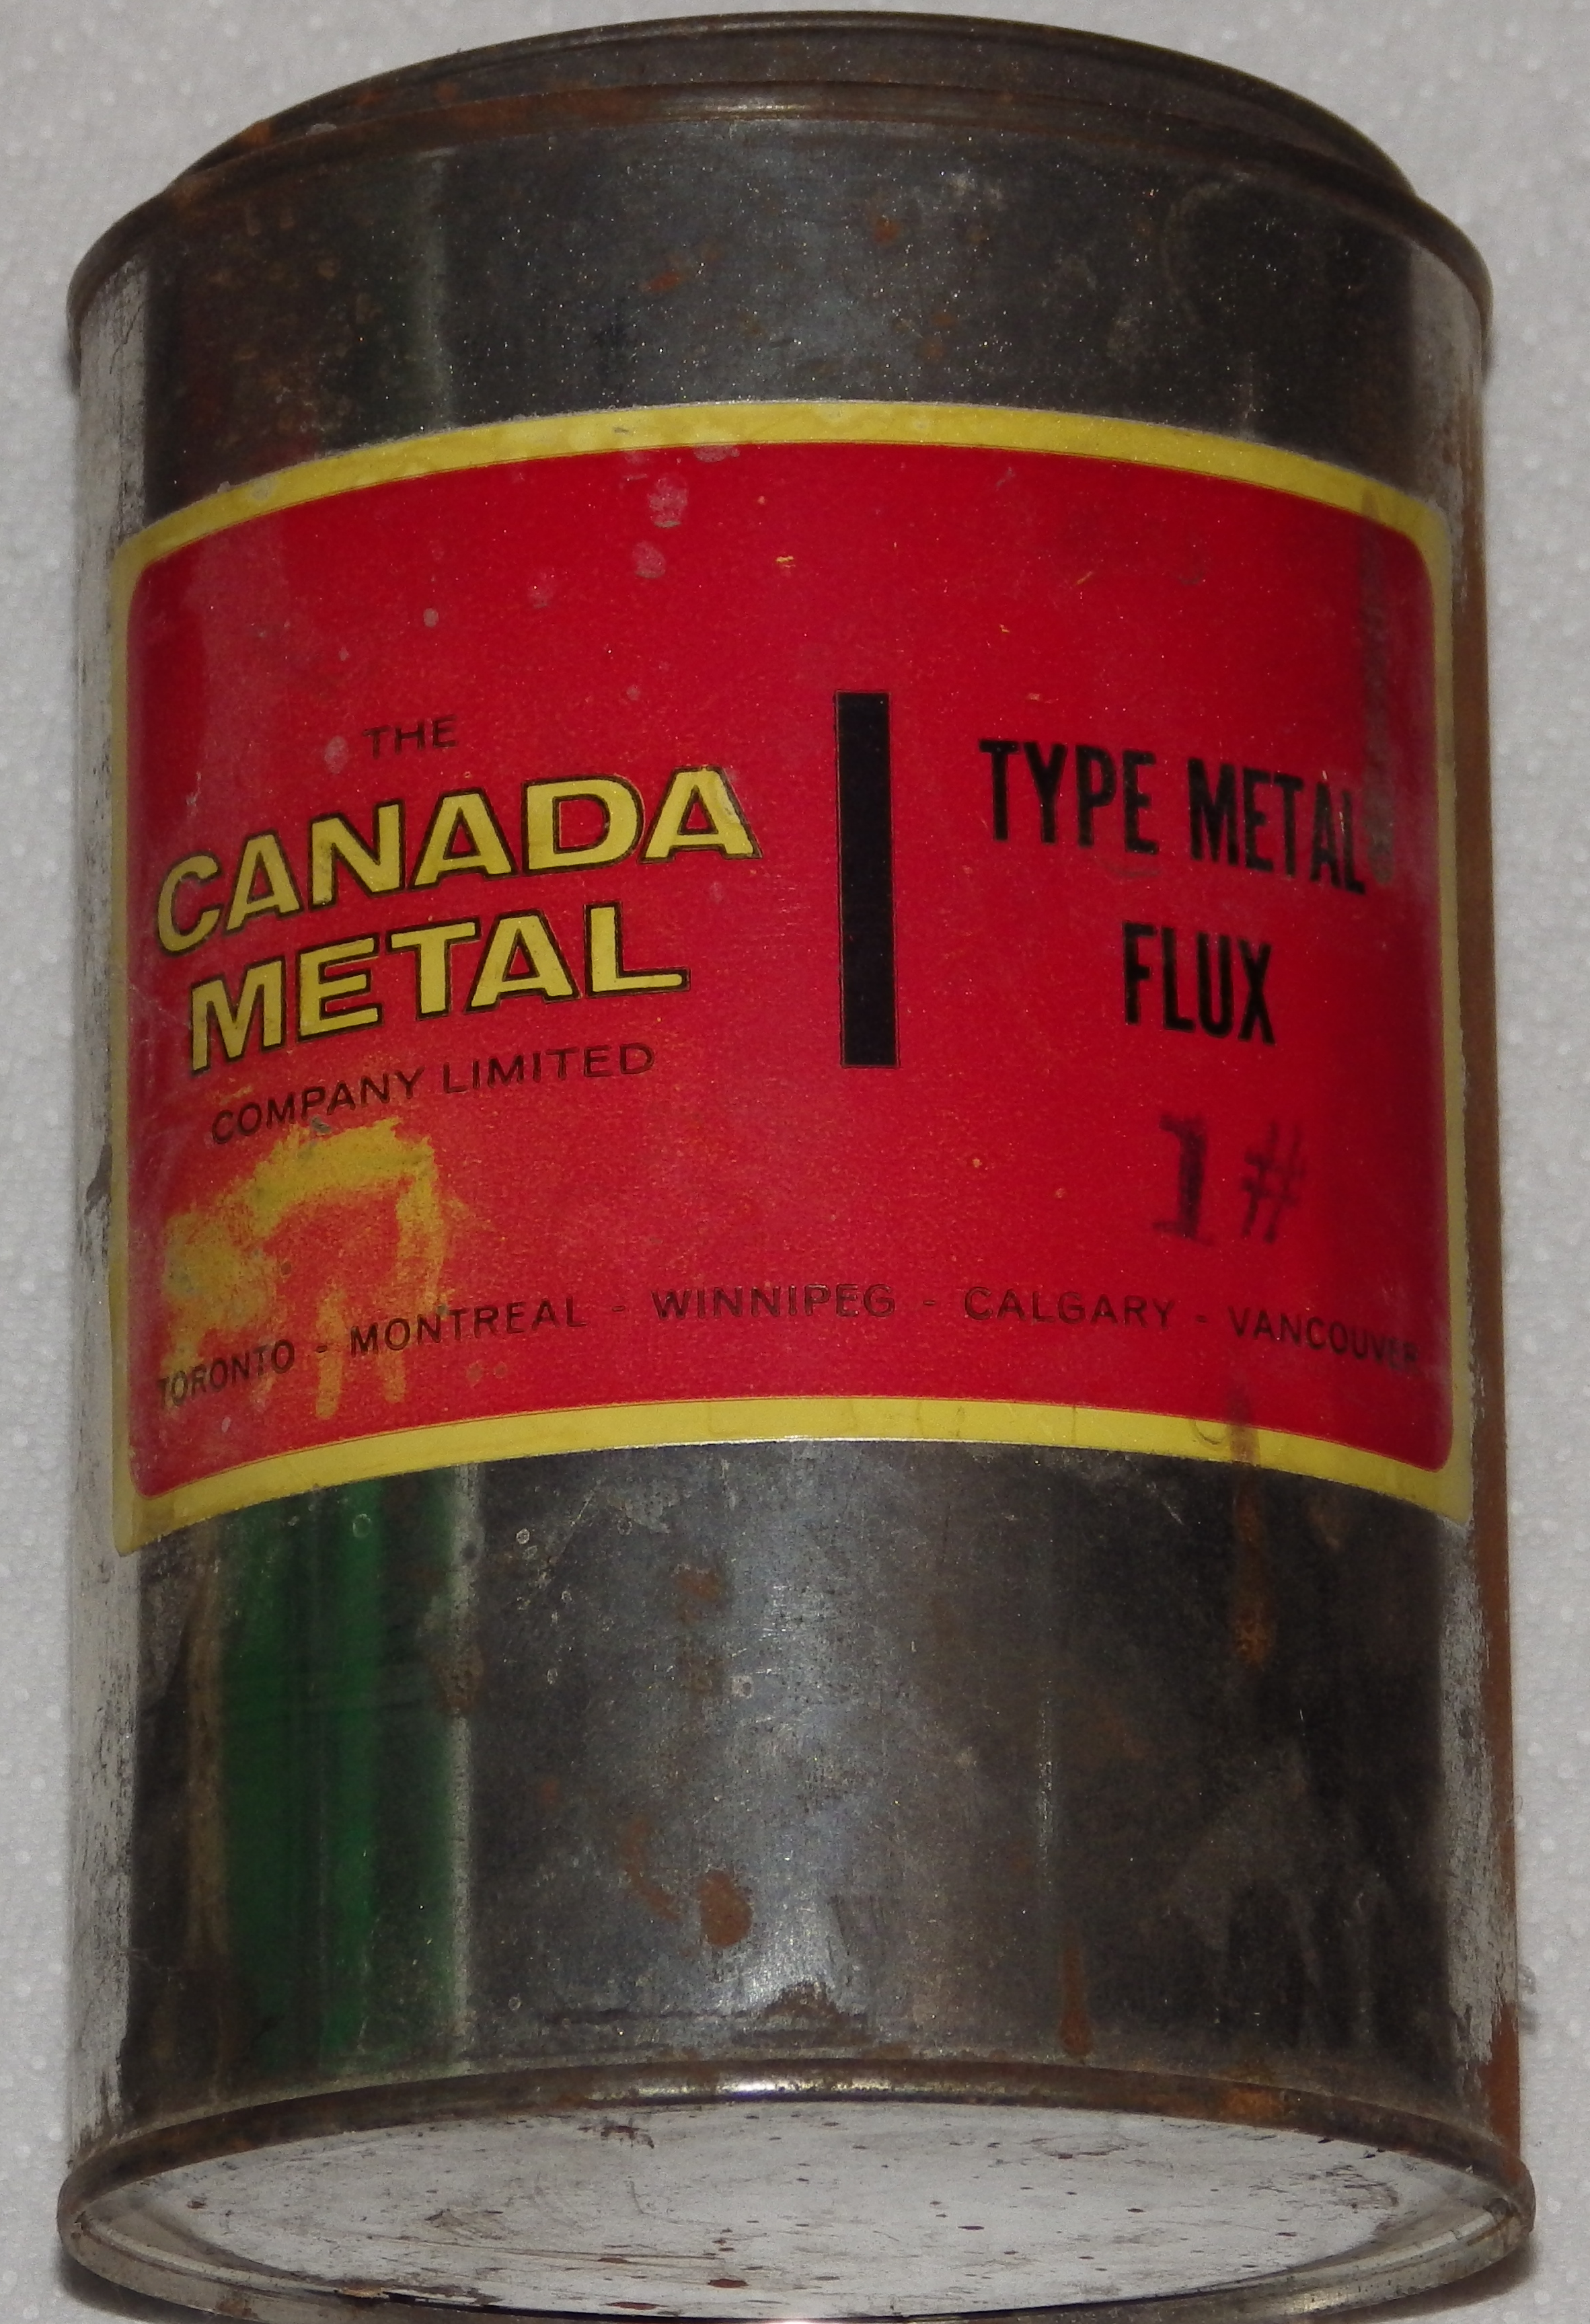
Each time the Piston is replaced in the Pot Well, it should be heated first and coated in Flux. Ordinary VitaFlux works well.
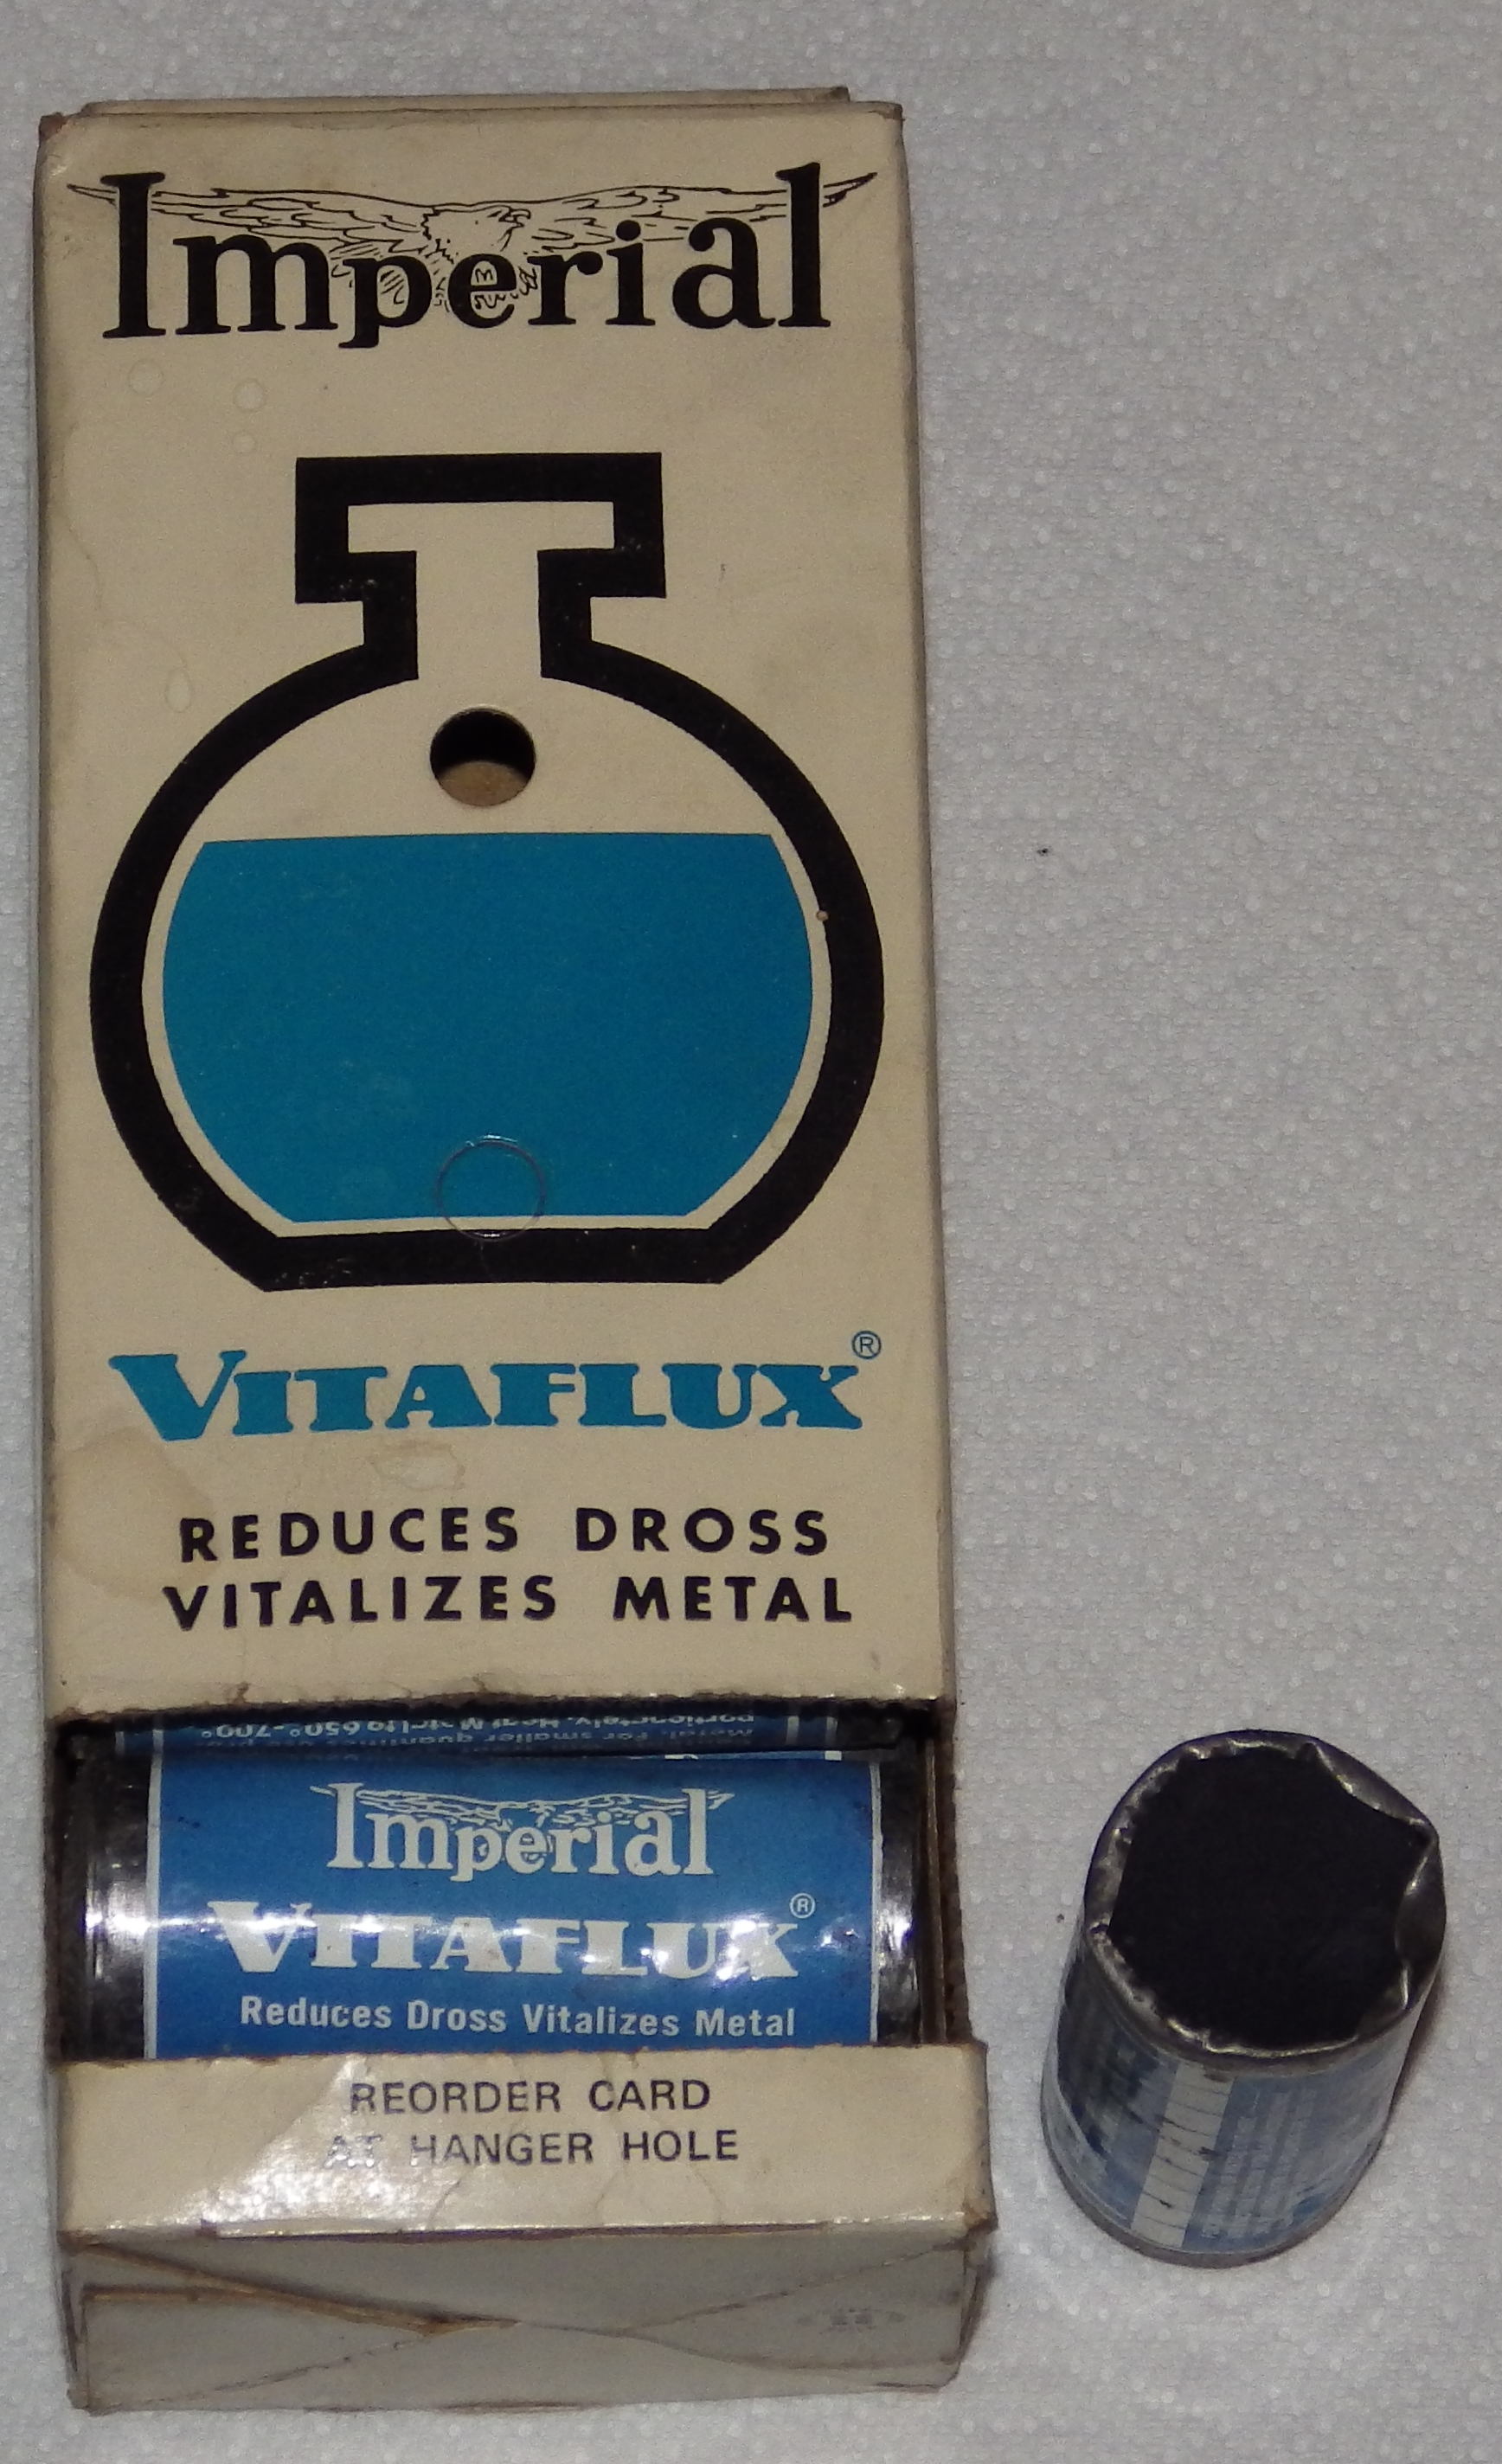
VitaFlux was at times rebranded under at least one other name (RichGraphic Products).
VitaFlux is still made by United American Metals, and is still sold by NA Graphics for a modest price. It is not worth the outrageous prices paid by the ill-informed on Ebay.
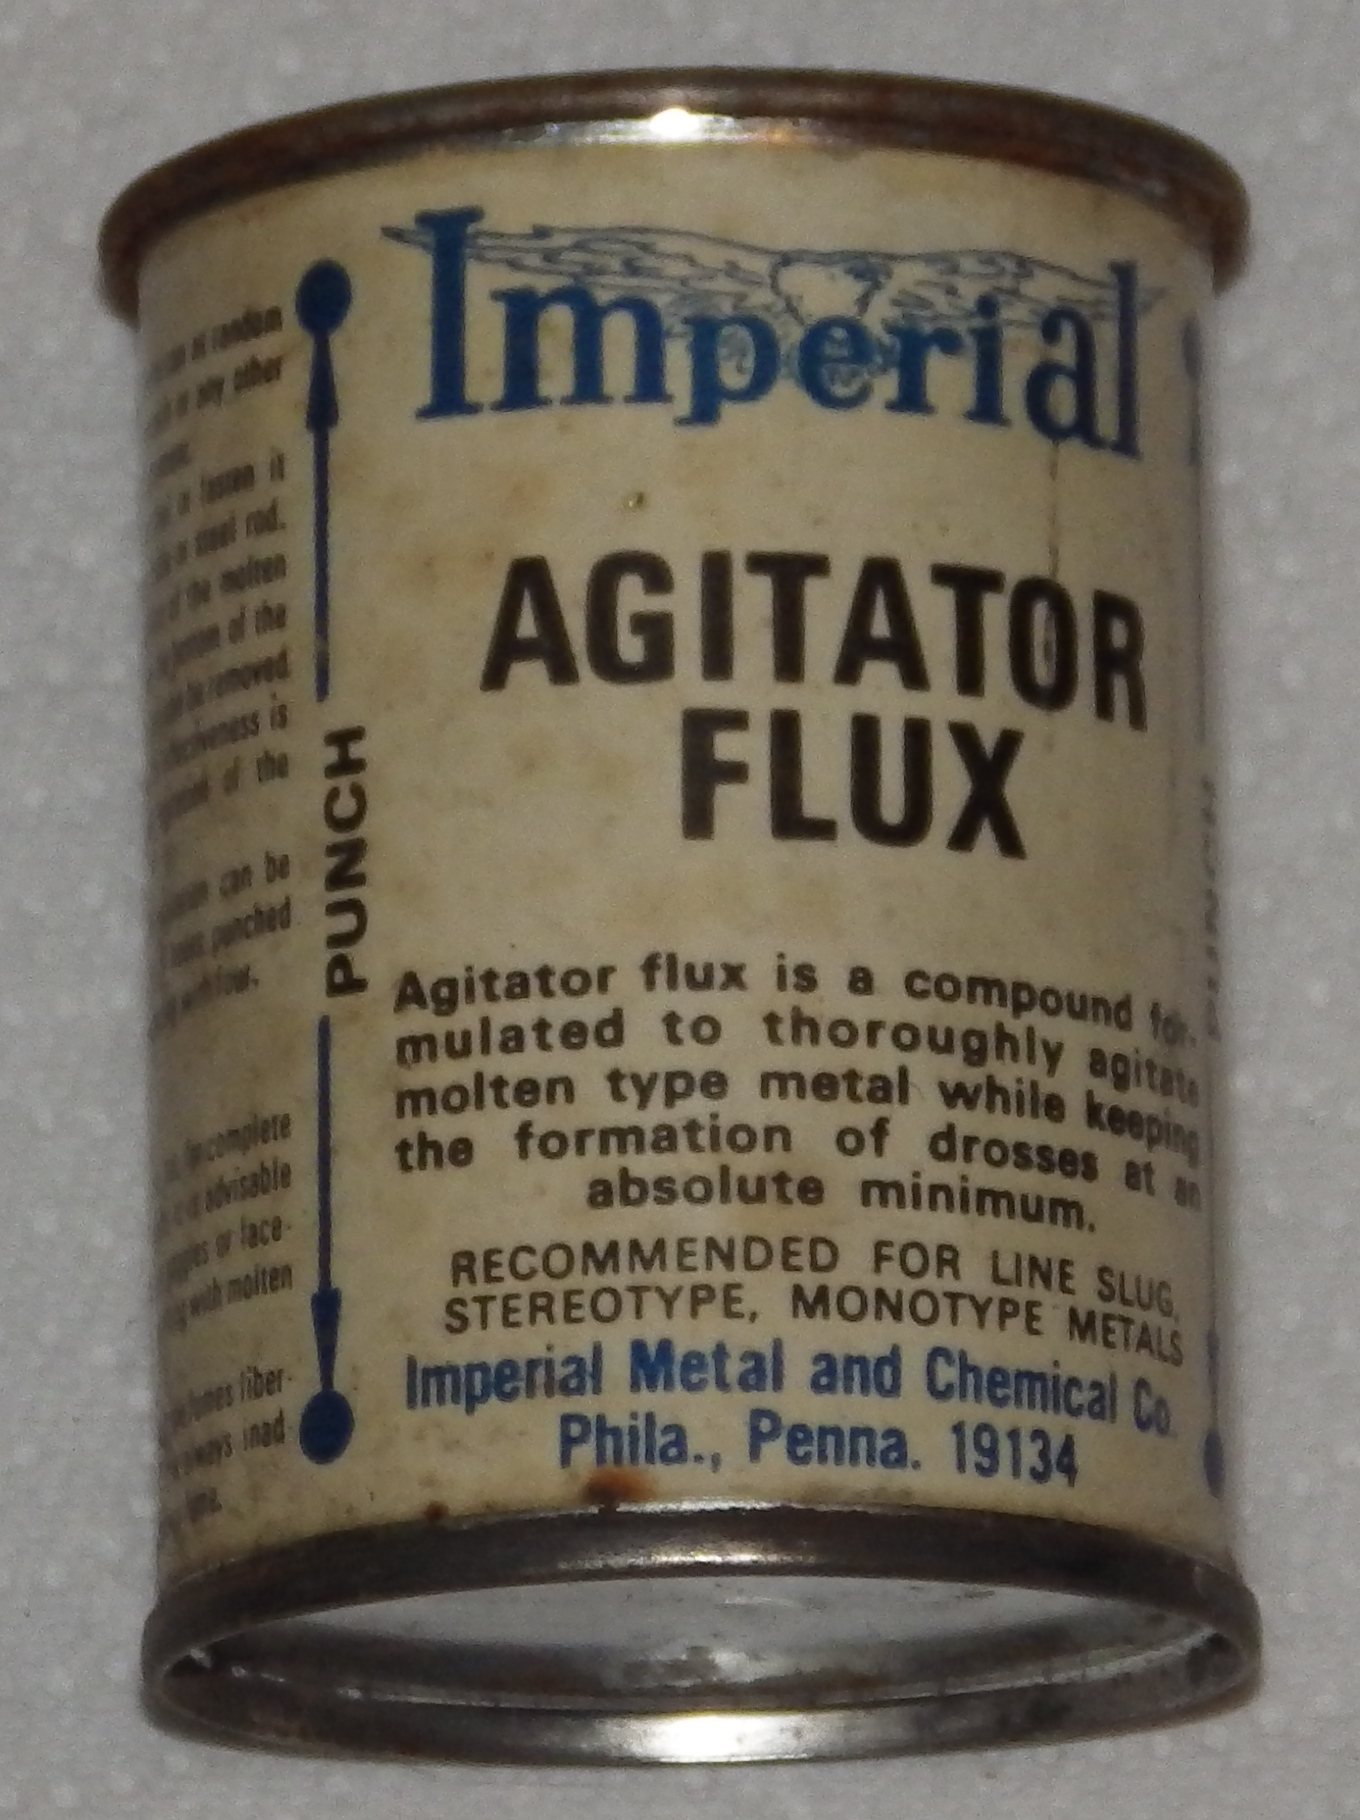
Several quite different kinds of "fluxes" were used in some hot metal operations to "clean" molten typemetal. Whether one wishes to use them for that purpose is a matter of personal opinion and folklore. These other fluxes are generally powdered or granular, and are not useful for fluxing the Thompson piston. Here are a few which you may run across in older shops:

These are really maintenance tools rather than operating tools. I'm including them here primarily because they were called out in the manuals.
A single-ended 1 1/4" box wrench.
This wrench is called out in the 1942 Parts Price List as a "No. 8238" wrench "(for Nozzle)," with no Lanston Monotype part number.
The 1942 Parts Price List calls out this tool, p/n 45L1, as a standard tool supplied with the machine.
[NOT DONE; I am unfamiliar with this tool.]
The 1942 Parts Price List calls out this tool, p/n X42L, as a "Special" tool not supplied with the machine by default.
[NOT DONE; I am unfamiliar with this tool.]
The 1942 Parts Price List calls out this tool, p/n 41L1, as a "Special" tool not supplied with the machine by default.
[NOT DONE; I am unfamiliar with this tool.]
The 1942 Parts Price List calls out this tool, p/n 40L1, as a "Special" tool not supplied with the machine by default.
The 1942 Parts Price List calls out "Valve Grinding Compound: For grinding Choker and Nozzle." This Compound is not given a Lanston part number.
You will need sufficient working space near the Thompson for the following purposes:
This seems like a long list, but it is surprising how little space is really needed. The slanted top of a Linotype operator's cabinet is convenient for holding the Dressing File and the galley of cast type. (When used alongside a Thompson, a Linotype Operator's Cabinet is called at Skyline Type Foundry a "Thompson Tender.") A flat, stable working surface such as the top of a matrix cabinet or galley rack is useful for the other purposes.
You will need galleys in which to put the type you cast. The galley size you use is a matter of personal taste. I find the 9x12 size to be convenient, but I don't cast that much type. Larger and smaller sizes can be used as well (a few very small galleys are useful when casting ornaments, especially). Galleys which are relatively wide compared to their length work best; the long, thin "newspaper" style galleys are less suitable. A typical casting project may require between two and six 9x12 galleys, depending on the size of the font and the number of fonts cast.
You will of course also need a galley rack for whatever size galley you decide upon. Empty galleys go into the rack upside-down with their open side to the back (this way you can readily identify which galleys are empty and keep them from accumulating crud). Galleys in use go into the rack right-side up (of course) with their open side to to front (putting the closed side in the back keeps type from falling into the depths of the galley rack).
Useful trick: Put the galleys in the rack at an angle, with the left edge of the galley one step down from the right edge. This helps keep the type upright against the left side of the galley.
Regardless of the size galley you use for regular operation, it is useful to have a few smaller galleys around for miscellaneous purposes.
There does exist a piece of specialized typefounders' cabinetry specifically for this purpose. It is a wooden cabinet which stands about six feet high and which holds several columns of small, special, galleys (about 5x5 inches each). The galleys are held at a slight angle. It has tall, narrow doors in front of each of these galley columns.
Lanston Monotype formerly supplied a large rack containing many small drawers for holding sorts. Such an item could be useful if you were casting sorts in quantity for a few typefaces. It is of less use to the hobby or jobbing typefounder who typically will cast a much wider range of faces in smaller quantities.
These are machines that a typefoundry could have, but which are not at all essential for making type.
Sooner or later, you will need a Printer's Saw (if only to cut your Casting Blaps).
If you have a Type Mortiser, you are fortunate indeed. I do not. Note that a Type Miterer is not the same as a Type Mortiser, even though Rouse built the second version of their Type Mortiser on the same base as their Miterer.
You do not need a Type Dressing Bench, although it would be cool to have one (I don't).
While one might think that the Ludlow Supersurfacer could be used for (super)surfacing type, I am told that its vise has by design a slight bow in it which makes it ill suited for this purpose (admittedly, I haven't tried it yet). However, Dan Jones of Pygmy/Pygment Press has constructed a special vise for the Supersurfacer for the purpose of cutting type down from one height to another. He used this to cut type down to height that he was obliged to cast over type-high due to the incompatibilty of antique foundry matrices with the molds he had available.
These tools are called out in the Lanston literature, but I am uncertain as to their identity and/or use.
The 1942 Parts Price List calls out a File (6" hand smooth flat) with File Handle (size 2) in the "Special" tools "Recommended for purchase ... for the most efficient maintenance." No Lanston part numbers are assigned to these.
Now, a Type Dressing File is indeed necessary for dressing type when operating the Thompson, but such a file is best used flat on the bench, without a handle. Files are also, of course, of great use upon recalcitrant machinery - to the point that they are sometimes used more than might be wise. But I do not understand why Lanston Monotype, a company which manufactured some of the most accurate production machinery of the 20th century, would suggest that the operators of this machinery possess an ordinary file with a handle. My own Thompsons display nontrivial damage caused by former operators who used their files too freely.
I am unfamiliar with this tool.
It is called out in the 1942 Parts Price List as p/n 43L1 in the "Special Tools" section.
I am unfamiliar with this tool.
It is called out in the 1942 Parts Price List as p/n 44L1, "Rod (square bronze .3" x .3" x 8")," in the "Special Tools" section.
The Hartzell Machine Works catalog from which an illustration of a Pin Wrench is excertped is in the public domain due to failure to comply with formalities then required at the time of publication. The excerpts from it here remain in the public domain.
All portions of this document not noted otherwise are Copyright © 2012-2013 by David M. MacMillan and Rollande Krandall.
Circuitous Root is a Registered Trademark of David M. MacMillan and Rollande Krandall.
This work is licensed under the Creative Commons "Attribution - ShareAlike" license. See http://creativecommons.org/licenses/by-sa/3.0/ for its terms.
Presented originally by Circuitous Root®
Select Resolution: 0 [other resolutions temporarily disabled due to lack of disk space]